
A common request we get from customers is the ability to add tags to instances that are provisioned to Ec2 from vCAC. Customers tag the instances for various reasons for example reporting, billing, building app relationships. This guide will walk you through the installation and configuration to extend vCAC now named vRealize Automation, to tag instances that are provisioned to Amazon EC2. The instructions and workflow provided are a building block for you to further build from. This guide is just one example. Please post comments if you plan to extend this further or need tips for doing so.
Installation pre-reqs
You will need the following in place for this guide:
- vCAC installed and configured guide here. I have tested on 6.0 and 6.1 however this guide should also work on vCAC 5.2 as long as you have the latest version of vCO that supports the AWS Plugin for vCO.
- EC2 endpoint configured in vCAC Guide here
- At least one AWS blueprint configured and available in the catalog
- AWS plugin downloaded installed and configured per the guide here
- vCAC to vCO extensibility configured, follow my guide here
- A nice quite place to work for a few hours where you will not be interrupted.
Change Log
version 1.0
Pre-flight Check
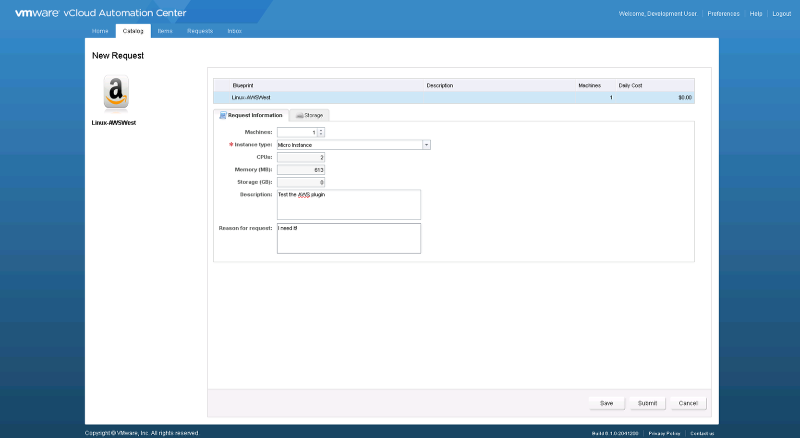
First, some house keeping, check that the AWS plugin is installed and functioning and can see instances you provision from vCAC. Provision a new EC2 instance from the catalog
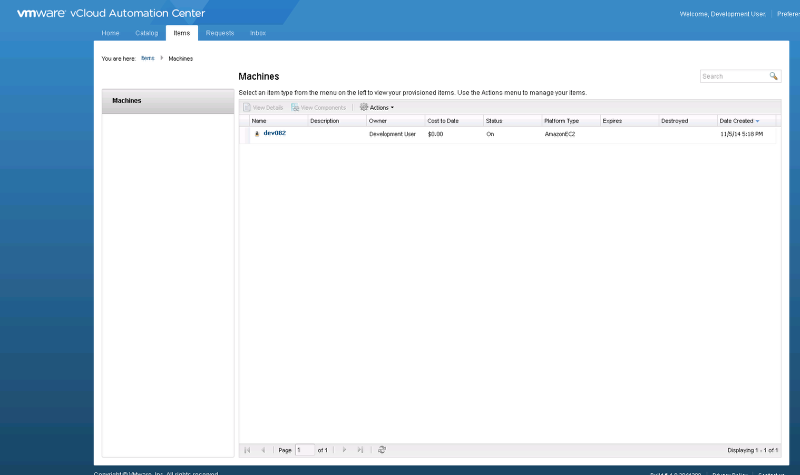
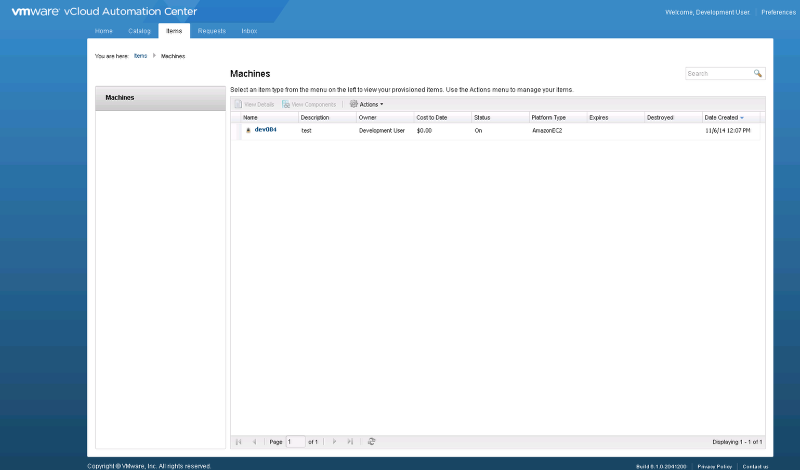
After a few minutes, check the Items tab for the new instance name
Now open vCO and change to the plugins tab and browse the AWS plugin for the new instance
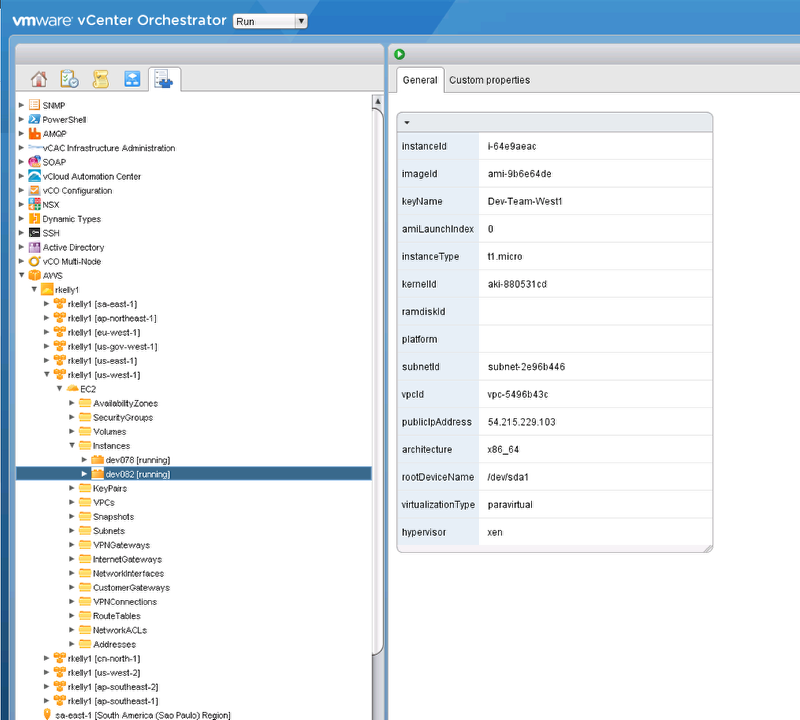
Great! We have the connectivity we need to get started.
Installation
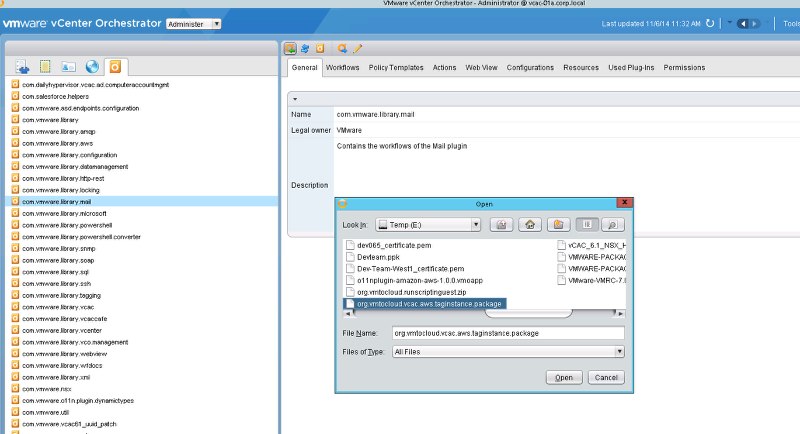
Now we will need to install the vCO package I created. Download the package here org.vmtocloud.vcac.aws.taginstance.zip Unzip the package file and import into your vCO server via the vCO client. Note: You can not import the zip file as it will fail
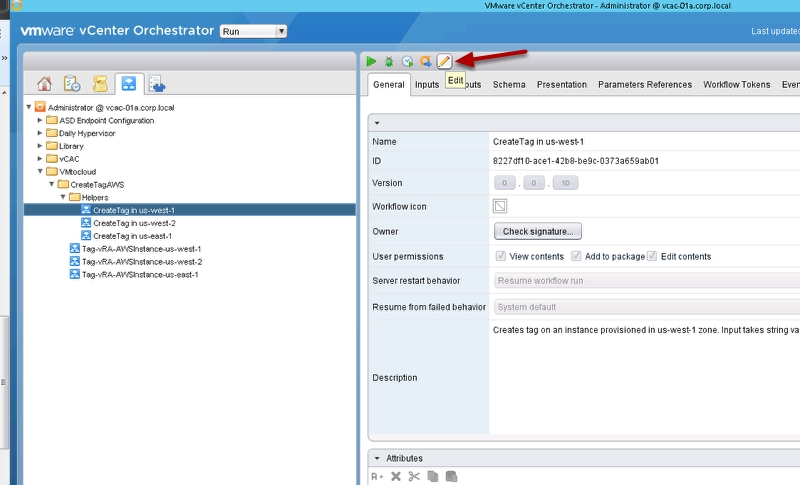
When you browse the workflows you should see the following new workflows

Now we will need to configure an attribute in each of the helper workflows so the workflow knows the vCO plugin client that you are using and the zone. Click on the CreateTag in us-west-1 workflow then click edit
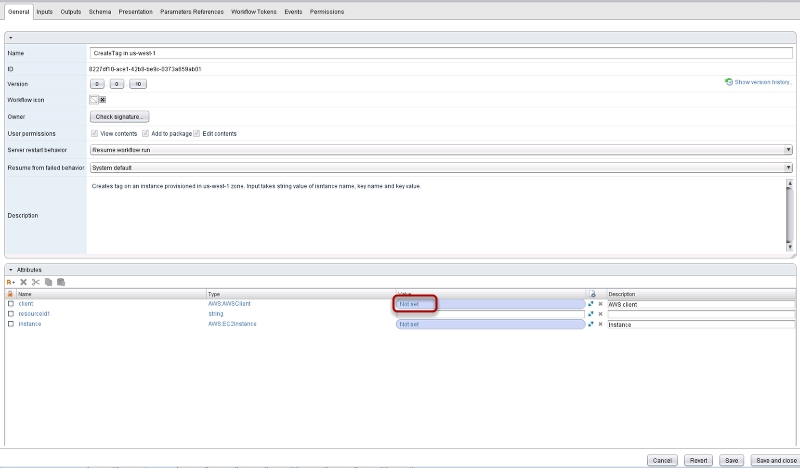
Browse to the general tab and edit the AWS client by clicking the not set text
Browse the AWS client and choose the us-west-1 zone as shown and then select
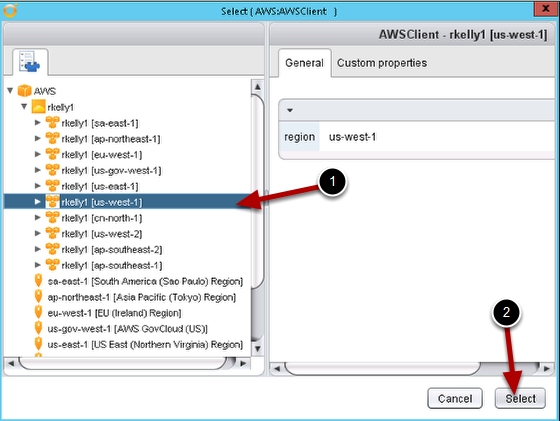
Now click save and close

Note: you will need to modify each helper file for the zone that you will be provisioning to. The package only contains us zones at this time. It should be pretty easy for you to see how to add other zones to the helpers and the main workflows. If this is not the case please comment or tweet me @vmtocloud and I will add them all to the package.
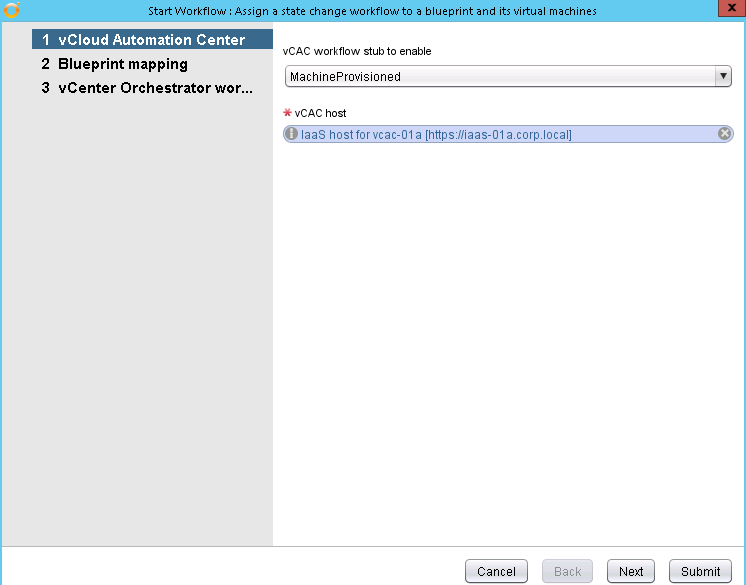
Now that our helpers are configured we will add this workflow to run after an instance is provisioned from vCAC (vRA). Run the “Assign a state change workflow to a blueprint and it’s virtual machines” and choose to enable the MachineProvisioned workflow and choose the vCAC host
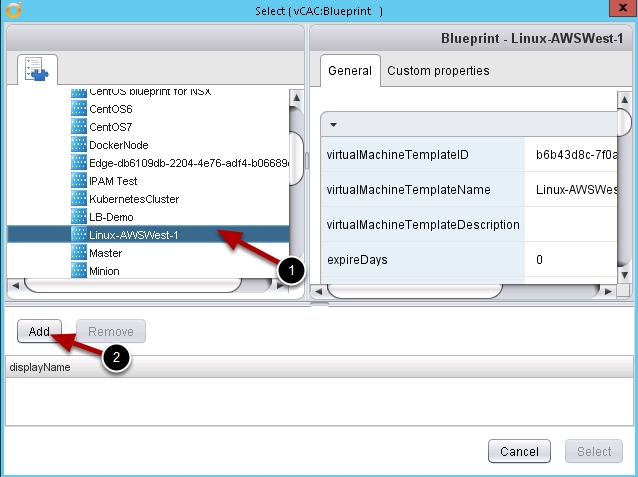
Now choose the blueprint that is configured for the AWS-West-1 zone and click add then select. If you have multiple blueprints for this zone you can also select them now.
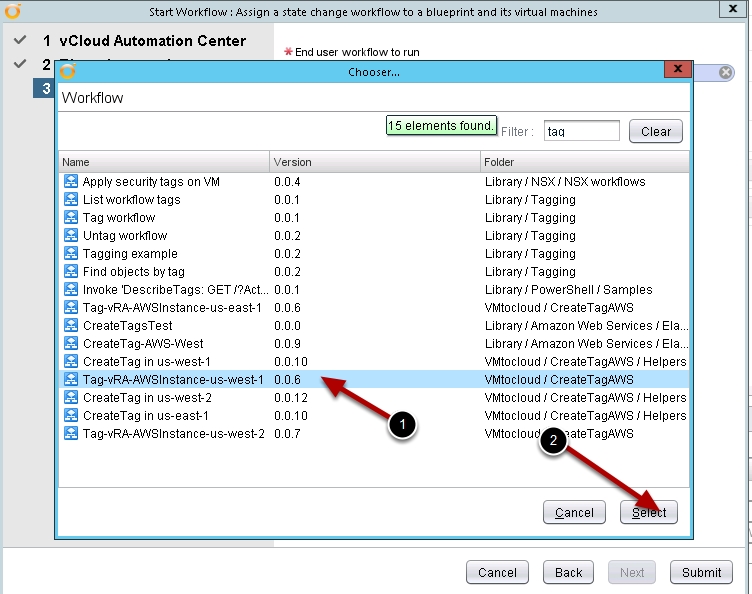
On the next screen we will choose the workflow template from the package we uploaded earlier
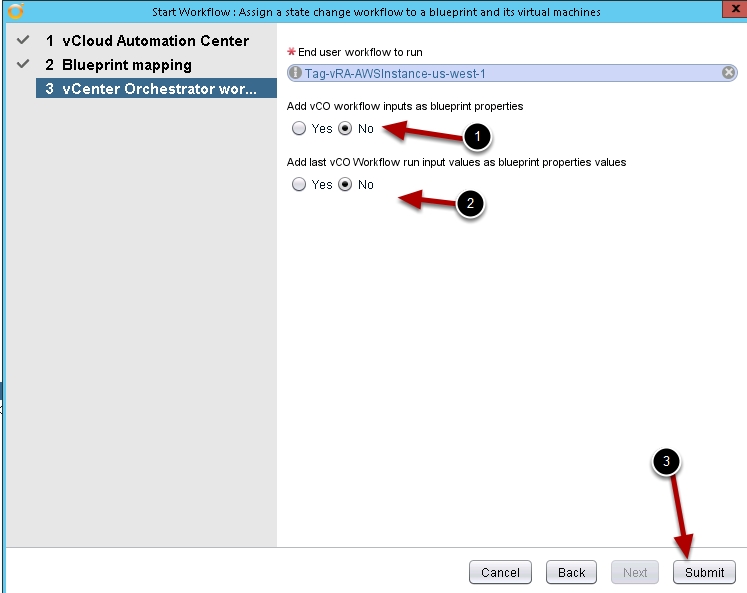
Make sure both boxes are marked no as they are in my example below then click submit and it will add the workflow to run after the machine is provisioned from vCAC
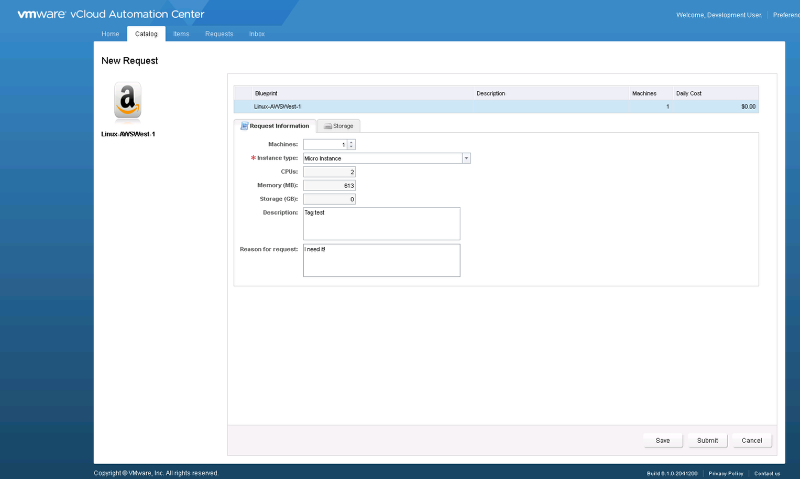
Now go to vCAC (vRA) and go to the AWS-US-West-1 blueprint we just modified and check the properties tab, You should see the ExternalWFStubs.MachineProvisioned property added with the workflow id of the Tag-vRA-AWSinstance-us-west-1 workflow in vCO. We will also need to add two new properties for our AWS Tag. Add the aws.key.1 and aws.key.1.value These are properties the workflow is looking for to add the tag in AWS
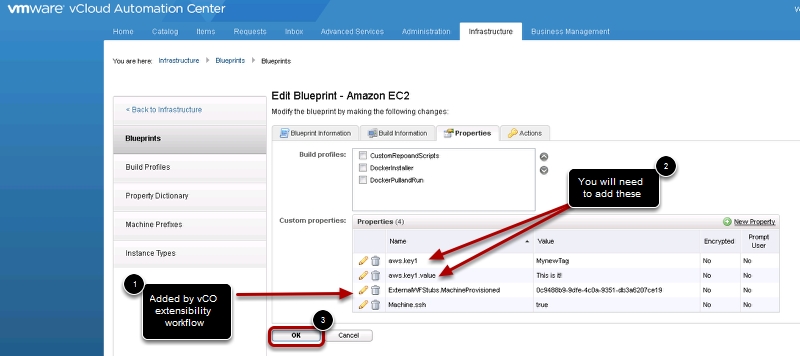
aws.key1 MynewTag
aws.key1value This is it!
Test your work
Go to the catalog and fire off a new request for an AWS instance
After a few minutes check the items tab for the new instance name
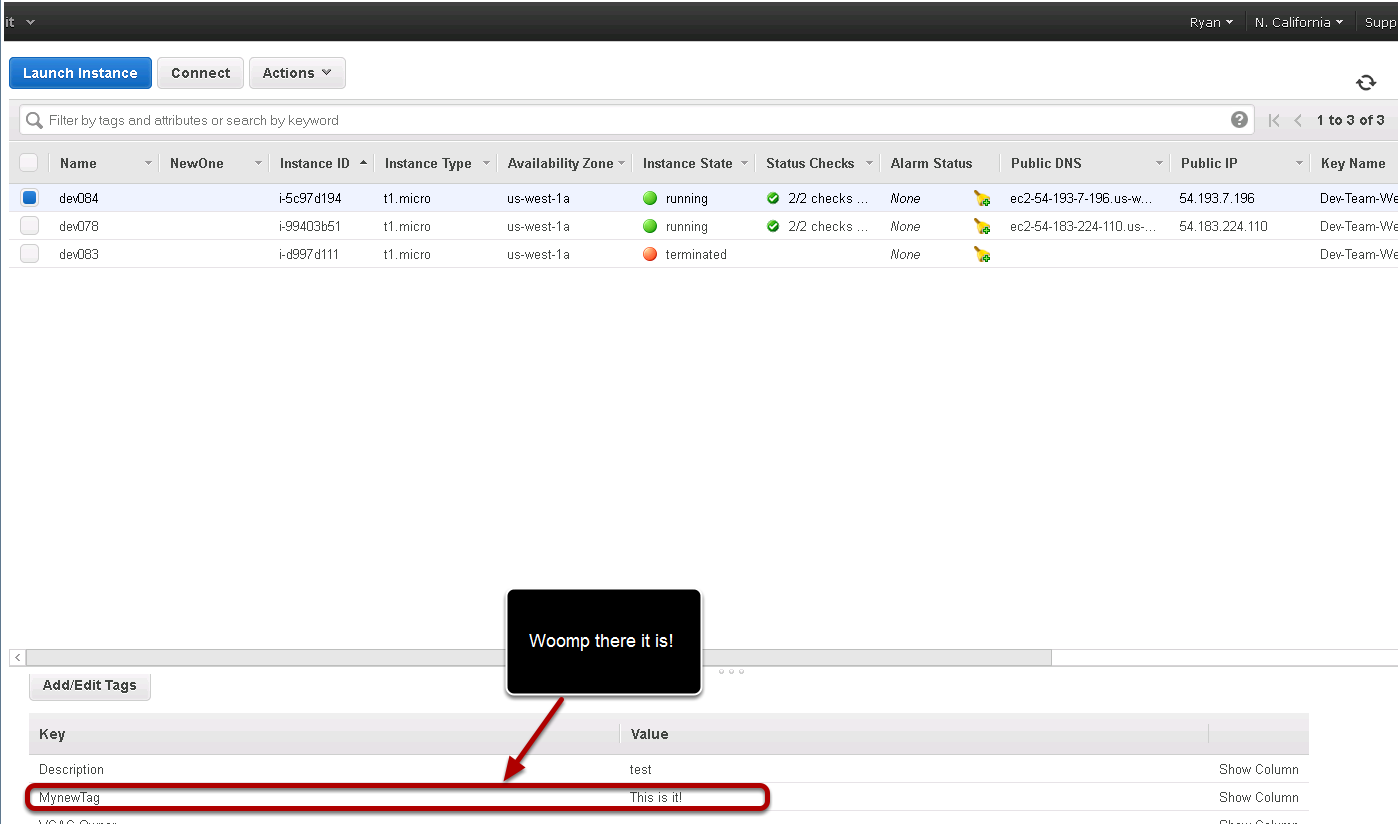
Log into the AWS EC2 console and navigate to the N.California Zone and browse the instance. Select the instance you just provisioned and view the Tags tab for your new tag!
Some issues with the workflows. They are specific to the Zone and compute resource that vCAC is creating the instance. You need to make sure you associate the right workflow with the correct blueprint. Also as you can see this example is only creating one tag with properties I entered. You could modify the workflows to create multiple tags. Just edit the main workflows and add the helper workflow multiple times. You can also get any property from vCAC. If you notice in the workflows I have n action to get the VM owner. You could also use any property from vCAC lick business group properties, compute resource properties a drop down list using property dictionary. It is up to what you require. Happy clouding!
Great stuff as always Ryan!
Pingback: How to Tag AWS instances provisioned from vRA 7 – VMtoCloud.com