I have been specializing in vRA/vCAC for over three years now. Previously I used Dynamic Ops as a customer. Lately it dawned on me that while I use the solution everyday there are many that are just seeing the solution for the first time. I remember the first time I went to create my first blueprint just following along in the GUI with no instructions. The provisioning failed. I had to reach out to an SE for help getting it to work properly. The goal of this post is to pass on that tribal knowledge to you so you can experience how awesome vRA is and be successful at your organization.
There are lot’s of guides and blogs already available for creating a clone or linked clone blueprint so I am not going to go into all the details of how to create one. This post will just focus on what is actually happening and what you need to setup for successful provisioning.
How the trick is done:
See below as the Masked Magician shows you what is really happening behind the scenes when vRA/vCAC provisions a template in vCenter from cloning or Linked clone.
First off, you will always need to have the latest VMware tools installed in your base template. This is so that vCenter guest customization can run the scripts to customize the guest.
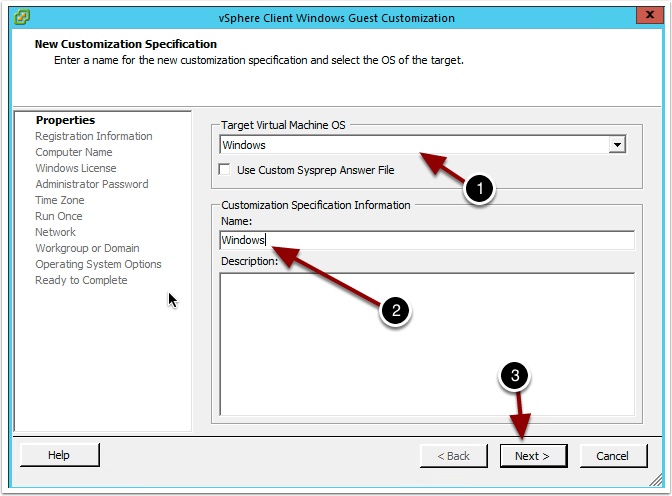
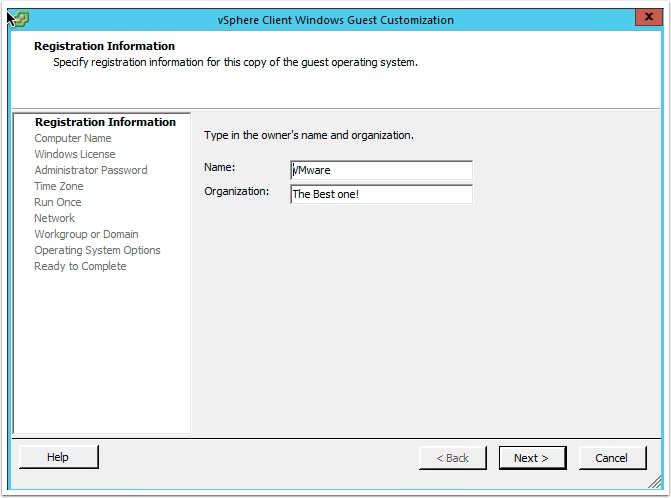
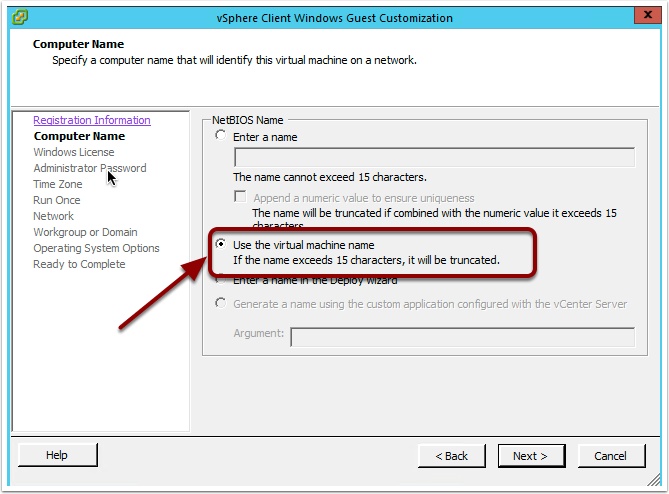
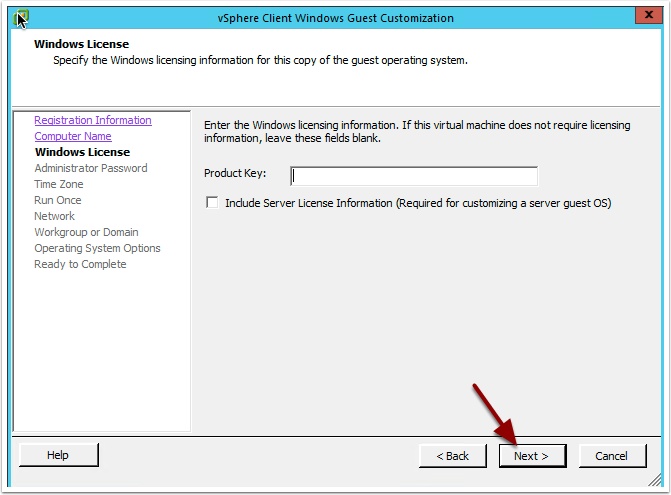
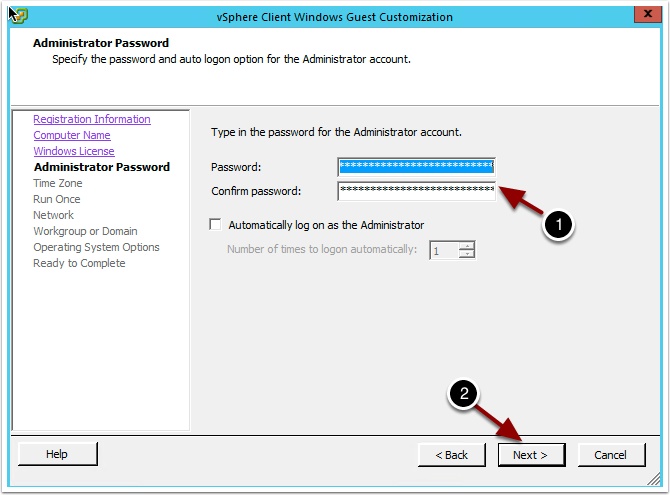
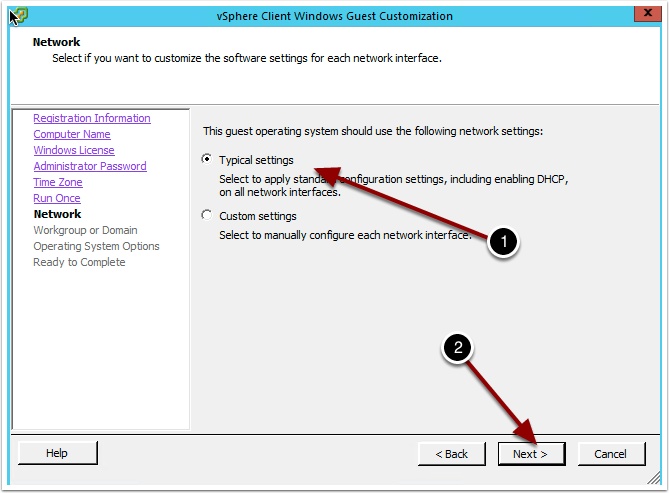
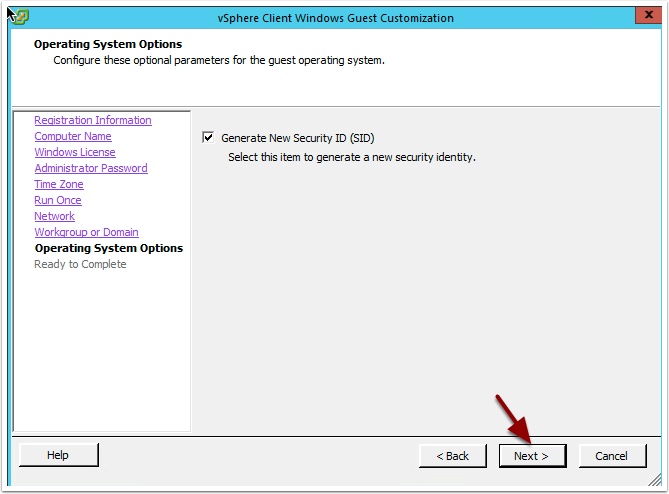
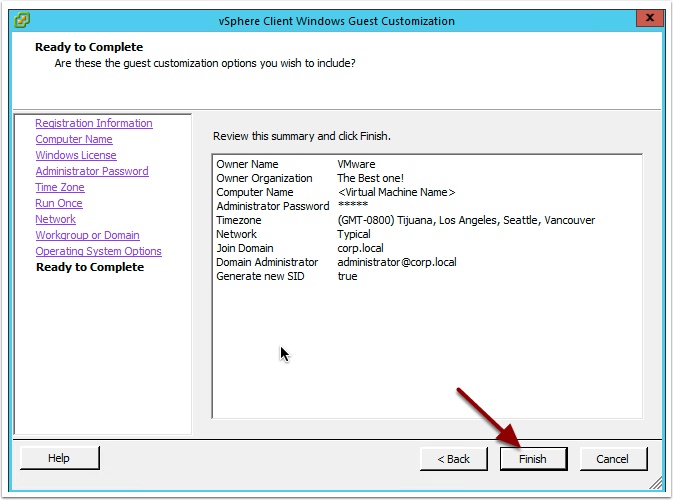
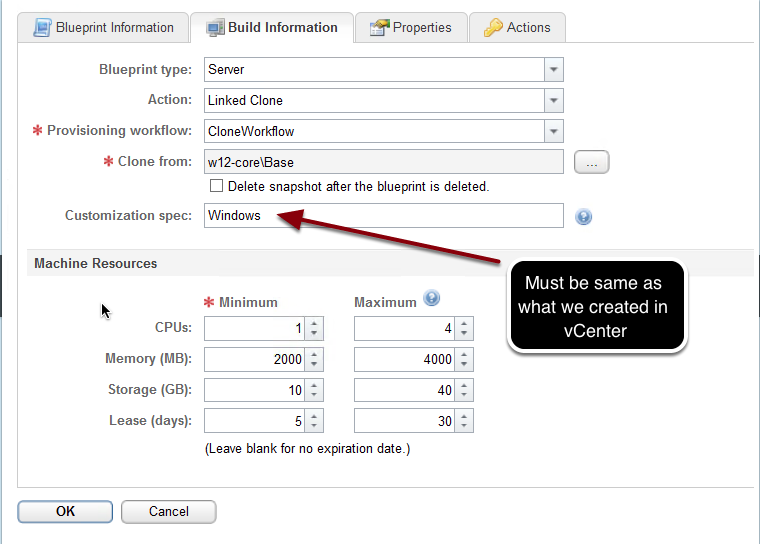
You need to create a generic customization spec in vCenter for Windows and Linux. I have provided step by step for both below.
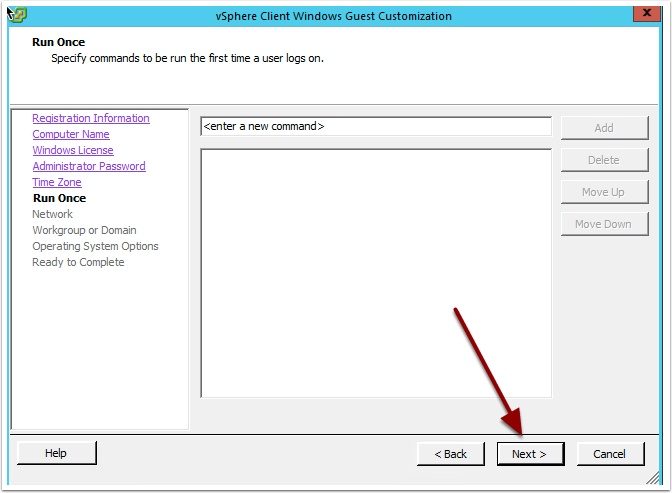
Add any run once statements you need, remember you can also use the guest agent or vRO workflows for this to keep it more standardized.
Enter the domain and credentials required to join the domain. (Make sure everything the administrator username is in the name@corp.local format. Using corp\name will fail!
Clone a new Windows VM using the customization spec we just created. It must successfully provision in vCenter before it will work in vRA/vCAC
Some notes about Windows Cloning. For sysprep to work and domain join you need to have DHCP and some free IP addresses available on the vLAN your provisioning to. This is so the cloned VM can get a temporary IP address before vRA/vCAC injects the static address from the network profile.
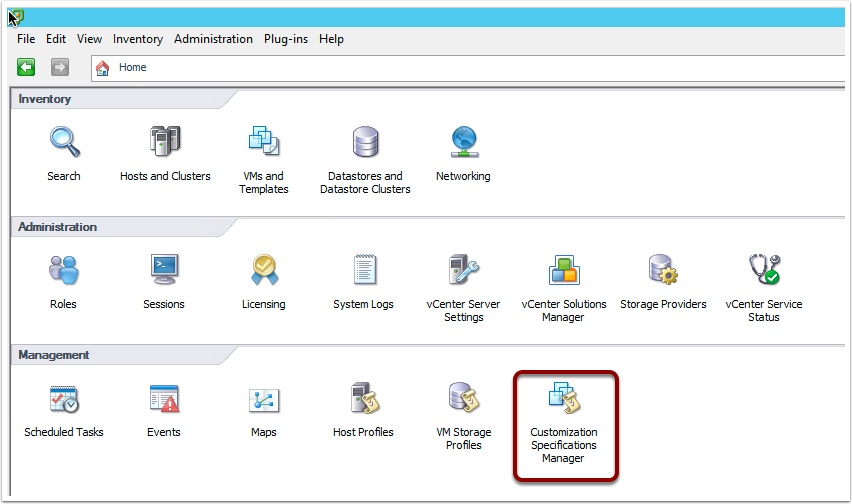
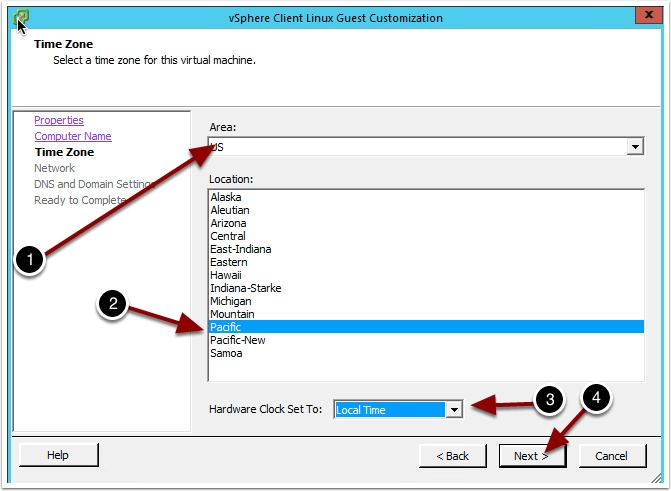
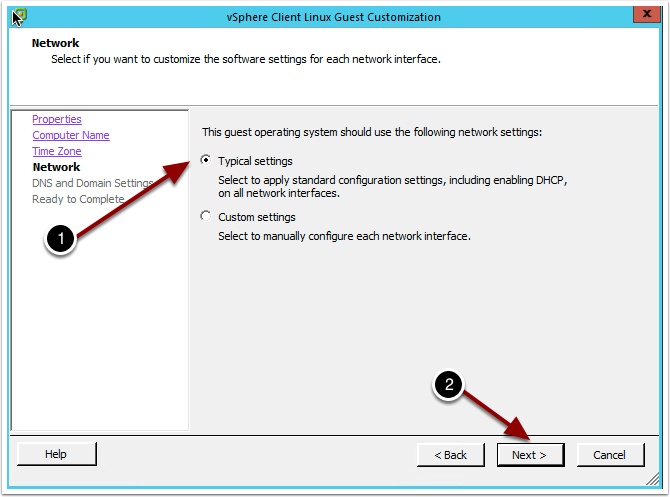
Linux: Open vCenter Client and go to home then click Guest customization

Click New and choose Linux and Name it Linux and click next
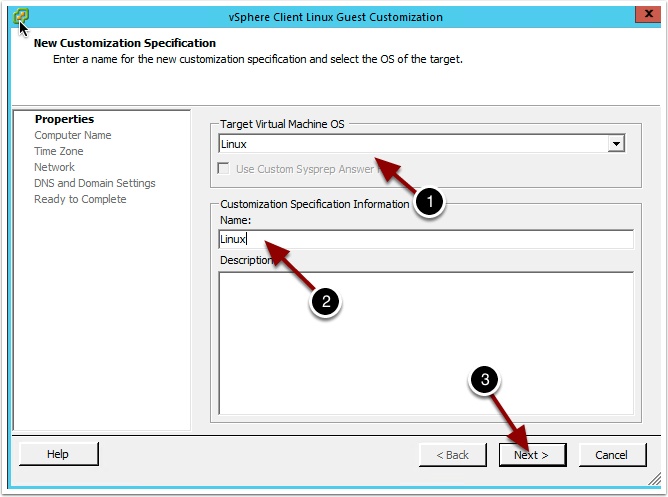
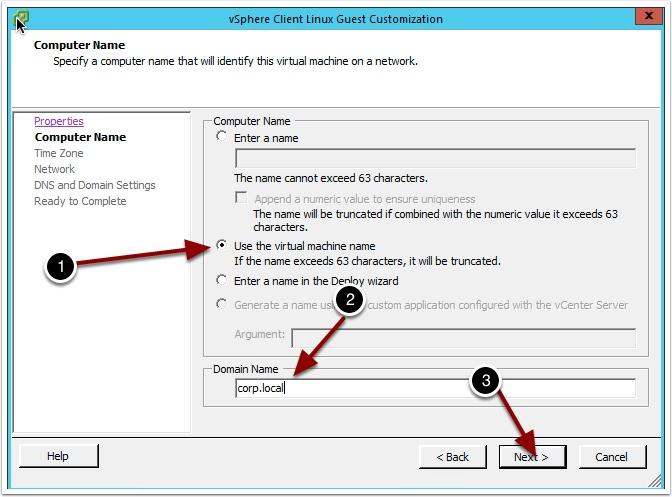
Choose use virtual machine name and enter the domain name. Keep in mind vRA/vCAC will override the domain name with what you set in a network profile.
Enter your DNS and search path and click next, remember vRA/vCAC will override this with what you set in the Network profile. This is where the Magic is happening!
Clone your Linux template using this new Spec. The Linux VM must successfully clone to vRA/vCAC to work.
Some notes about Linux Cloning. For some operating systems like CentOS you may need to edit the settings of the VM so that it is a RHEL operating system instead of CentOS.
Also see the following so you don’t end up with additional network configurations in your guest: http://wandin.net/dotclear/index.php?post/2013/04/26/Prepare-RedHat-/-CentOS-for-Cloning







Fantastic items from you, man. I have be mindful your stuff
previous to and you are simply extremely wonderful.
I really like what you have acquired here, certainly like
what you are saying and the best way through which you assert it.
You make it enjoyable and you continue to take care of to stay it smart.
I cant wait to read much more from you. That is really a wonderful site.