
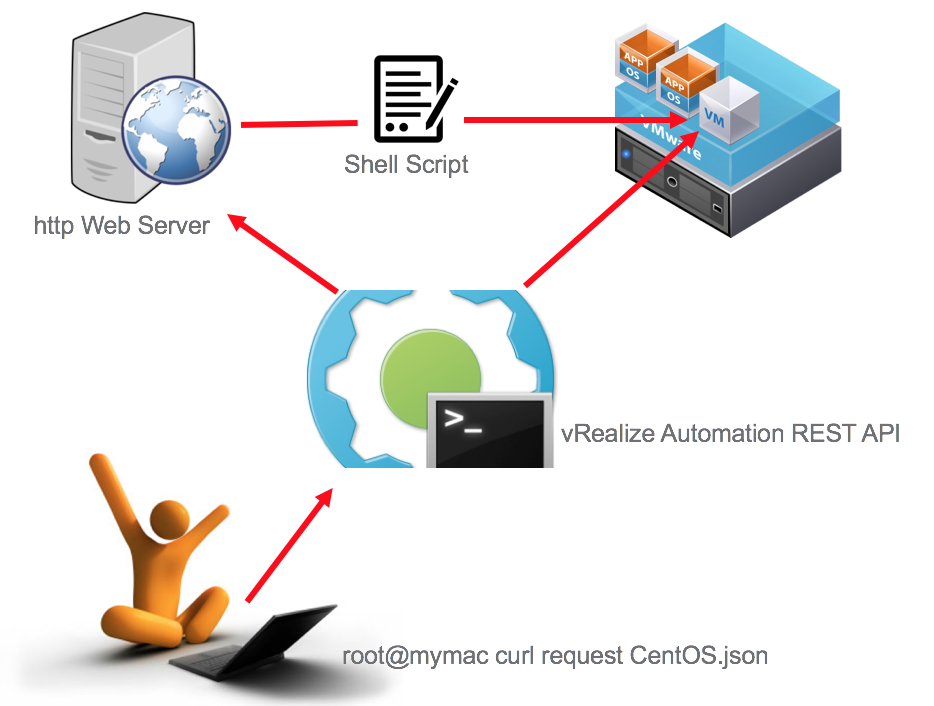
Do you want to make your developers happy and win their trust and business? Or, are you a developer that works at a VMware shop and you just want command line REST API access to your infrastructure? Well, then you have come to the right place. In this guide I will show you infrastructure folks how to create a developer friendly blue print. For you developer folks I will show you how to consume one of these blueprints using the REST API in Curl. But wait…there’s more. If you act within the next 24 hours I am going to throw in the download link to this blueprint absolutely free! It’s an amazing offer you won’t want to miss.

Overview of the solution
This guide will show you how to build a blueprint that will allow the developer to request a new Linux VM, in the request they can input the URL for their HTTP web server, specify the file to get and the working directory to execute it in and have it run commands on the Linux VM at provisioning time. This can be used to build simple installations like Apache Web Server or more complex application installations and configurations.
Credits
Jad El-Zein @virtualjad for his help with the new vRA 7 API
Bruce George for help with the new vRA 7 Software Components
Pre-Reqs
- Working installation of vRealize Automation 7 Enterprise
- Working vRealize Automation Agent Blueprint – See my guide here
- A Web server that that can serve files using wget and that is accessable from the VM’s provisioned from vRA – See instruction for Apache here http://book.seaside.st/book/advanced/deployment/deployment-apache/serving-files
First, Create your software component
If you have done the pre-req work we should already have a working Blueprint with the vRealize Automation Agent installed and tested. Now we will build onto that by creating a Software Component that will run commands in the guest VM at provisioning time so the developer can run whatever scripts they want as part of a REST API request. Login to vRA portal as a Cloud Admin. Then go to the Software Components Tab and click New.

Now enter the following Name and Description and press next

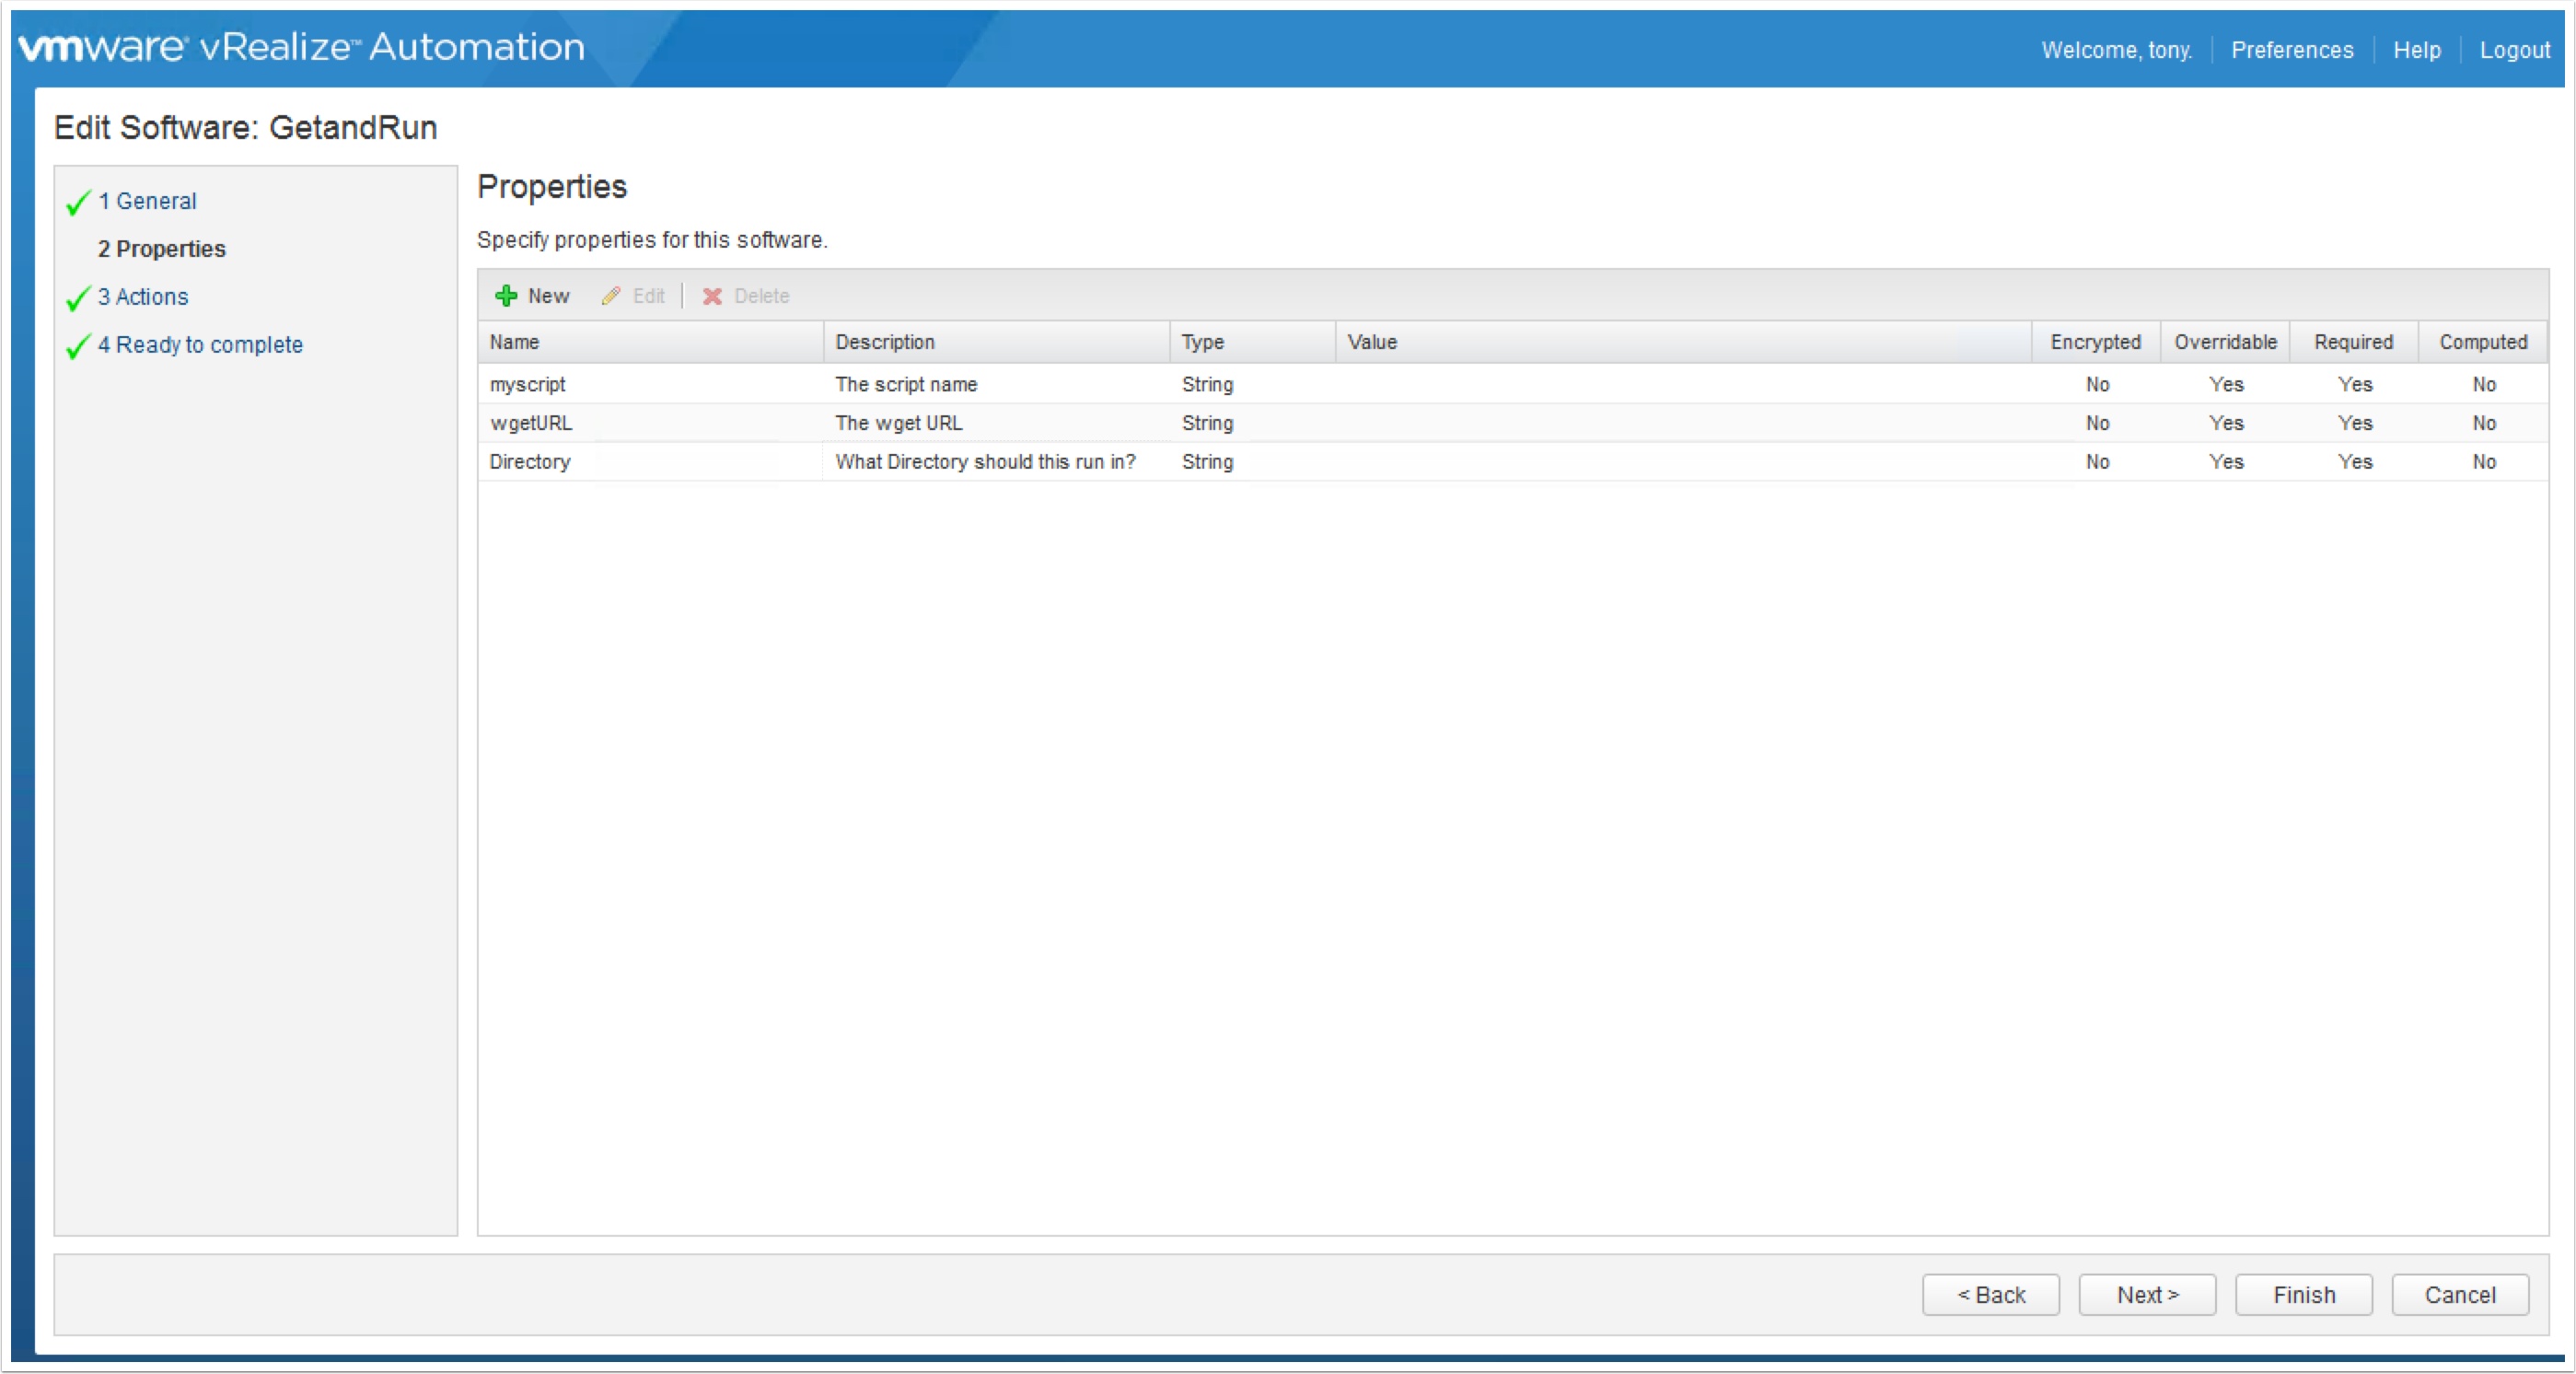
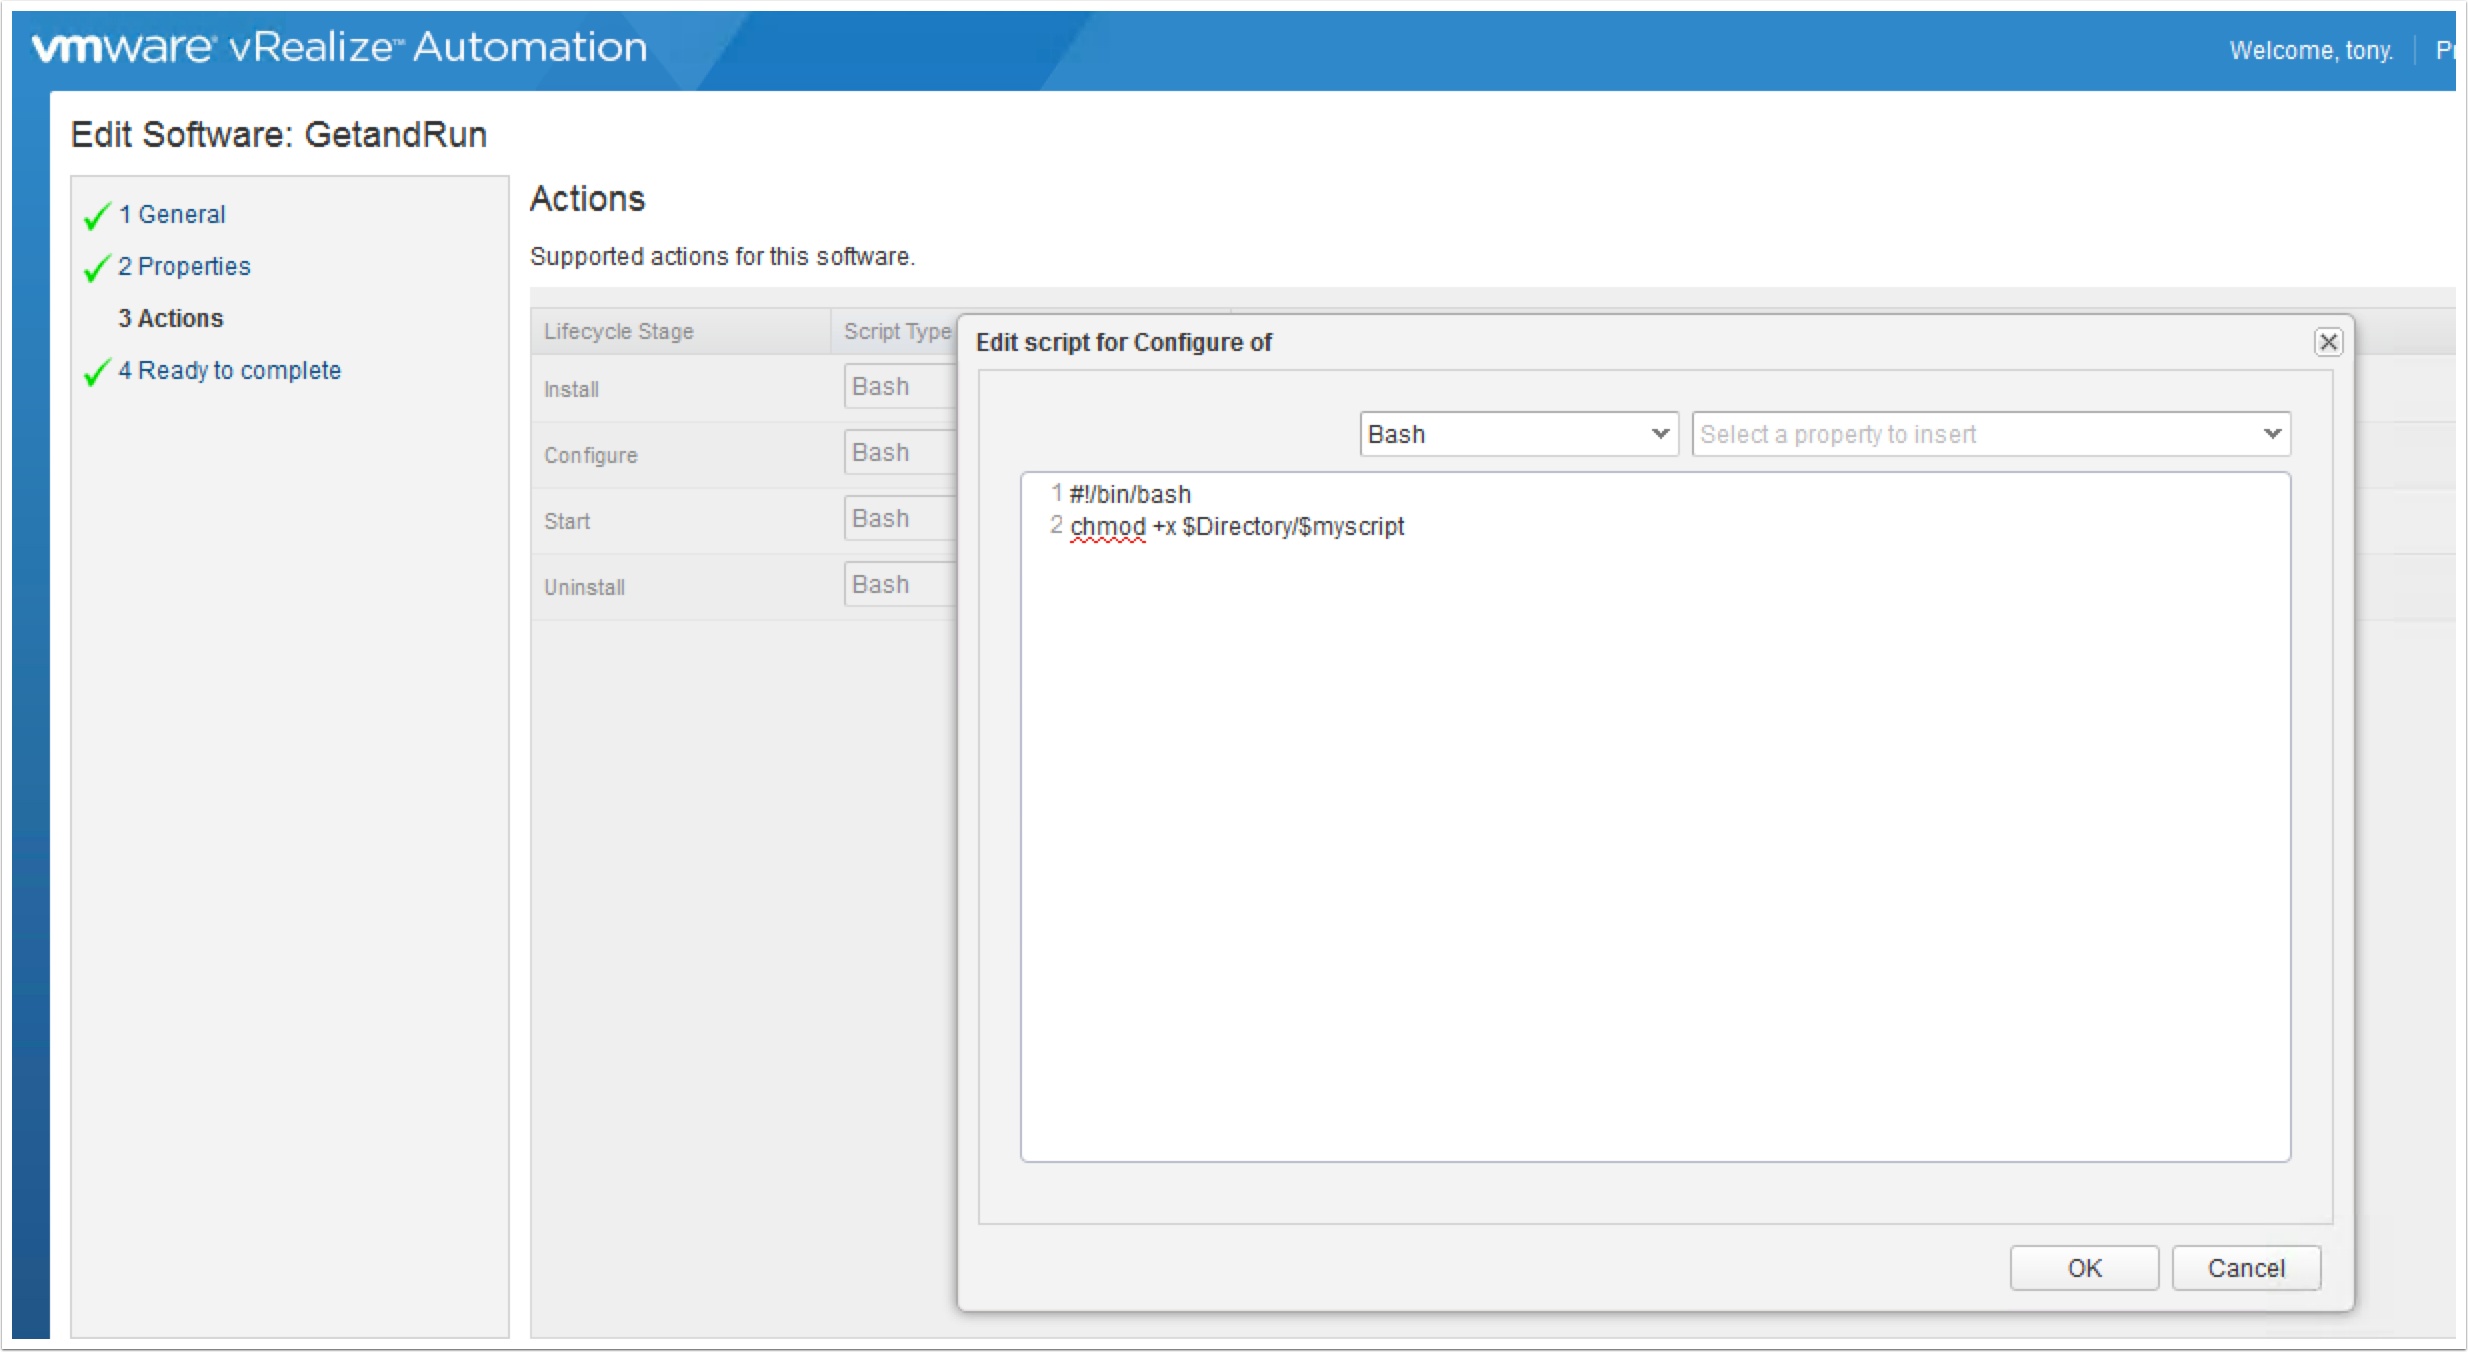
Now create the three properties as shown and press next. We will later use these properties as variables in our scripts.
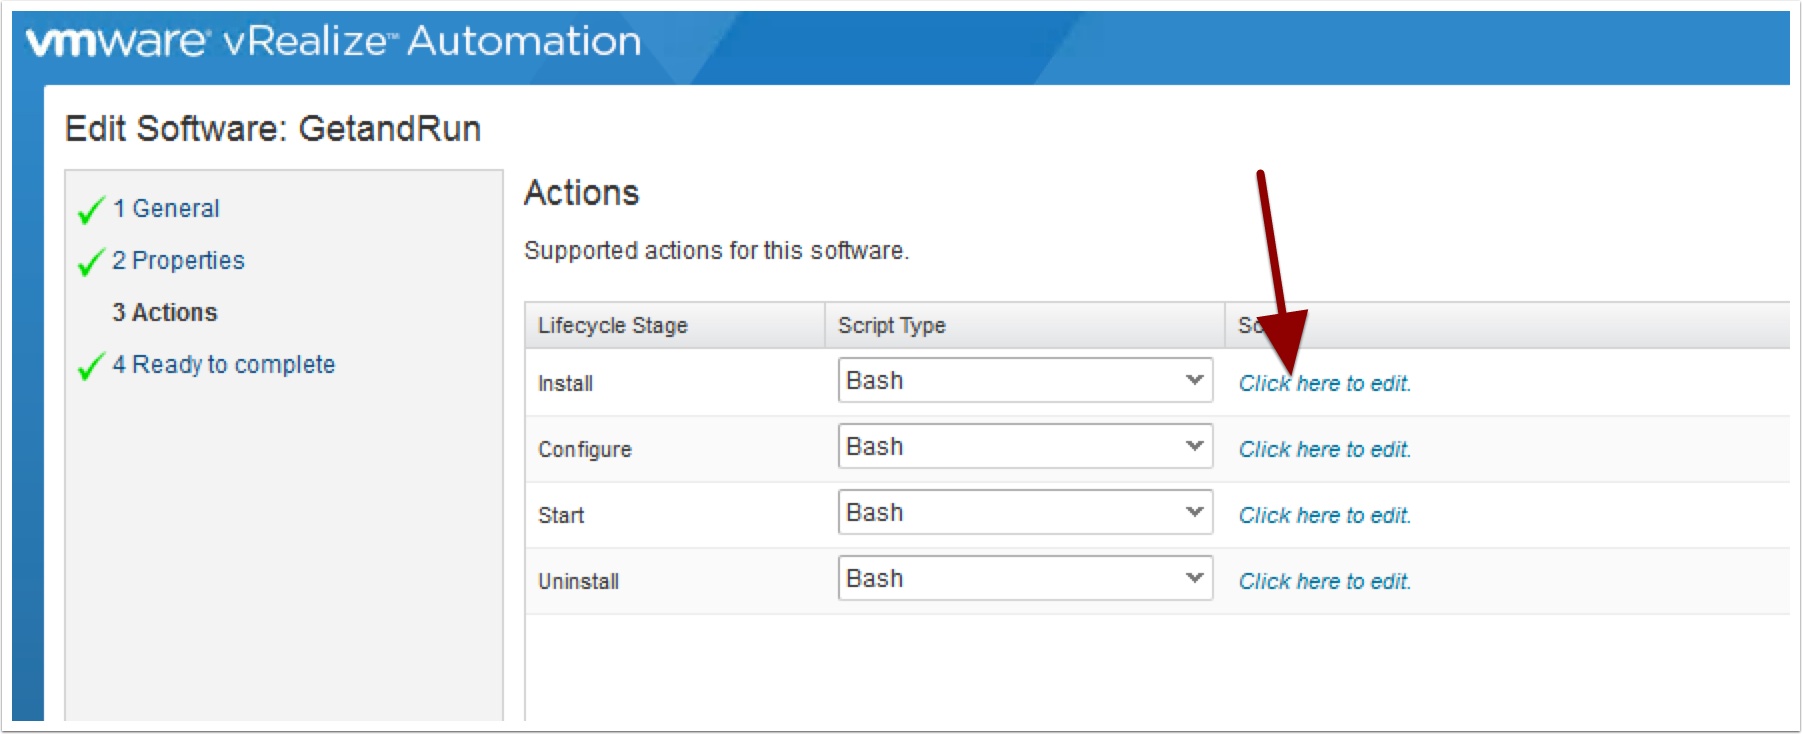
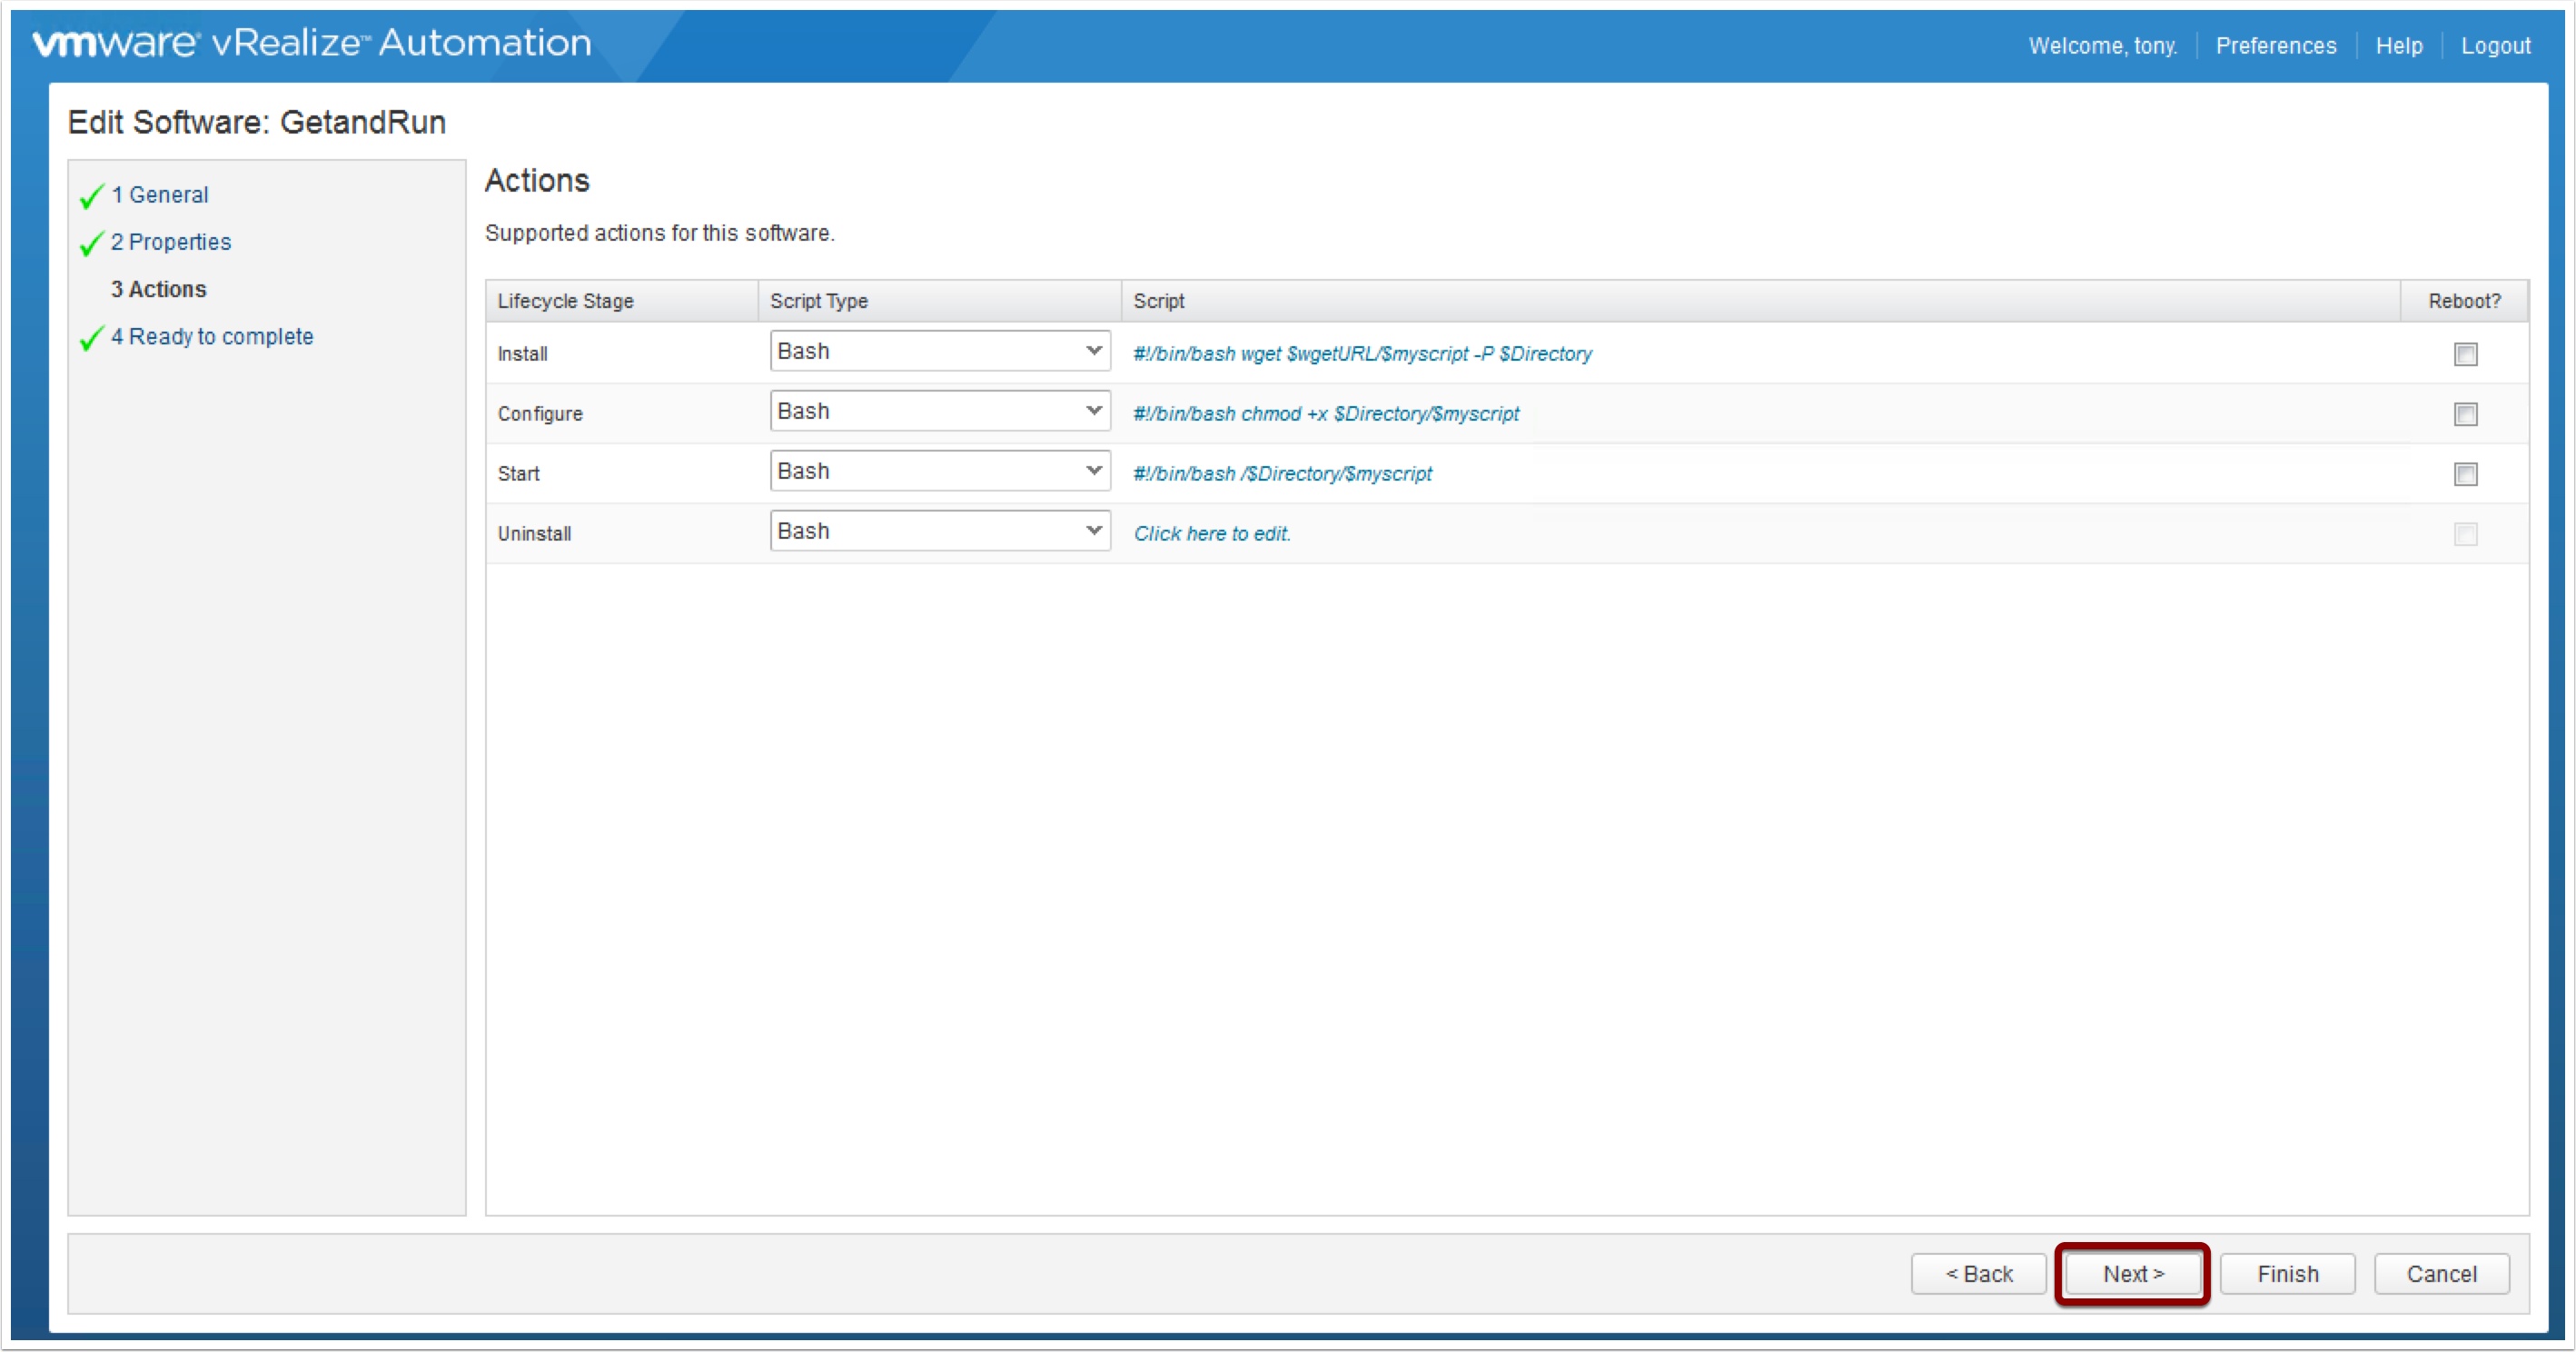
Now on the Actions screen next to install Click the Click here to edit.
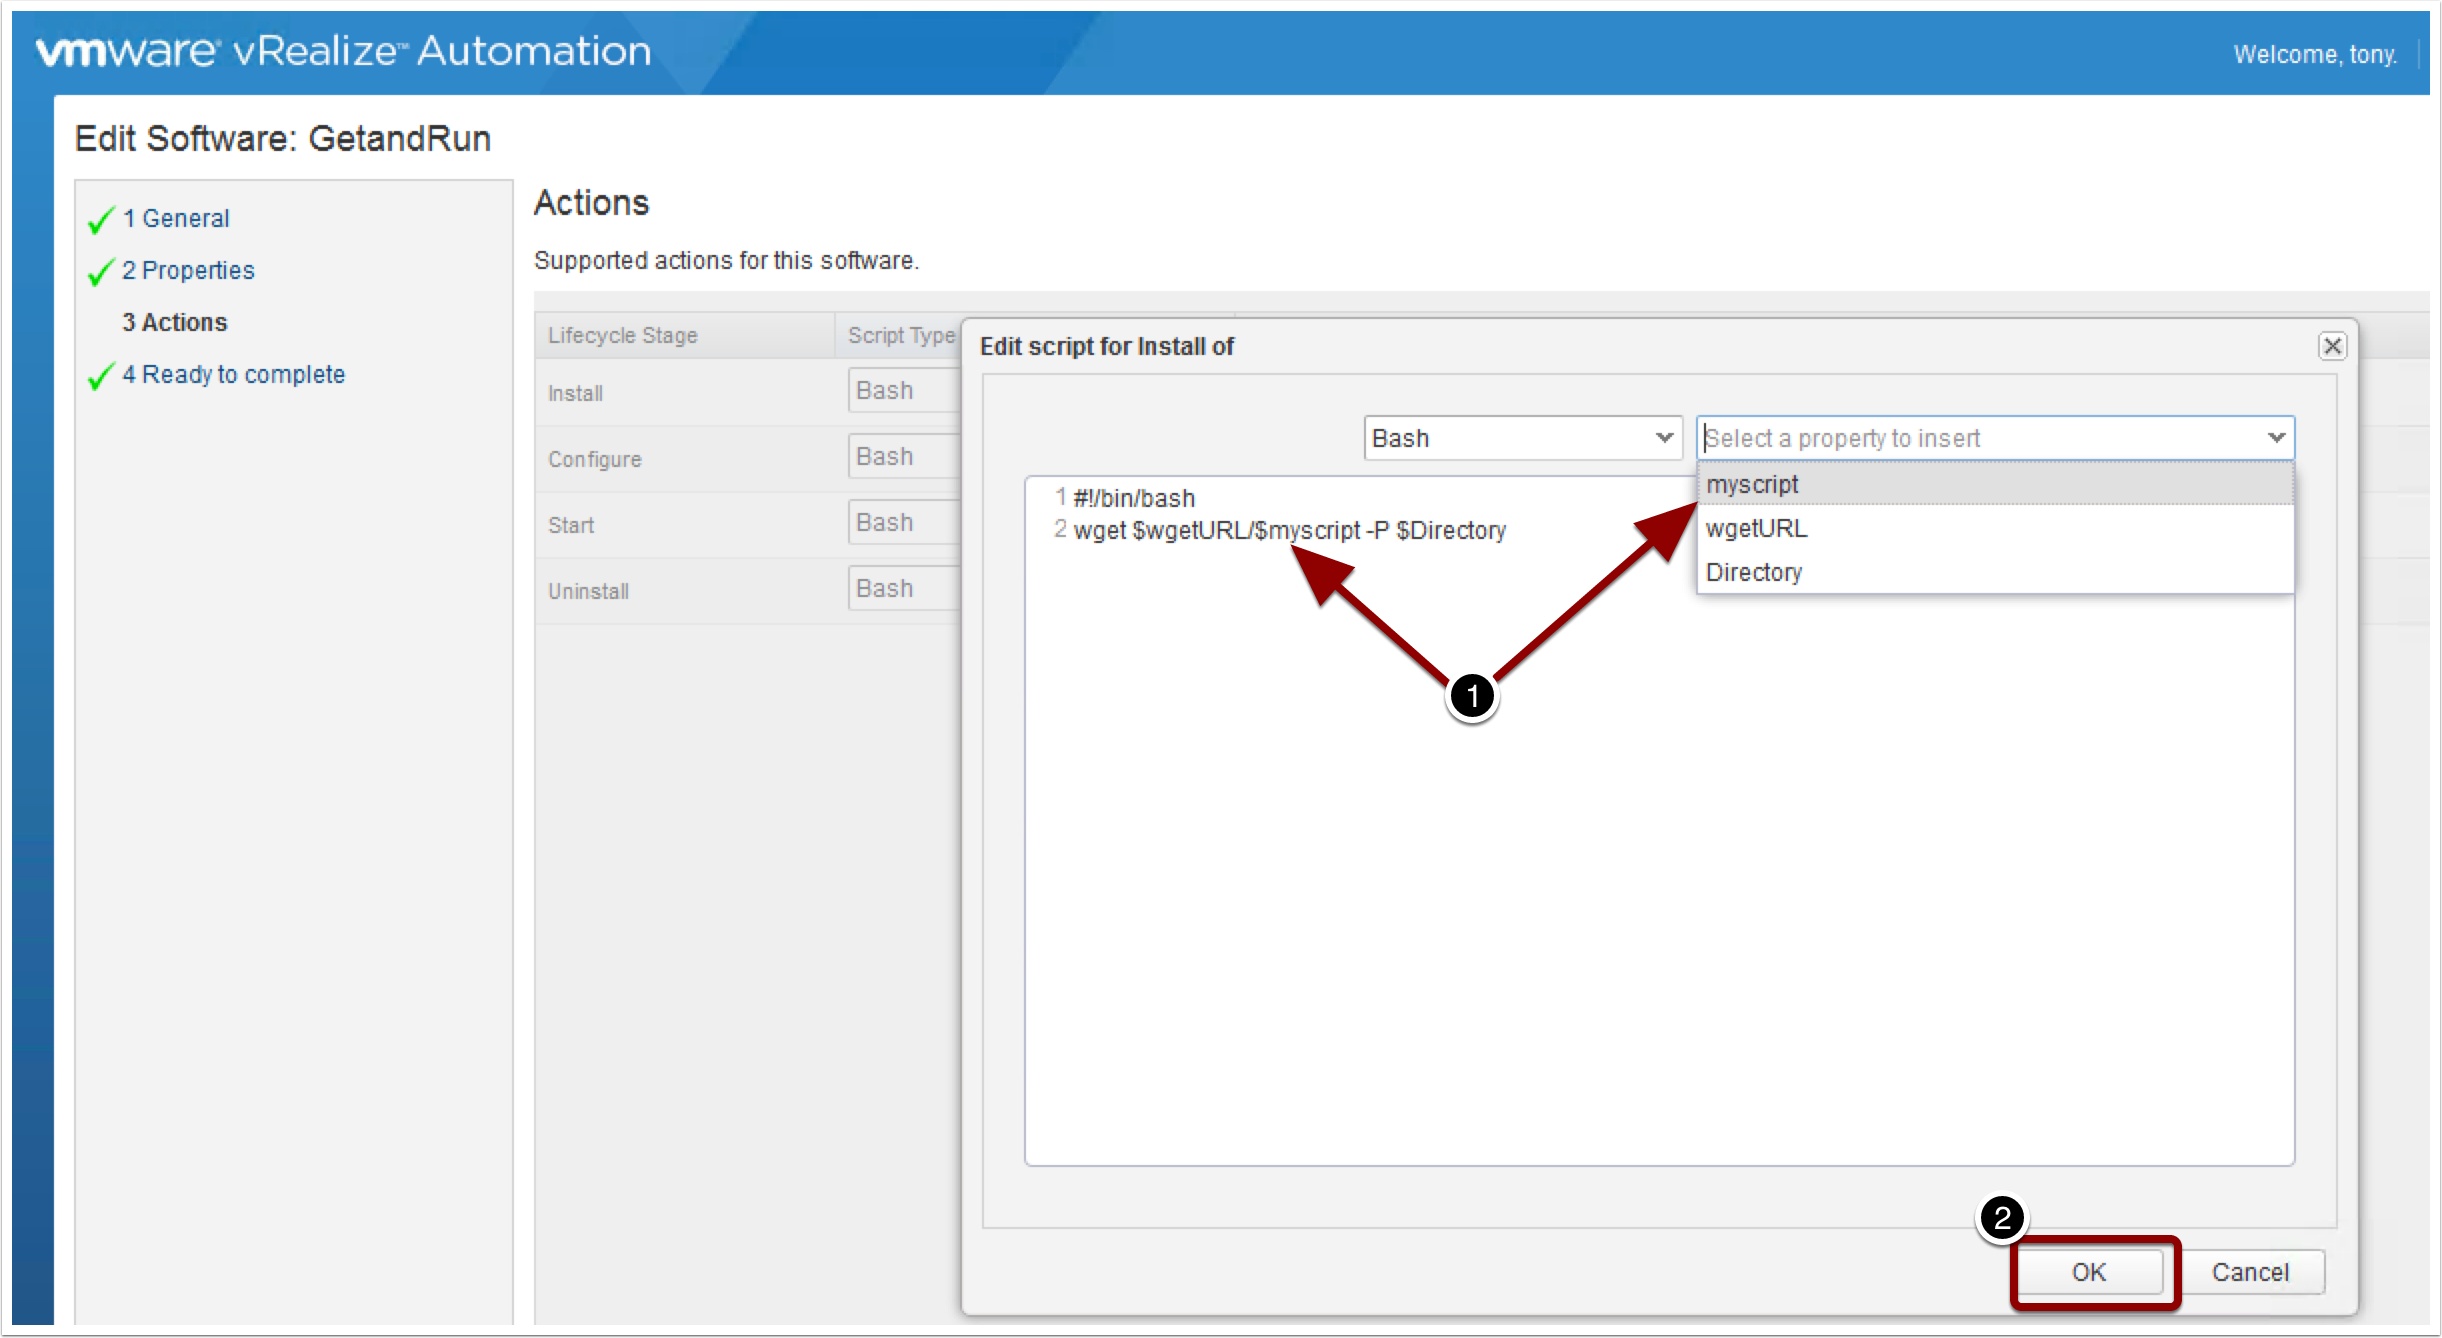
Enter the following and Click Ok
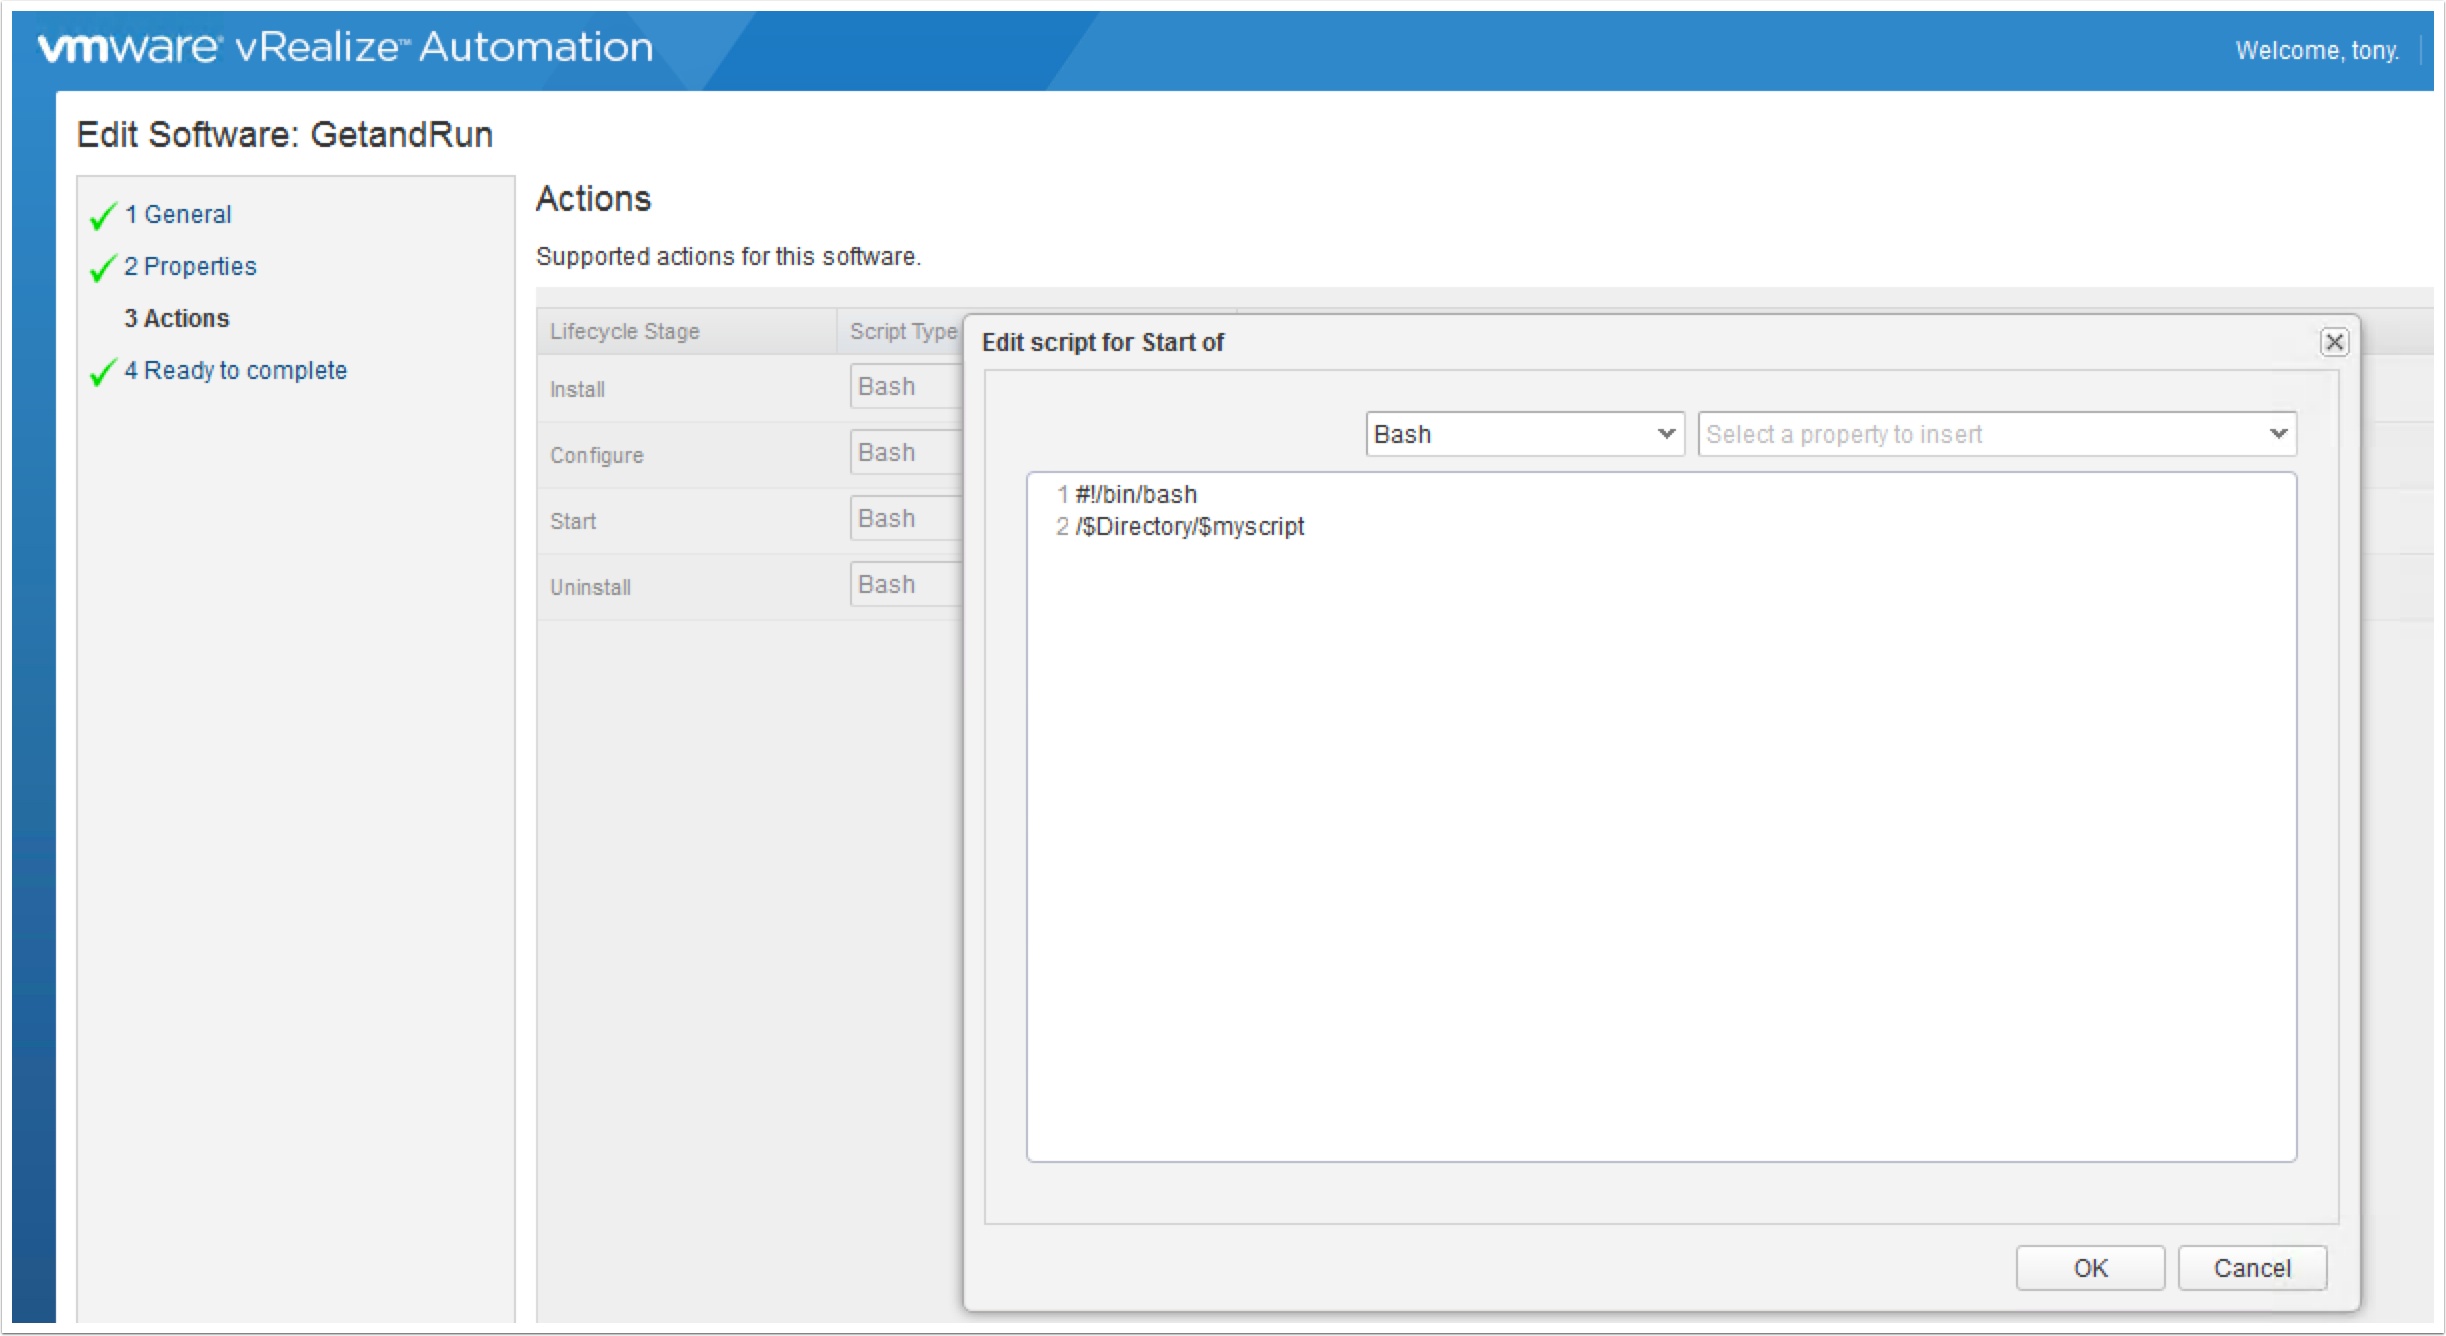
Notice that in the script I am using the variables we created earlier. This are so that these are replaced with what the developer enters in at request time.
Now do the same for the Configure stage
Finally, Edit the start stage
You should see the following and press Next
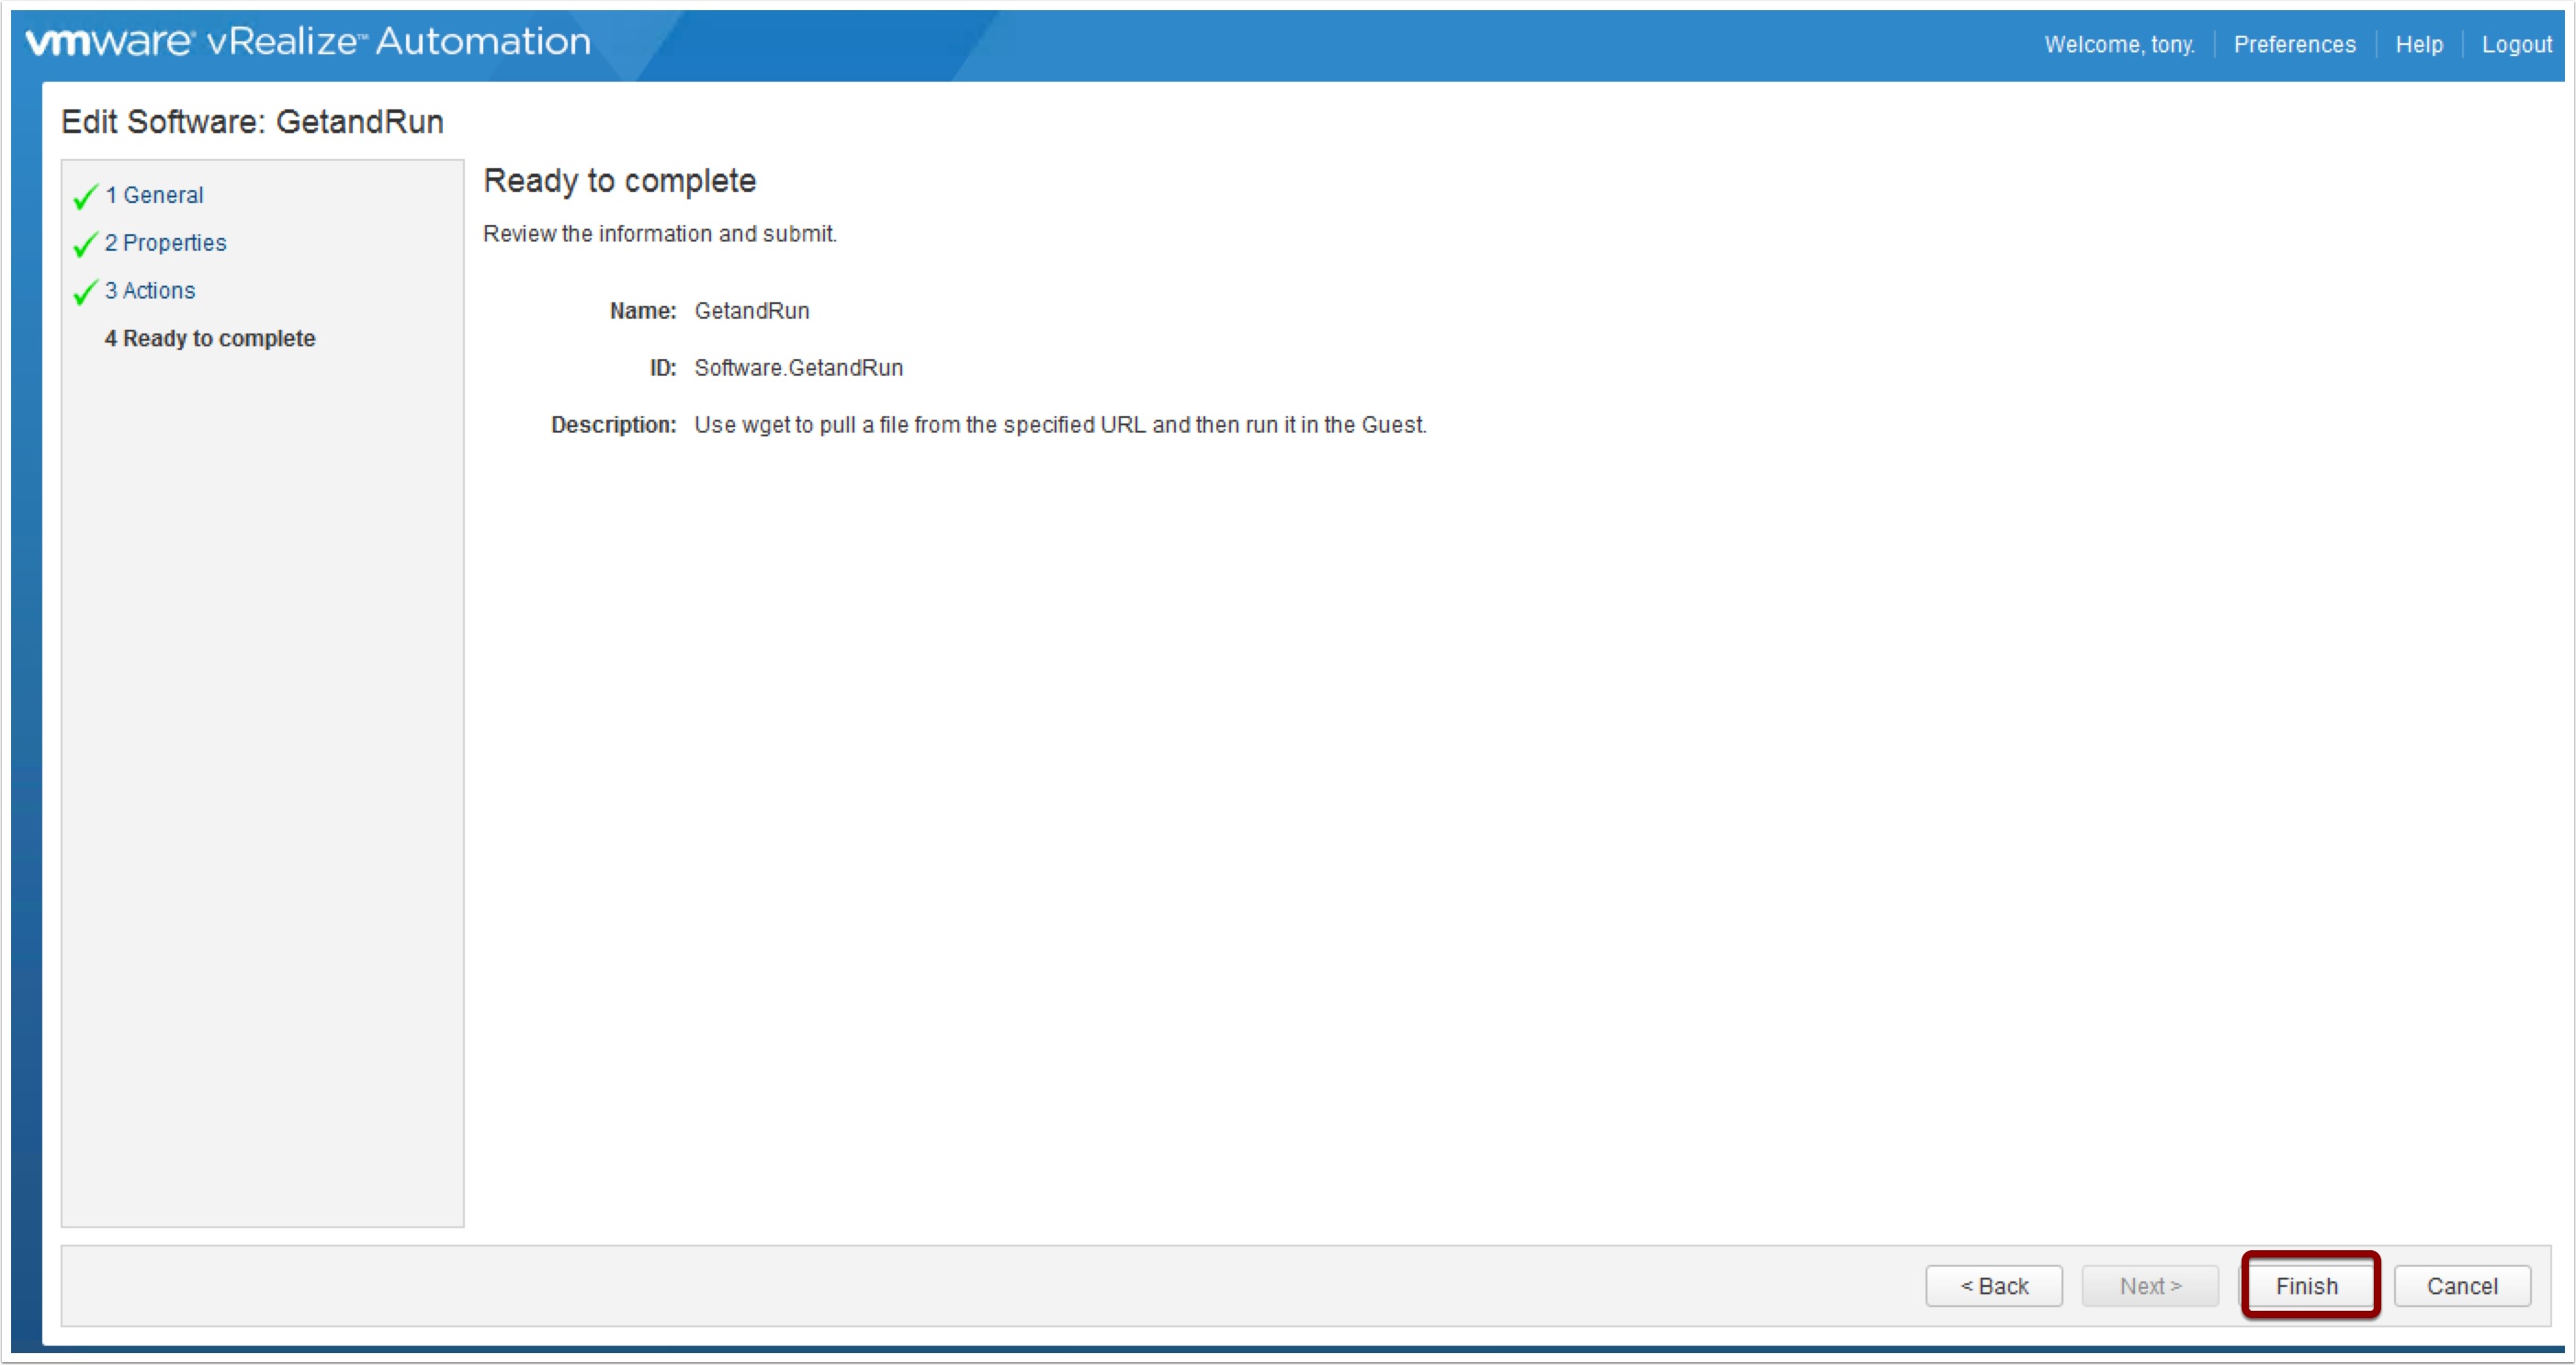
On the following screen press Finish
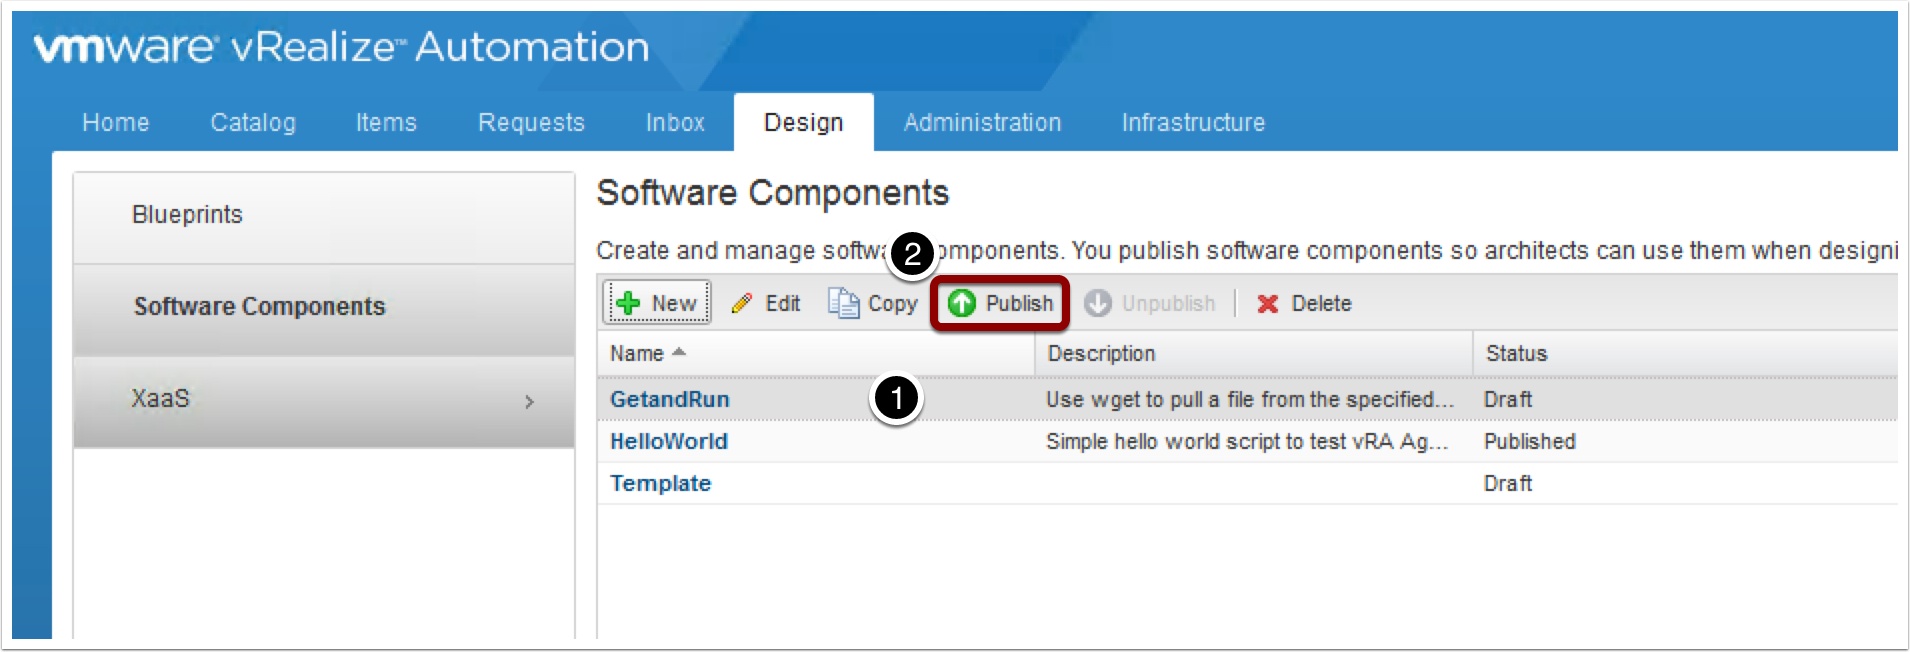
Now click to highlight the GetandRun Component and click Publish
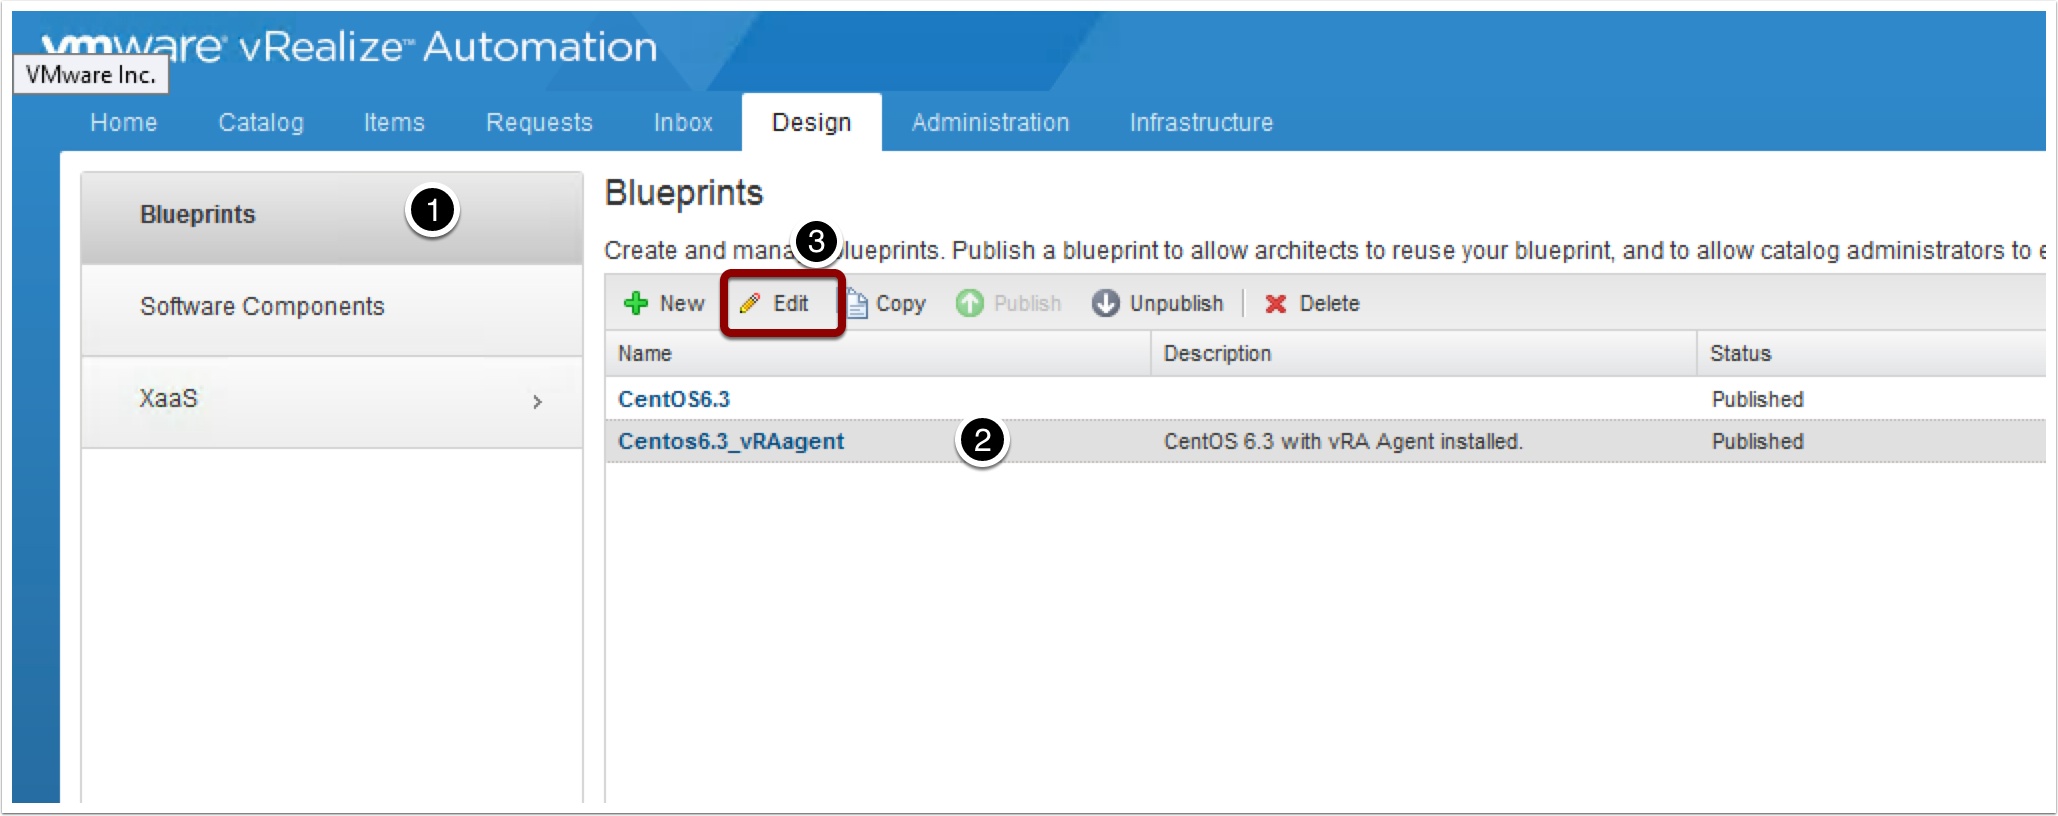
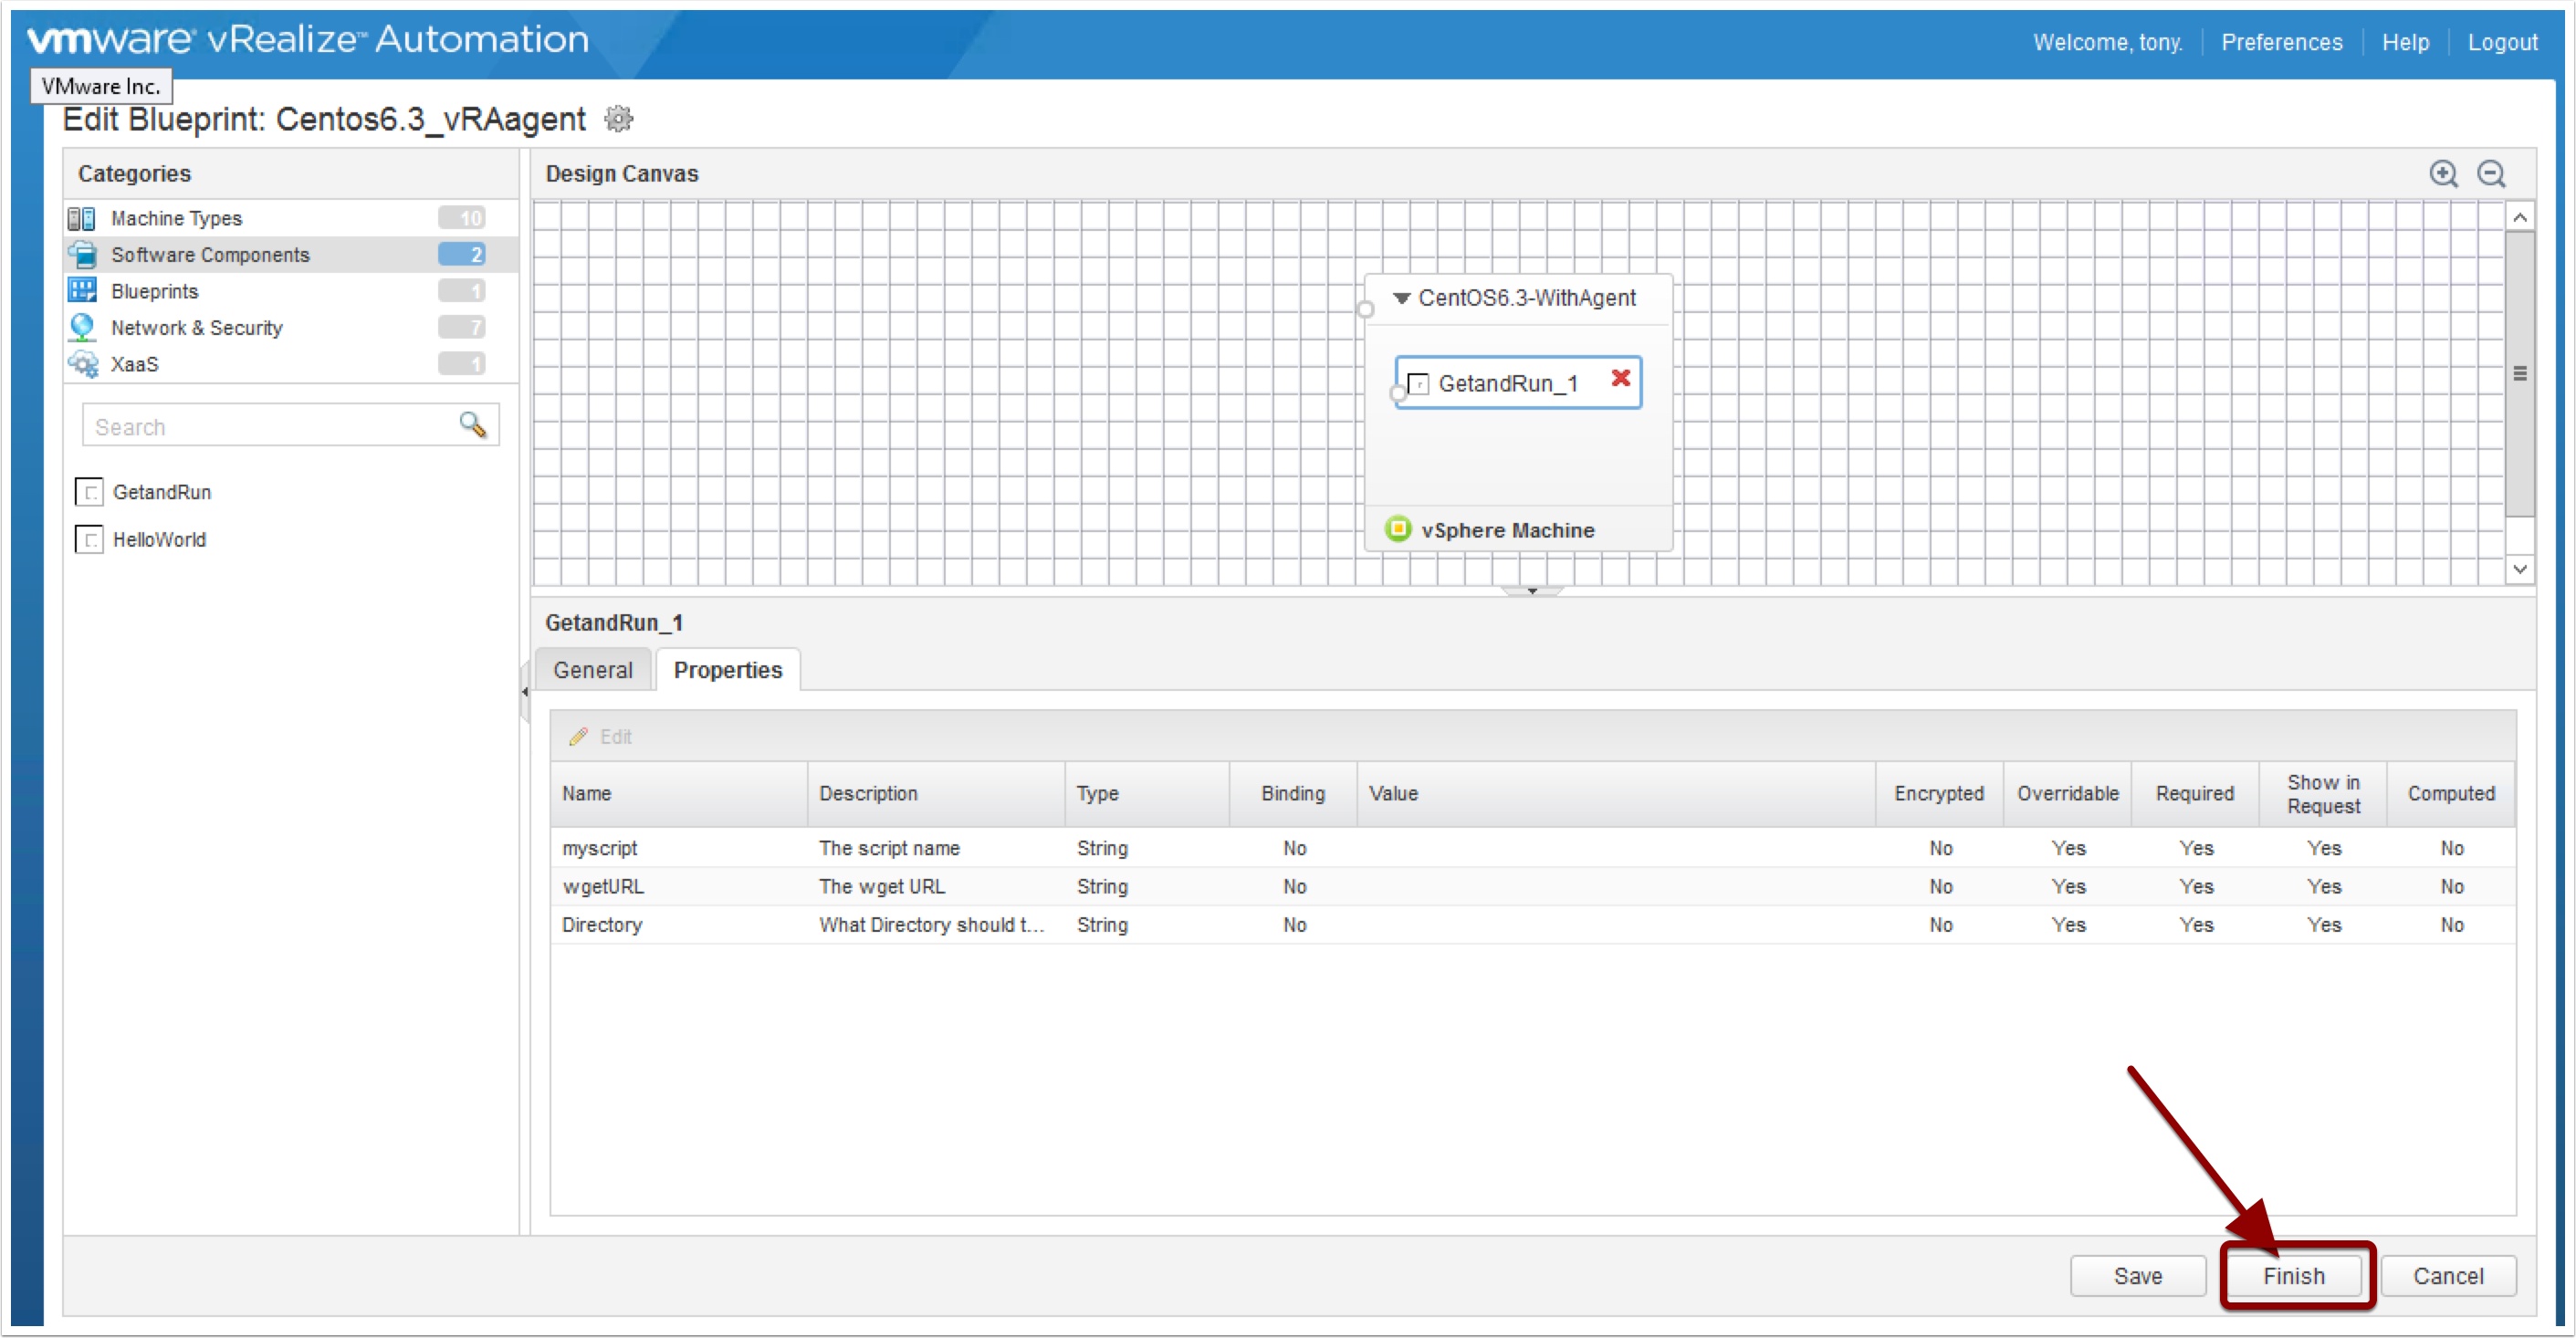
Now let’s add this software component to our blueprint, click the blueprints tab then highlight out Centos6.3_vRAagent blueprint and click edit
In the left pane click Software Components and notice our GetandRun component

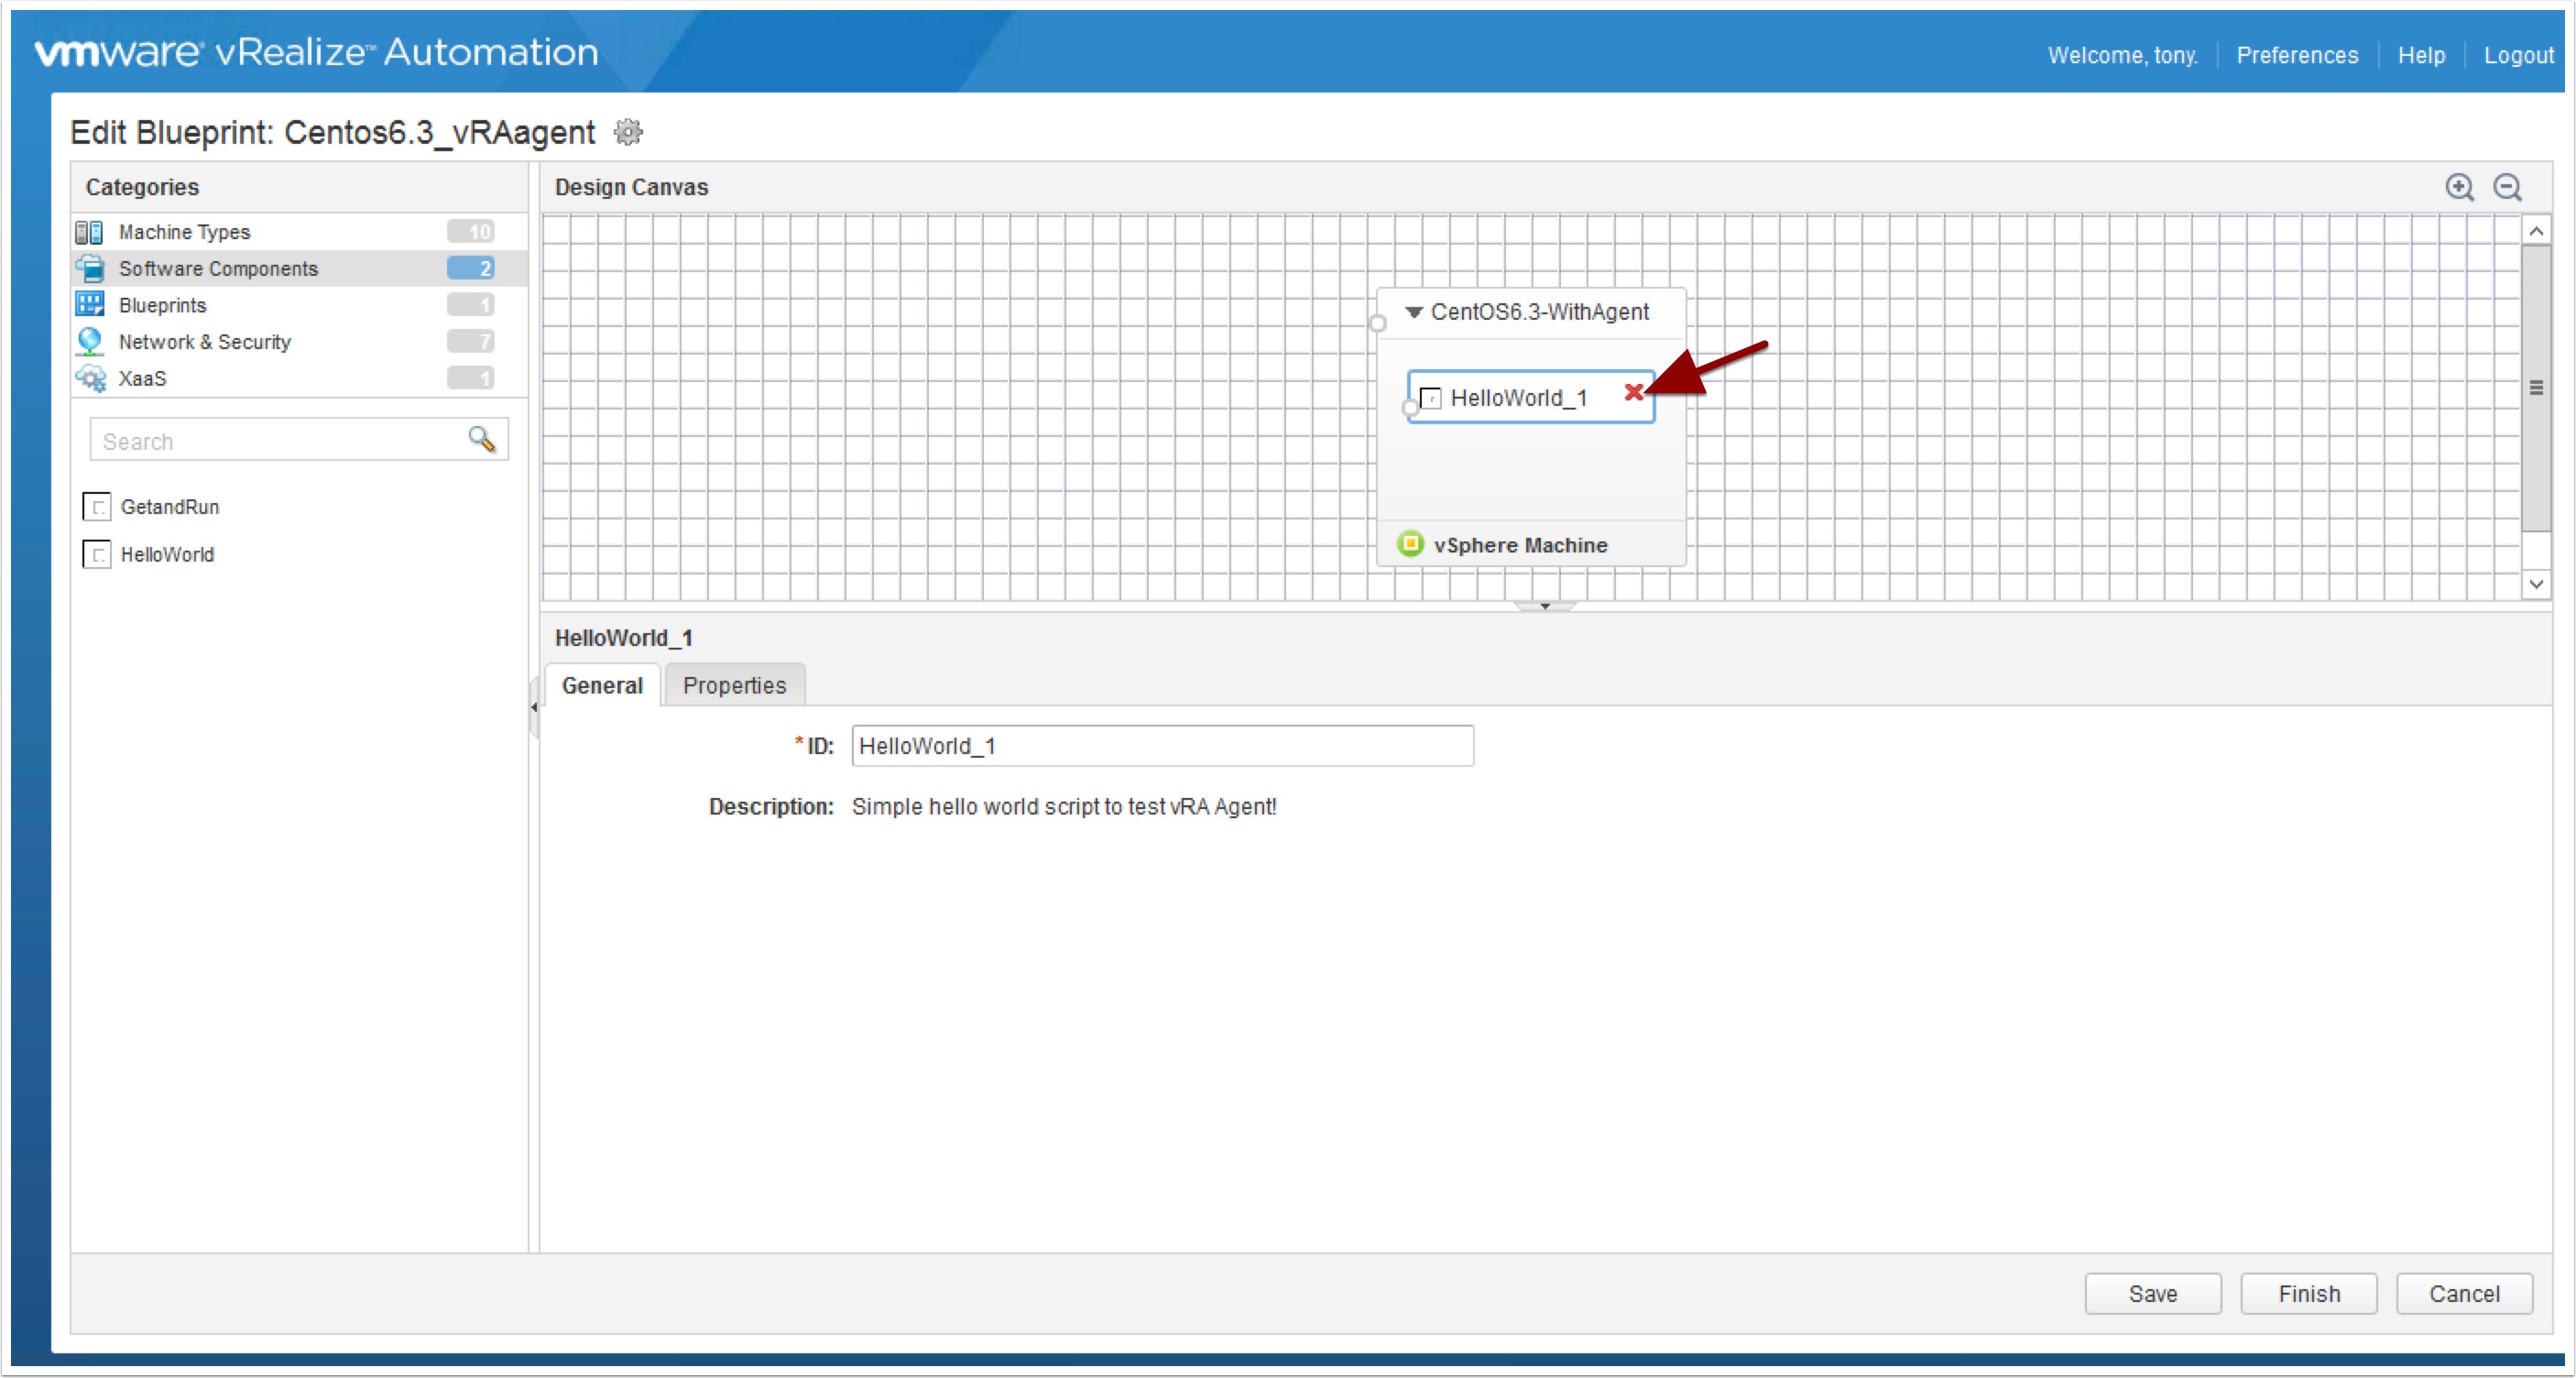
We will need to clean up our Blueprint by removing the HelloWorld component, click it and click the red X to remove it.
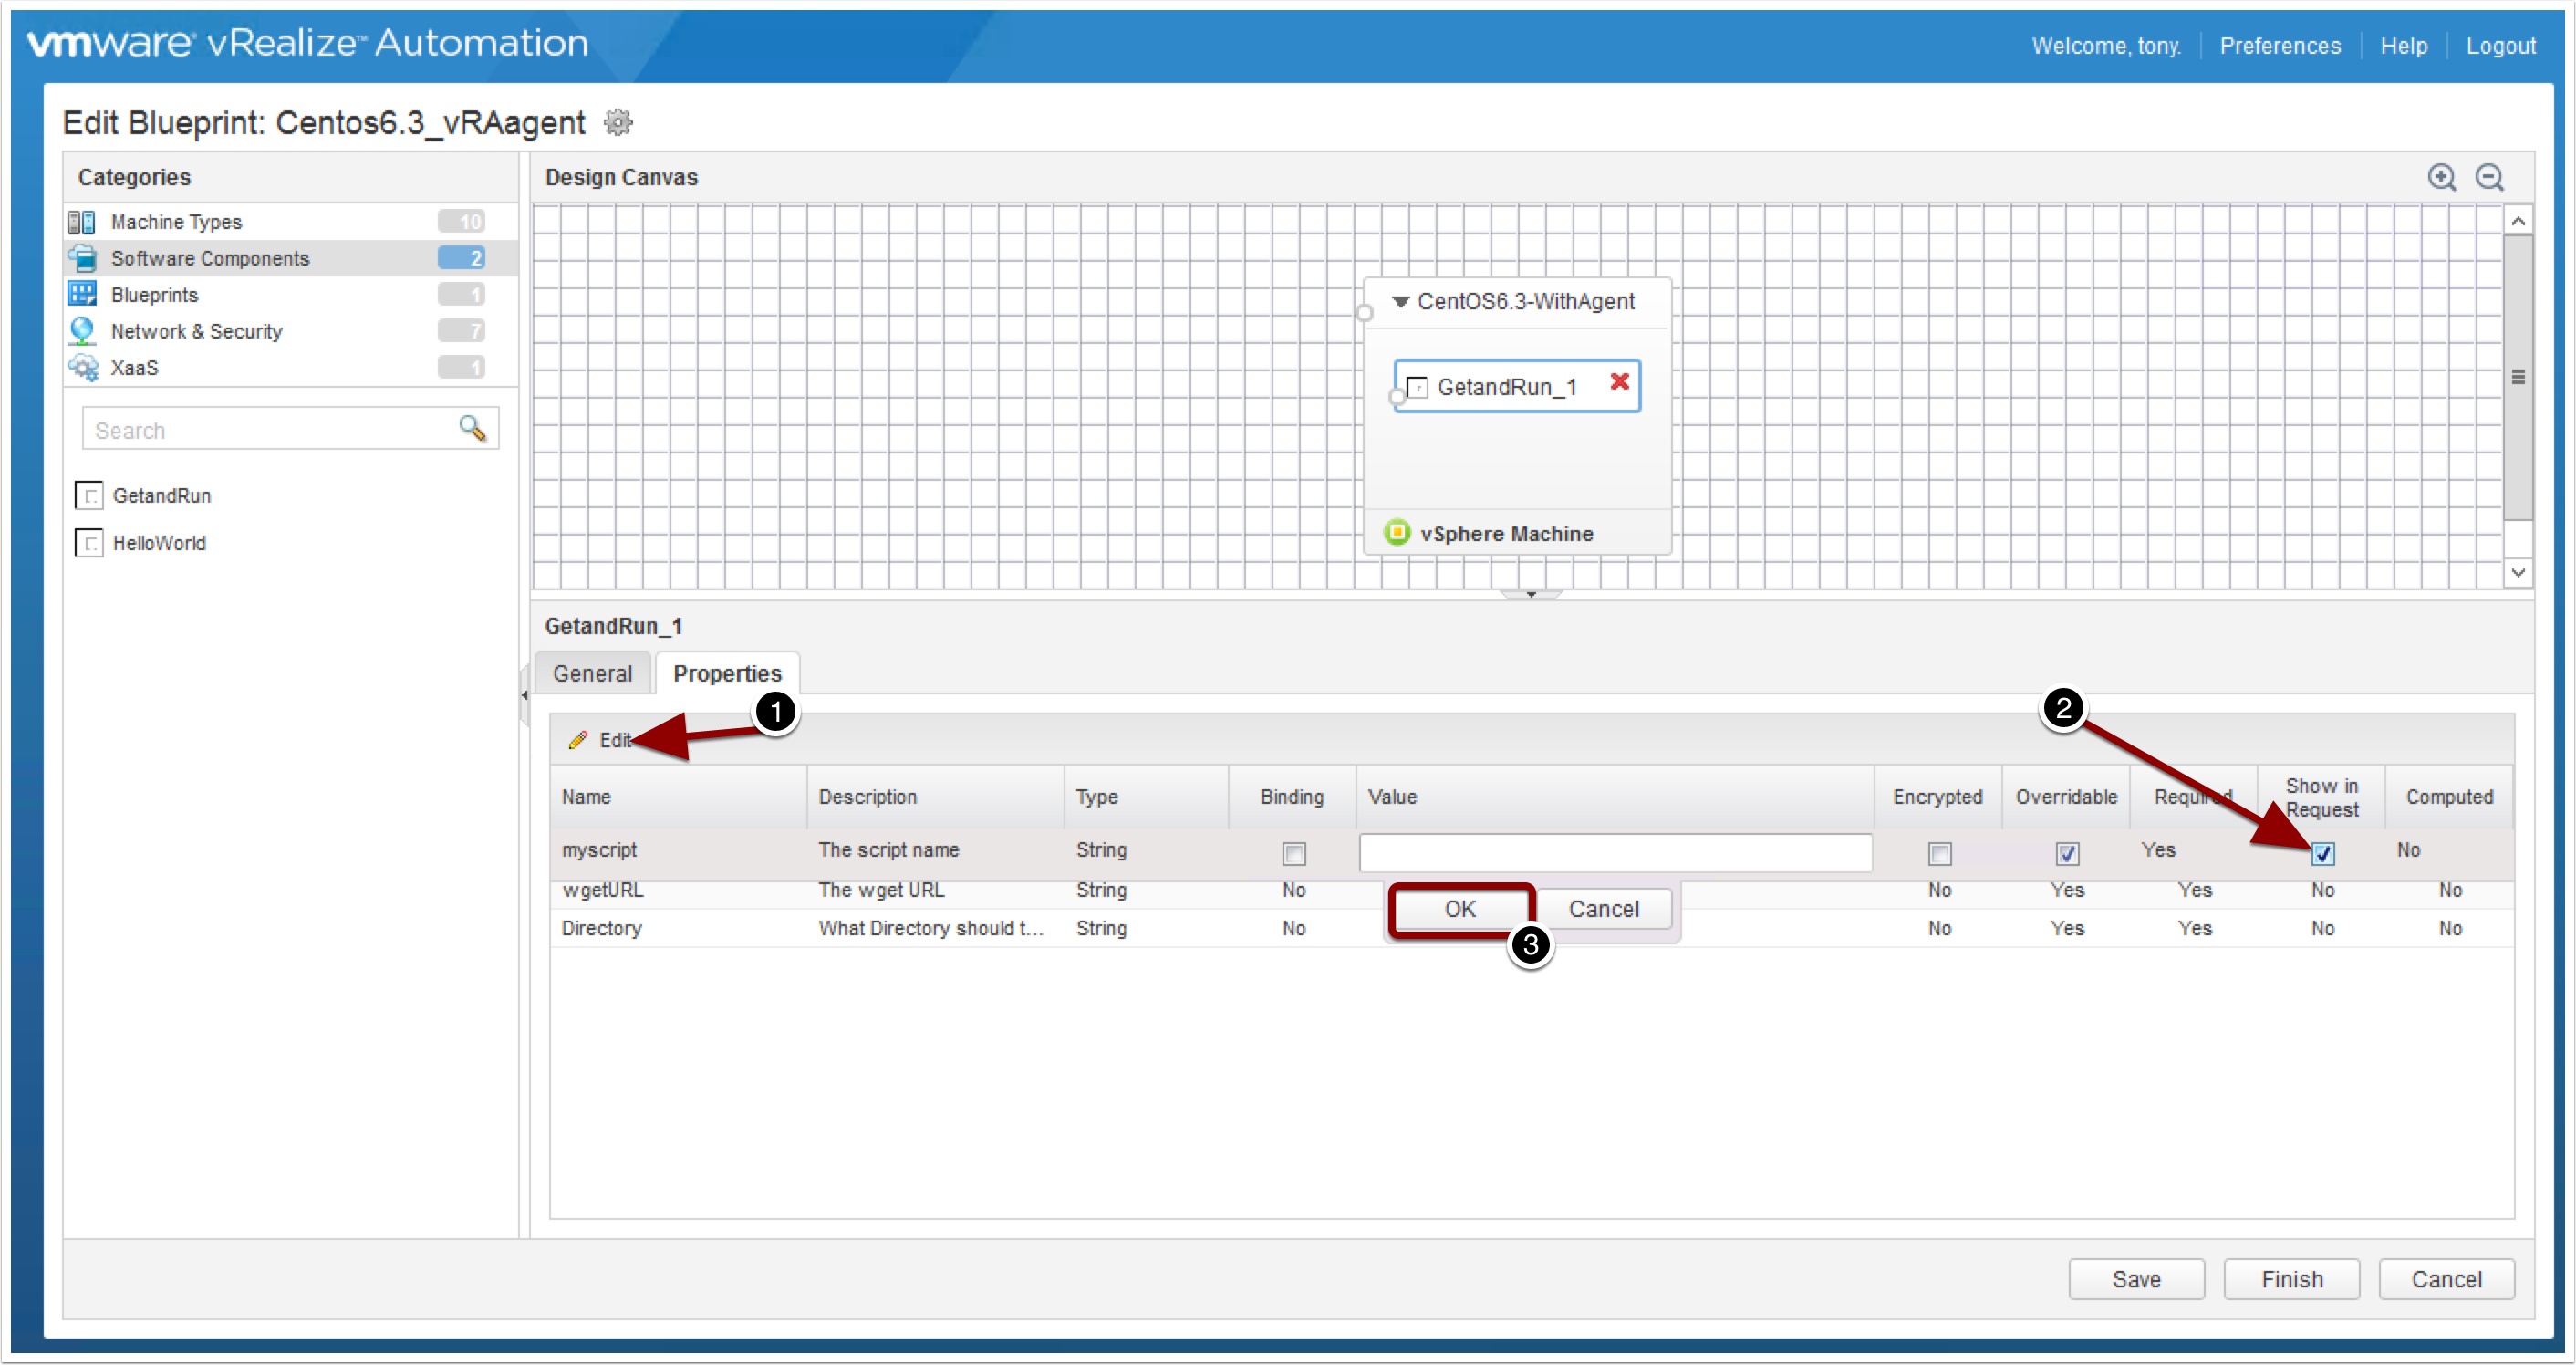
Now drag and drop the GetandRun component onto the blueprint

Now click properties and edit each property to check mark Show in Request
It should look like the following and press Finish
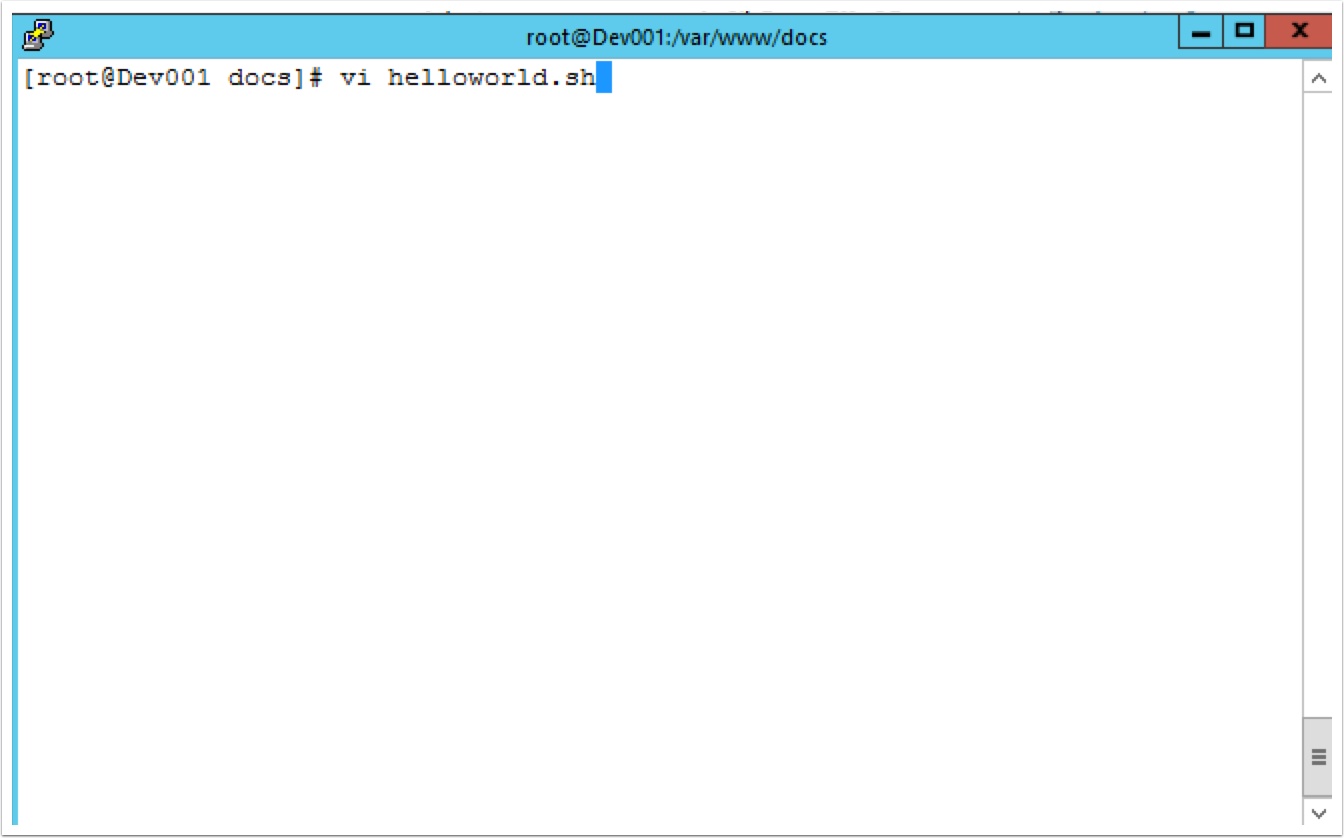
Now, before we fire off a new request let’s create a shell file on our HttP file server. SSH into that box and change to the directory that is serving files and use vi editor to create a new shell file named helloworld.sh
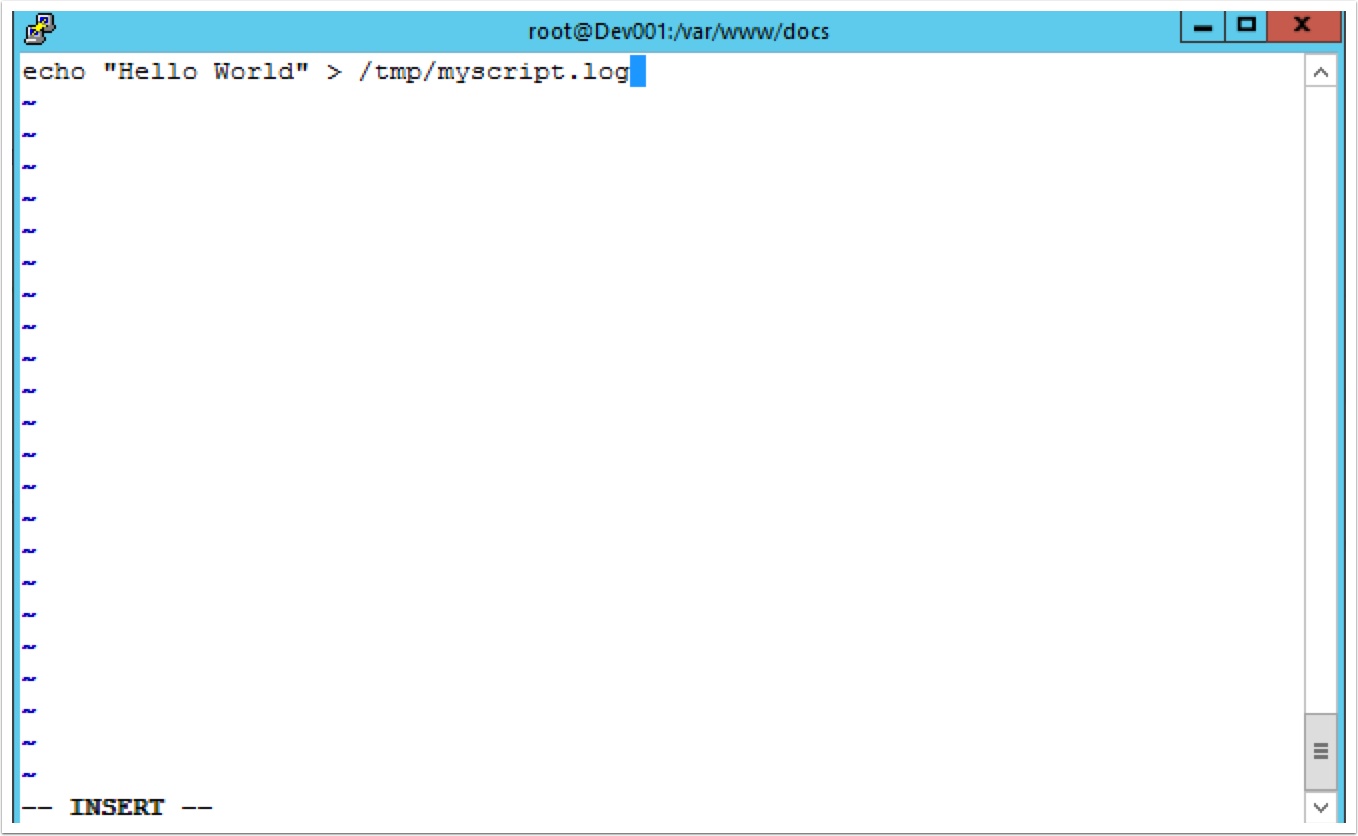
Press i and enter the following then press ESC then hold Shift and press ZZ to save the file
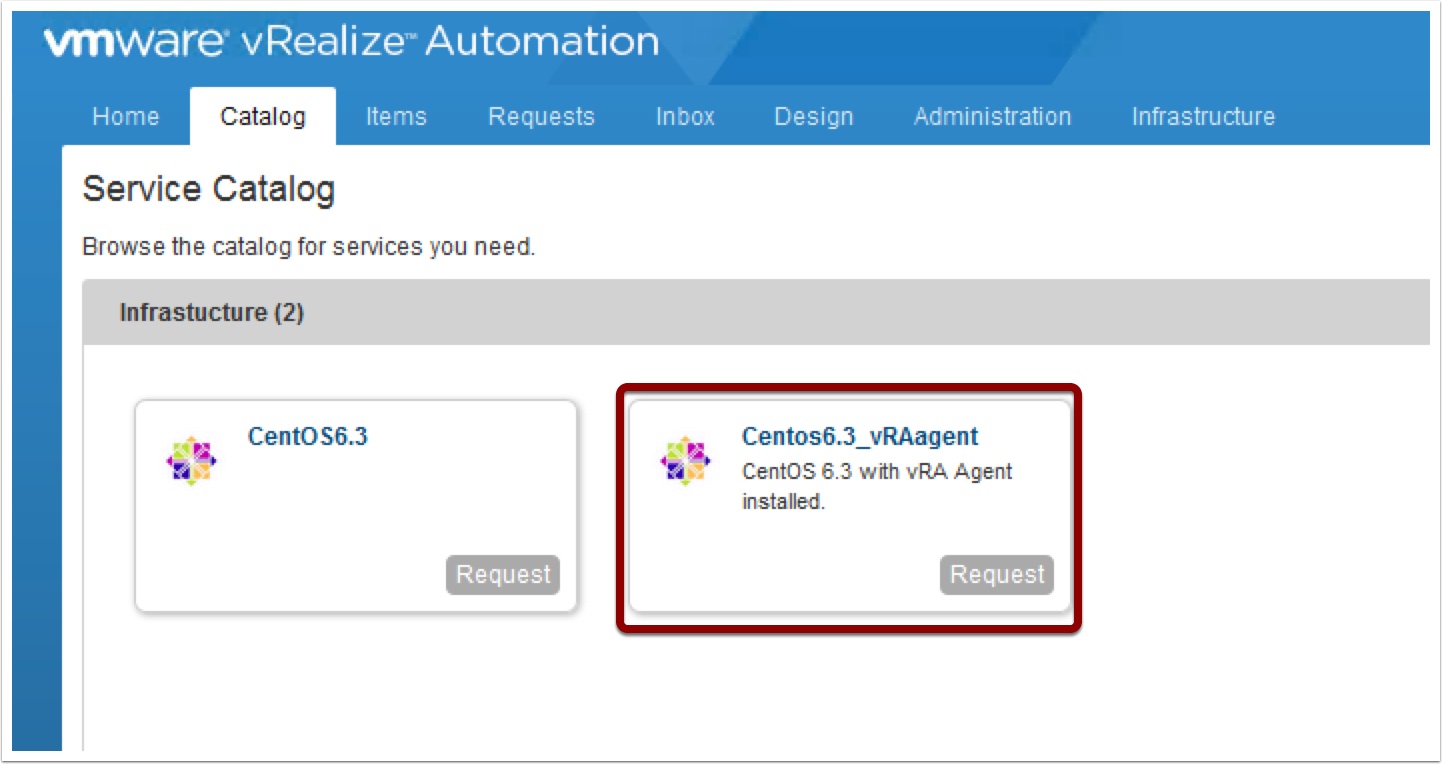
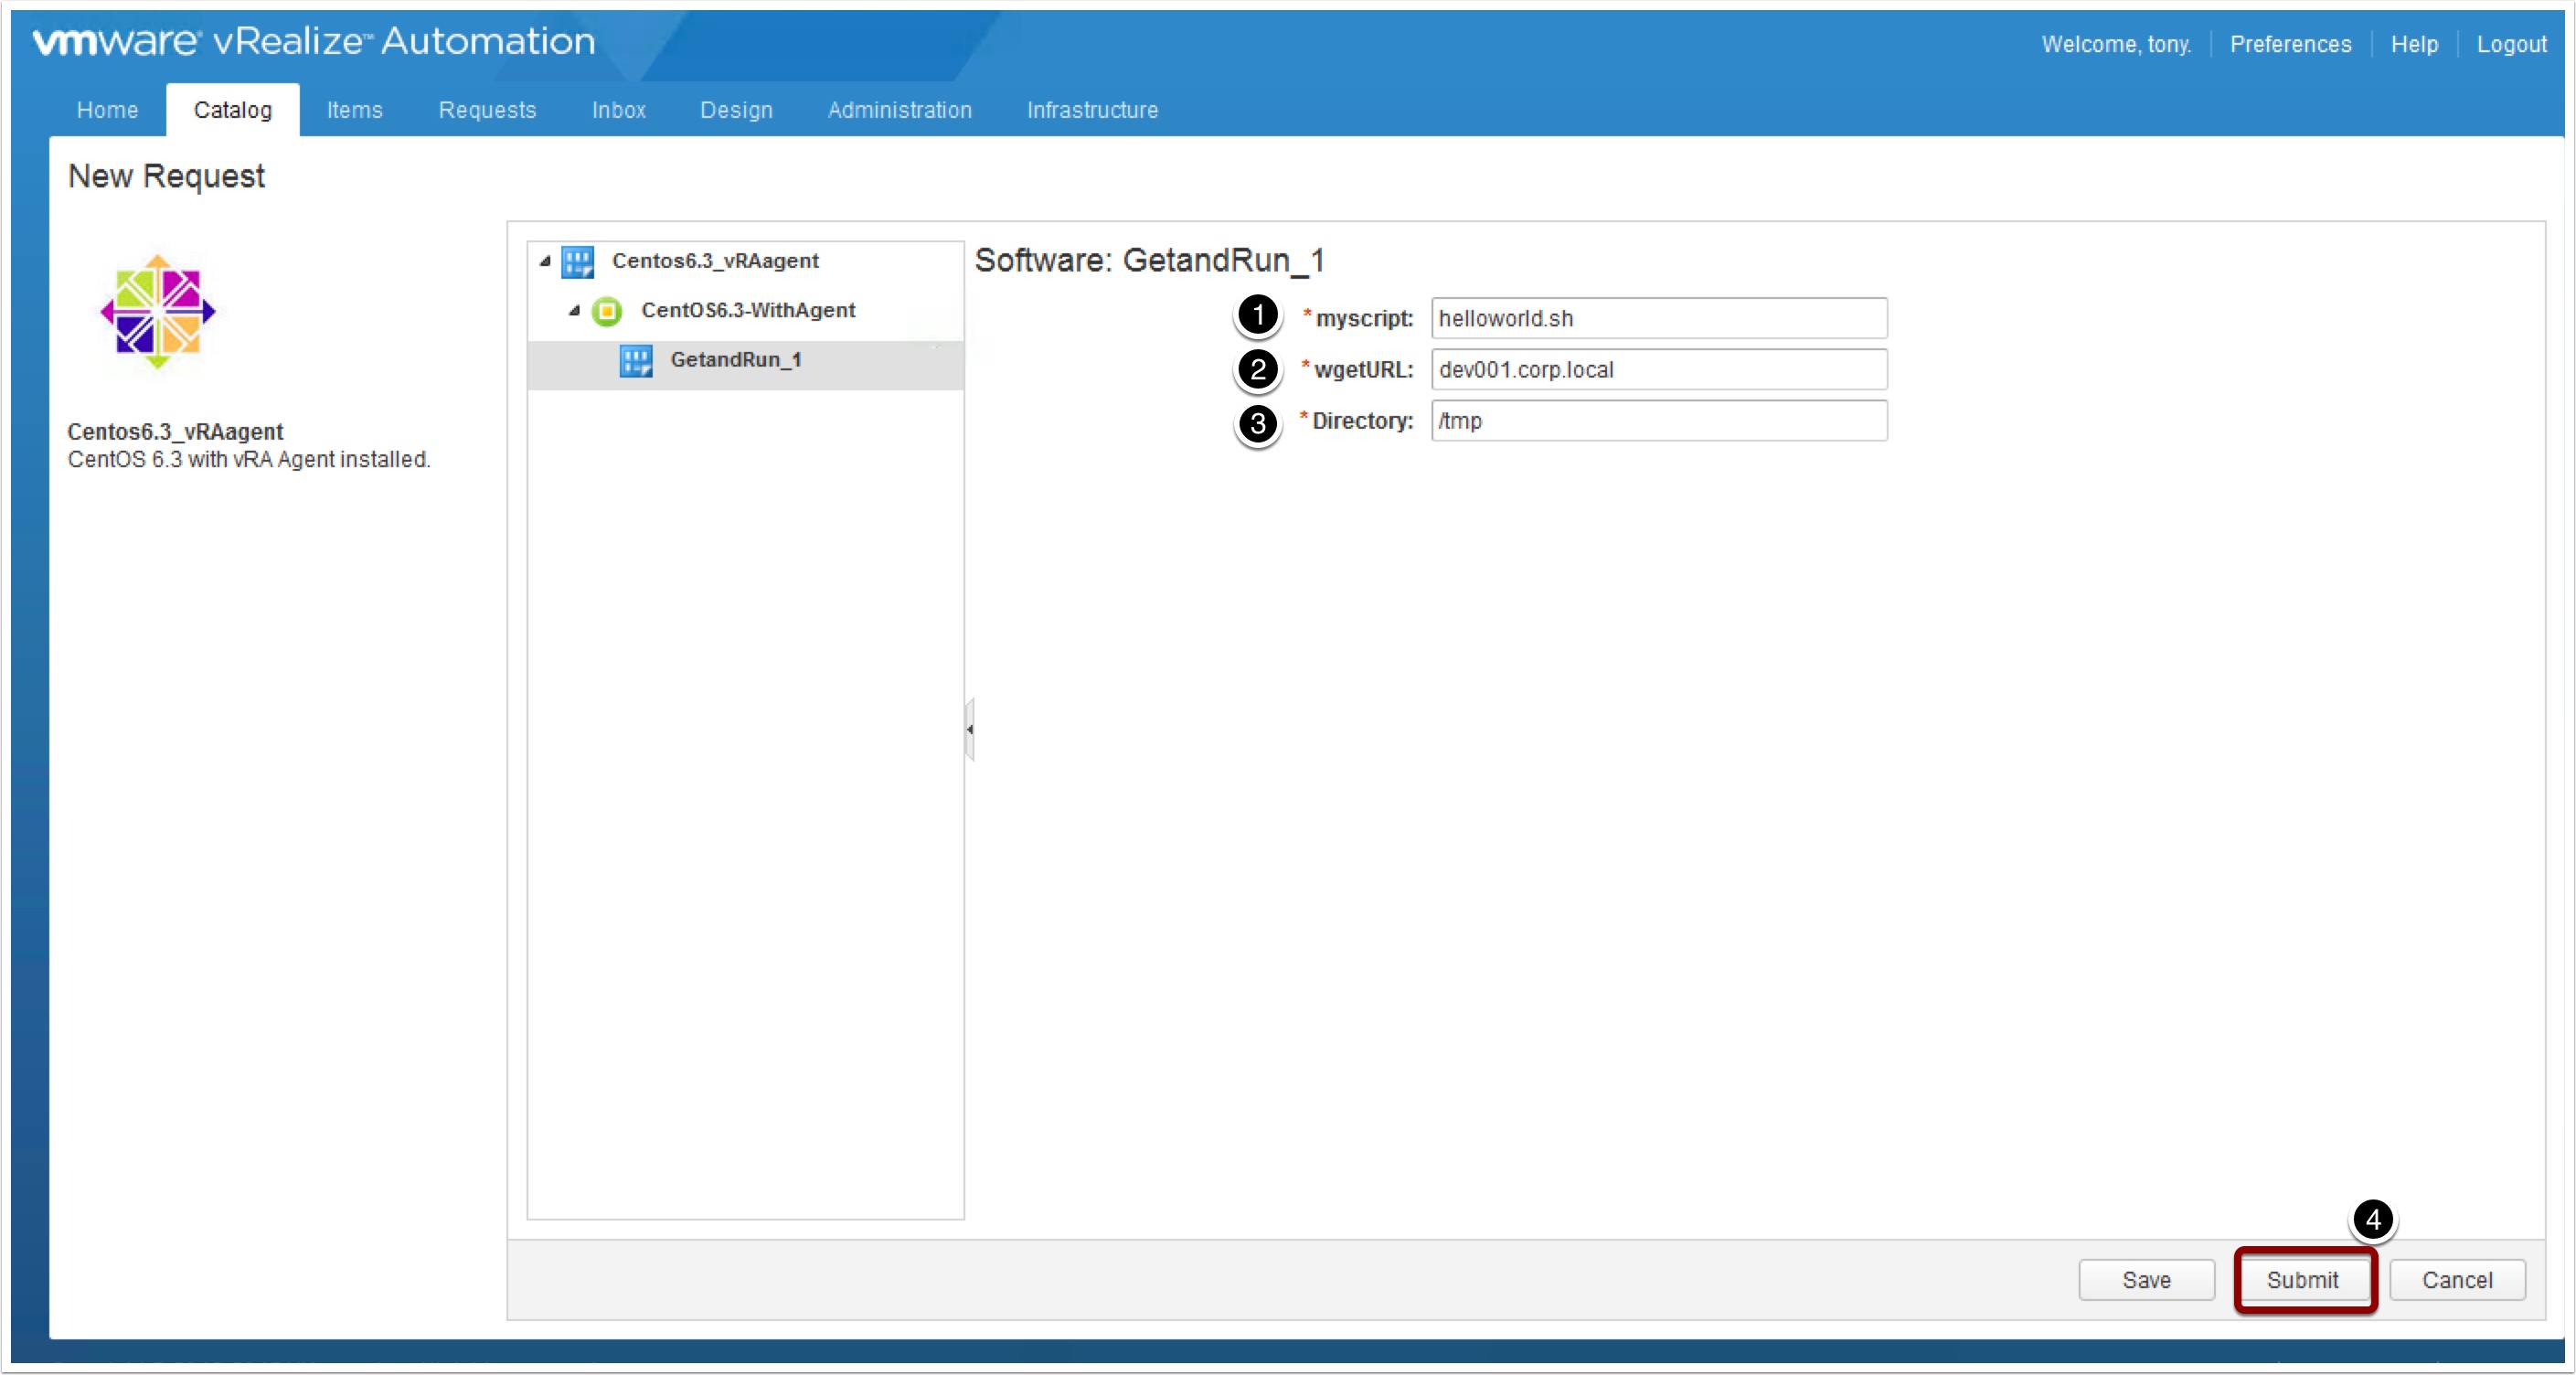
Now that we have the script on the HTTP server let’s fire off a new request. Before we test from the REST API let’s try this with the Portal UI just to see if we set everything up right. Click the Catalog tab then click the Centos6.3_vRAagent Blueprint
Enter a description and Reason and then click the GetandRun_1 icon to the left
Notice you have three required fields to fill in, fill in as shown replacing the wgetURL with your server IP or url then click submit.
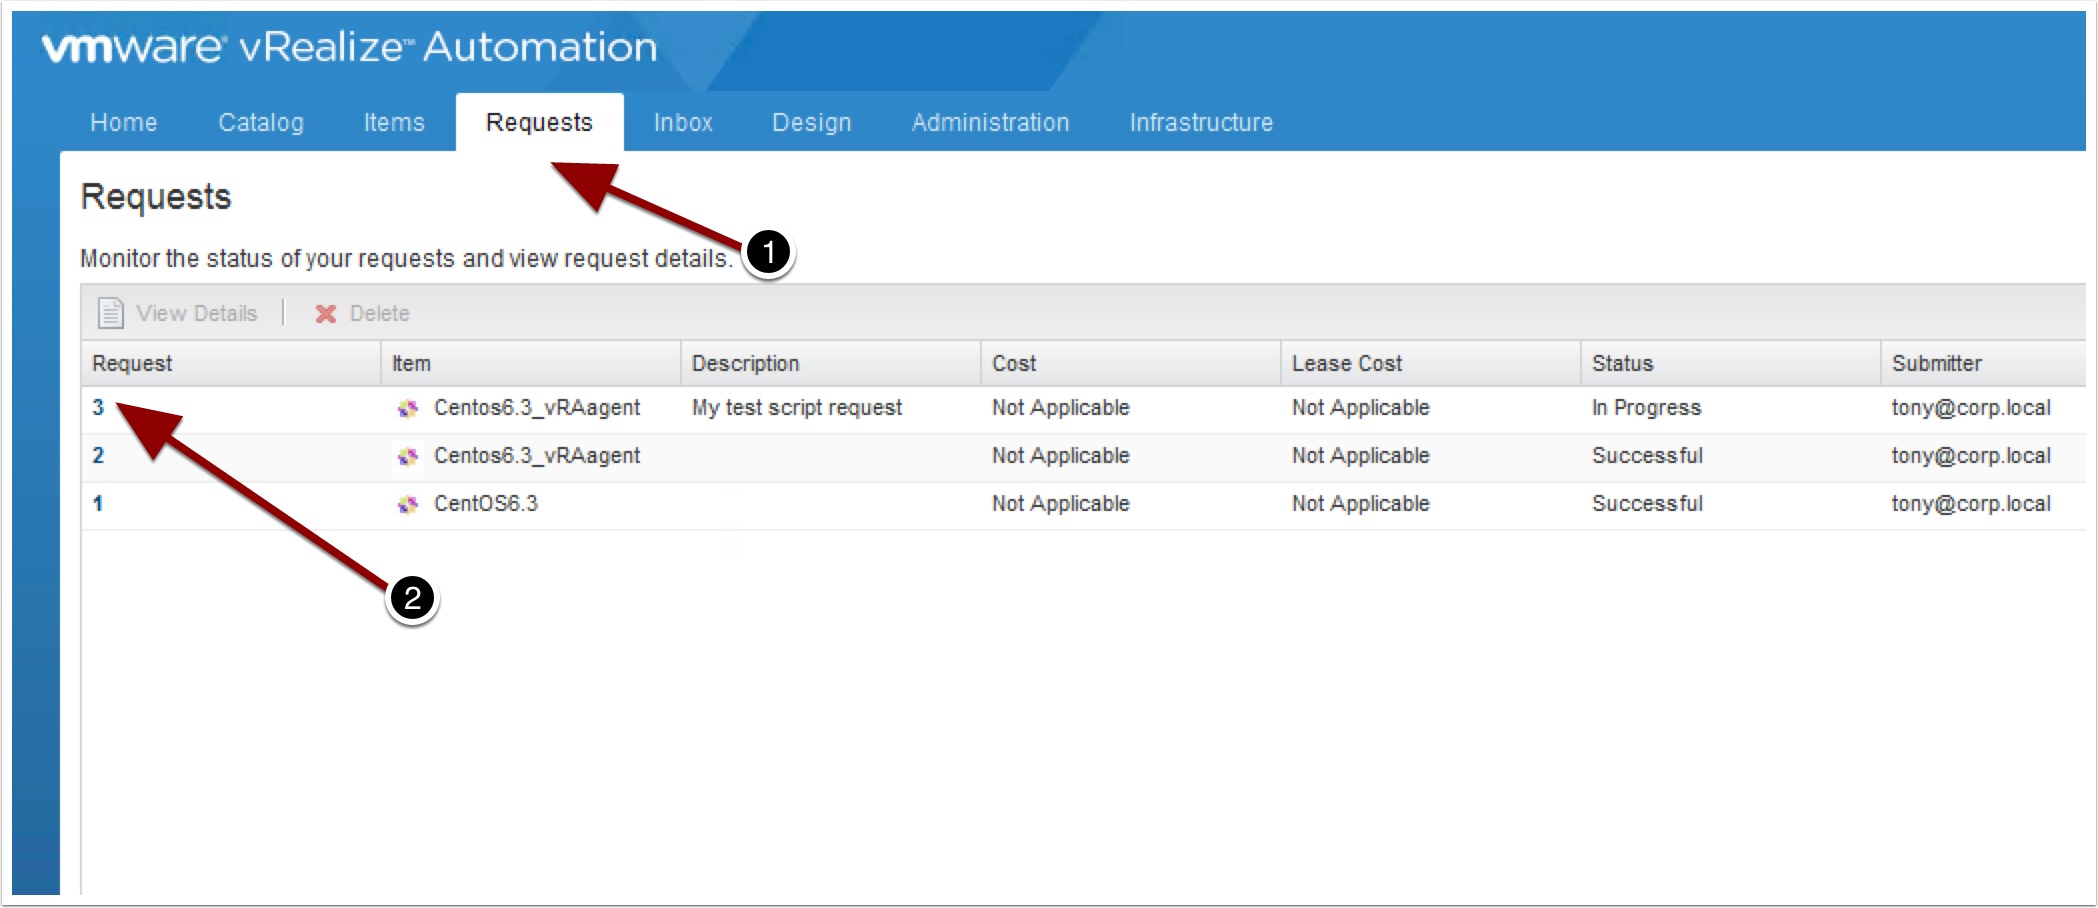
Now click on the Requests tab and click your new request
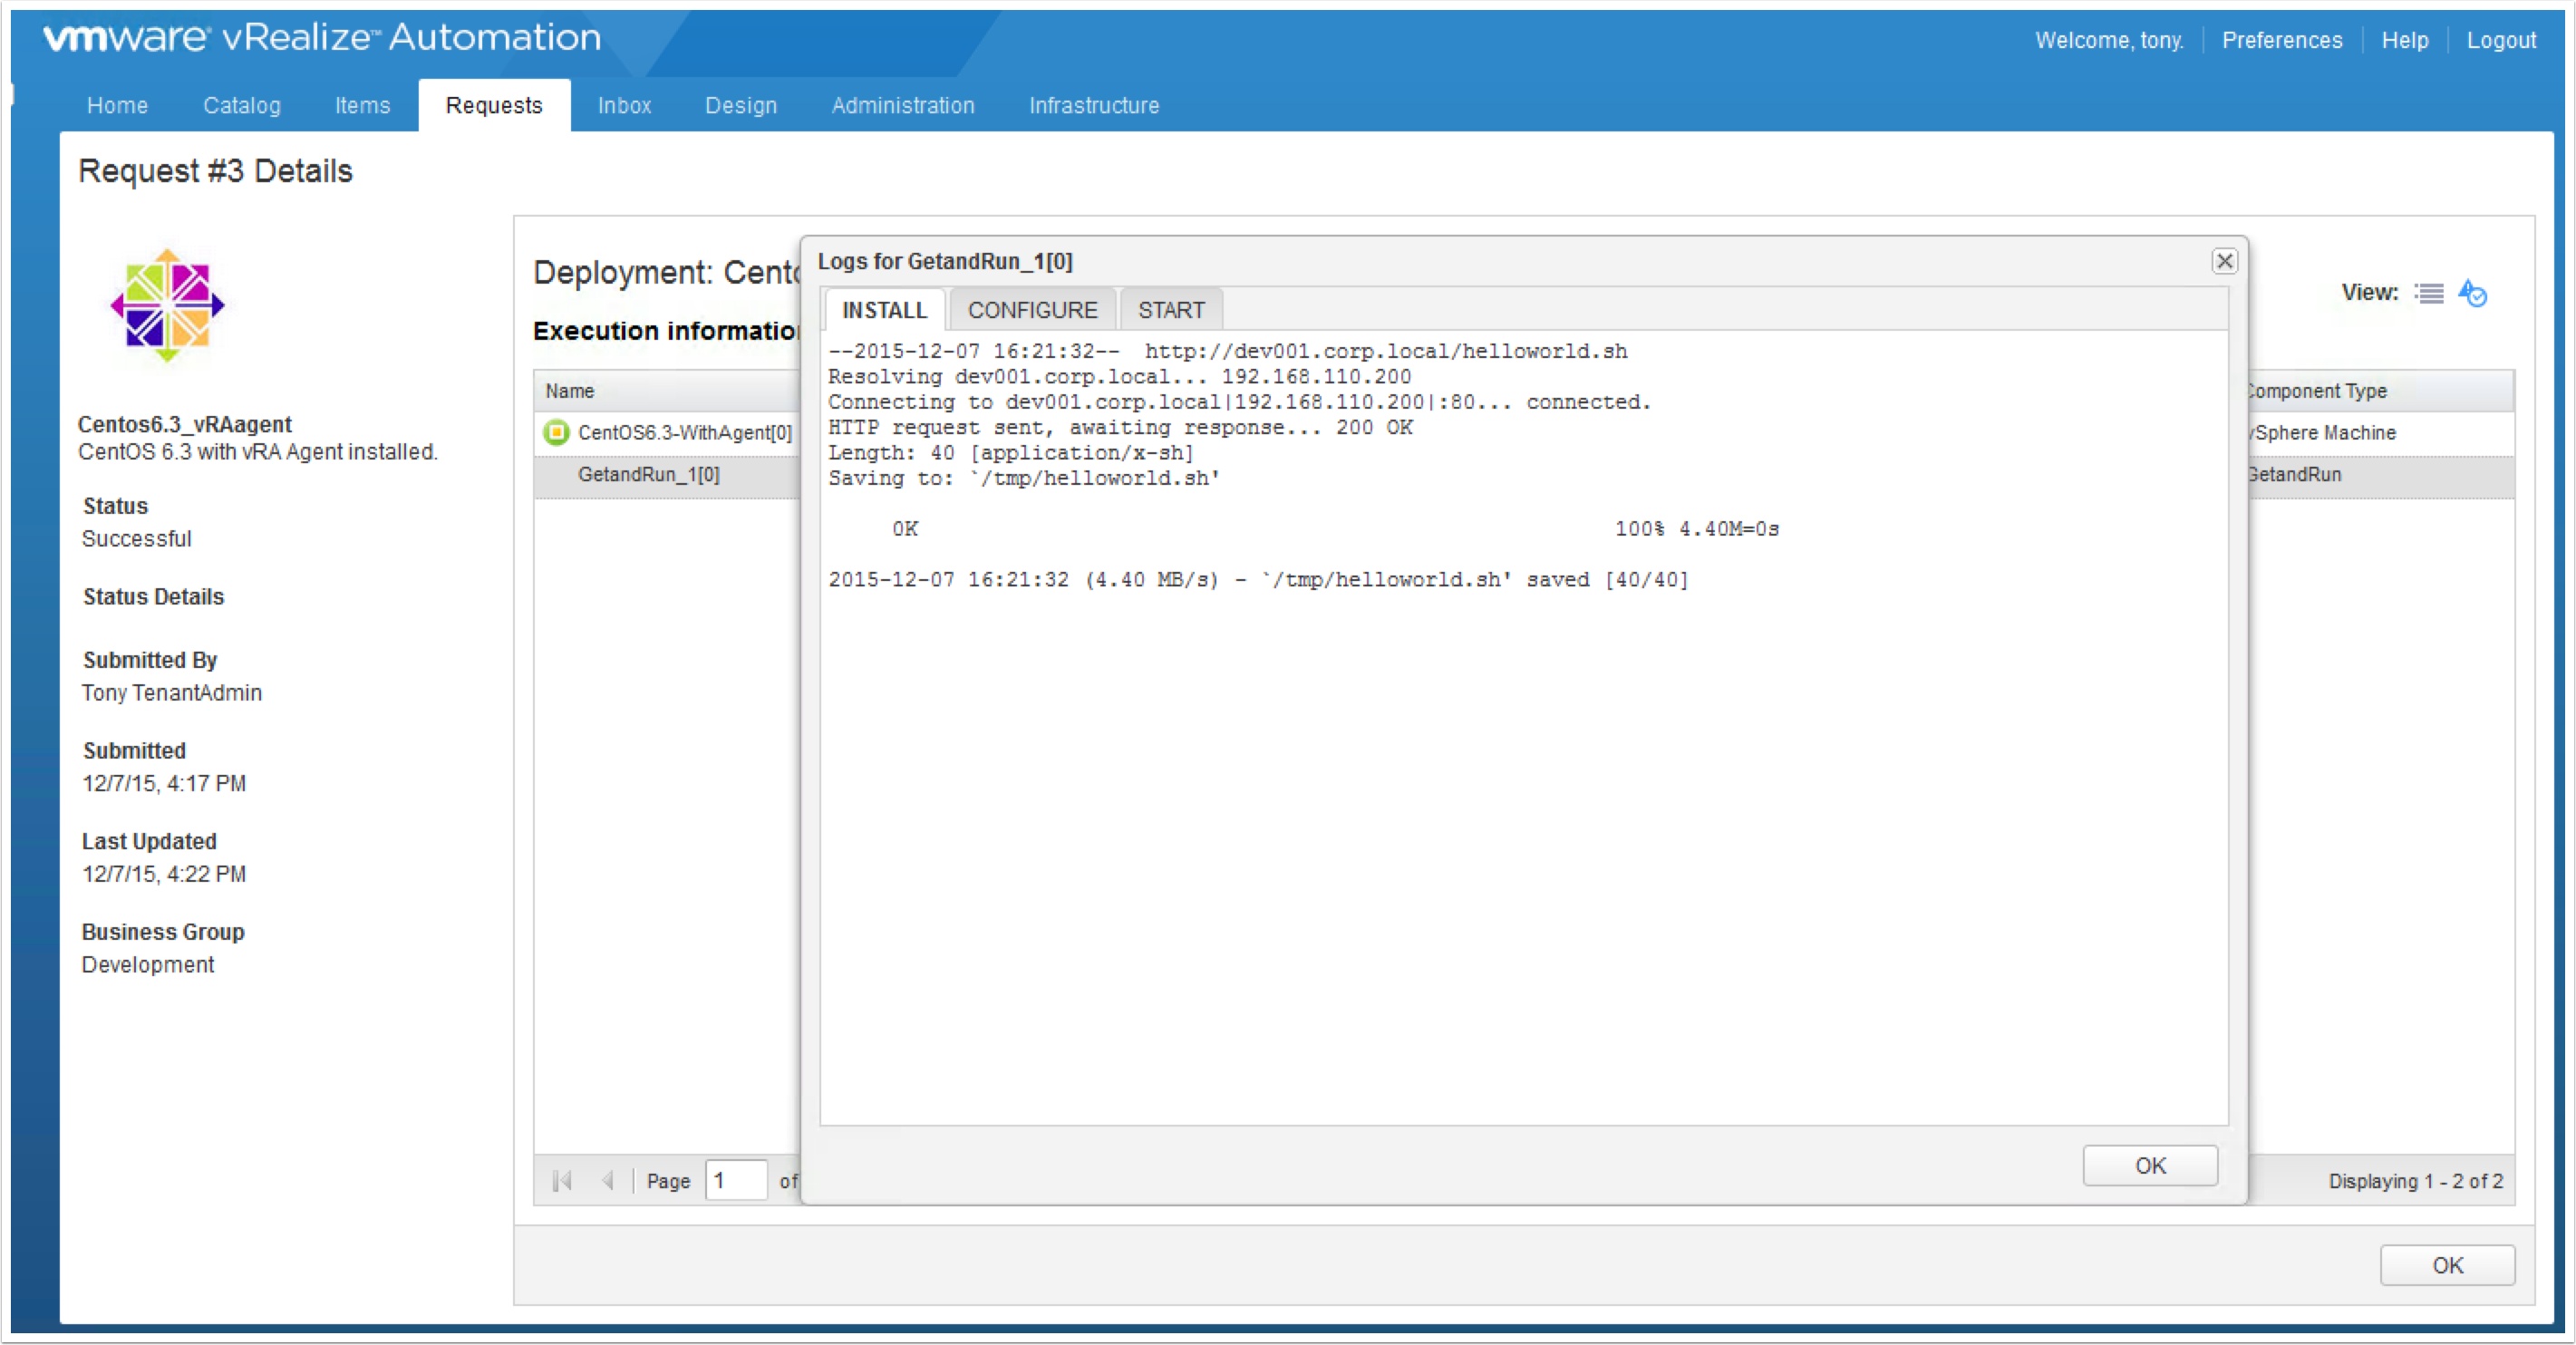
Now click the icon in the upper right to see the status of the request
To view status of the Software Component execution click the radio button

You can see the Logs for each stage
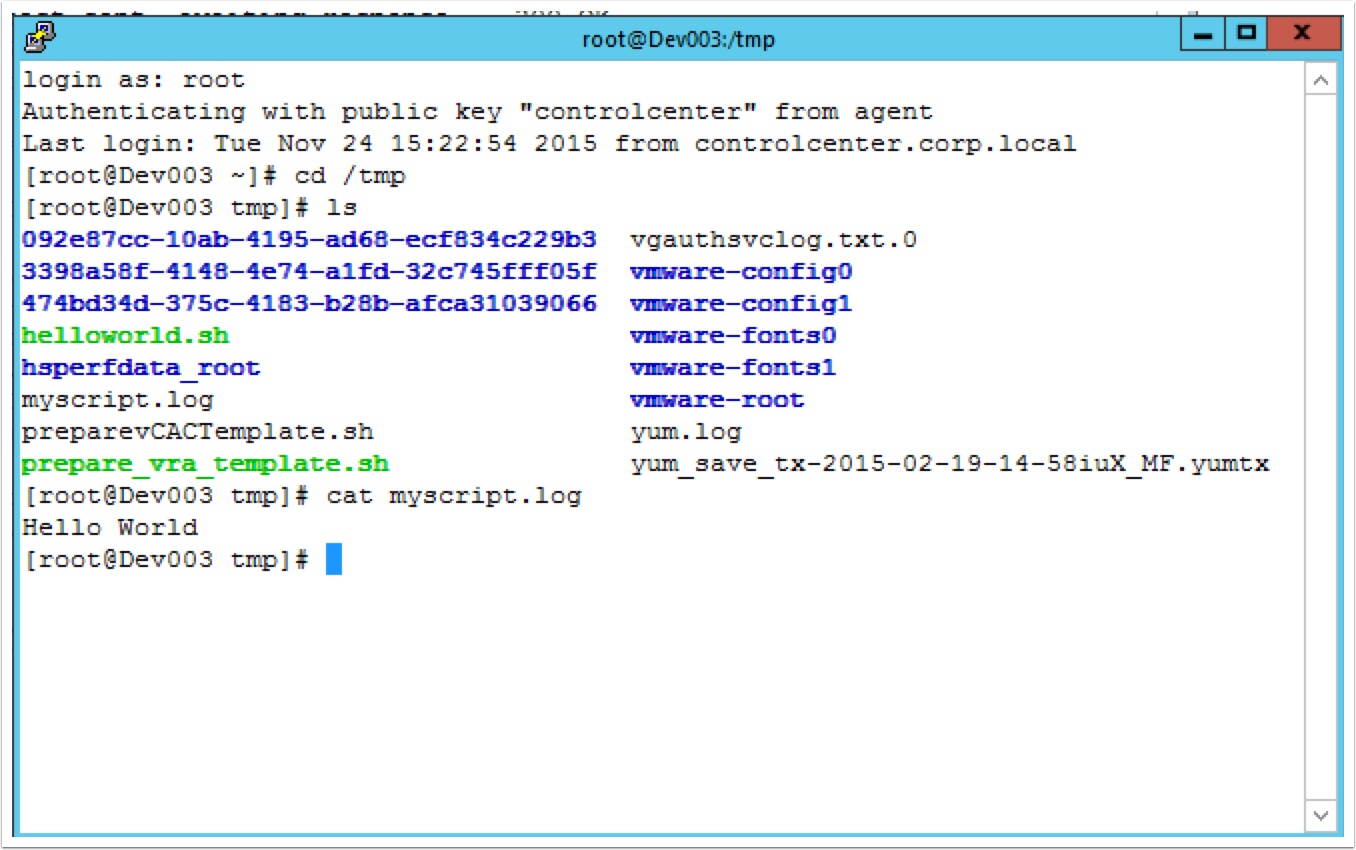
Once the request complete successfully SSH into the new VM and check that the file executed as expected
Pingback: Requesting the VRA Developer Friendly Blueprint with curl – VMtoCloud.com