
Introduction
Please note that the methods used in this article are the “old” approach, and it is best to utilize the modern capabilities of vCO using my updated blog post in the link below:
https://www.vmtocloud.com/service-now-cmdb-integration-in-30-minutes/
In this article I will show you how easy it is to leverage vCenter Orchestrator’s out of the box plug-ins and workflows to apply more complex integrations with vCAC. This particualar use case is quite common, and involves Service Managment integration, specifically, ServiceNow. This configuration demonstartes what we call “southbound” integration from vCAC, meaning, as part of the machine lifecycle, vCAC will create and update a ServiceNow incident when a machine/service is both deployed and decommisioned. I am leveraging the vCO SOAP plug-in for this example. There are other methods, including vCO plug-in from Interra, but this example is just one of many approaches that can be taken.
Please note that the examples used here can be applied to any type of ServiceNow use case including Change Managment, Problem, and CMDB. We are only using Incidents as an example, but the techniques used can be applied to all areas. As you will see with the workflows we generate from the SOAP plug-in, we can map any field exposed via ServiceNow web services. These fields can be used as parameters, inputs, and outputs within your vCO workflows as you see fit. This gives anyone tremendous flexibility is building out a workflow specifid to your organizations needs.
Using this guide you should be able to configure and setup this integration in less than 2 hours.
Pre-requisits and Skills:
- You should have some basic vCO and vCAC skills before attempting this. Also, I’ll assume you have worked with the vCAC Designer to modify Stubs such as MachineProvisioned in the past.
- This is done using vCAC version 5.2 or 6.0 and vCO version 5.1 or 5.5
Loading the vCO SOAP Plug-in
The first step is to download and install the SOAP plug-in for vCO. This can be dowloaded from vmware.com
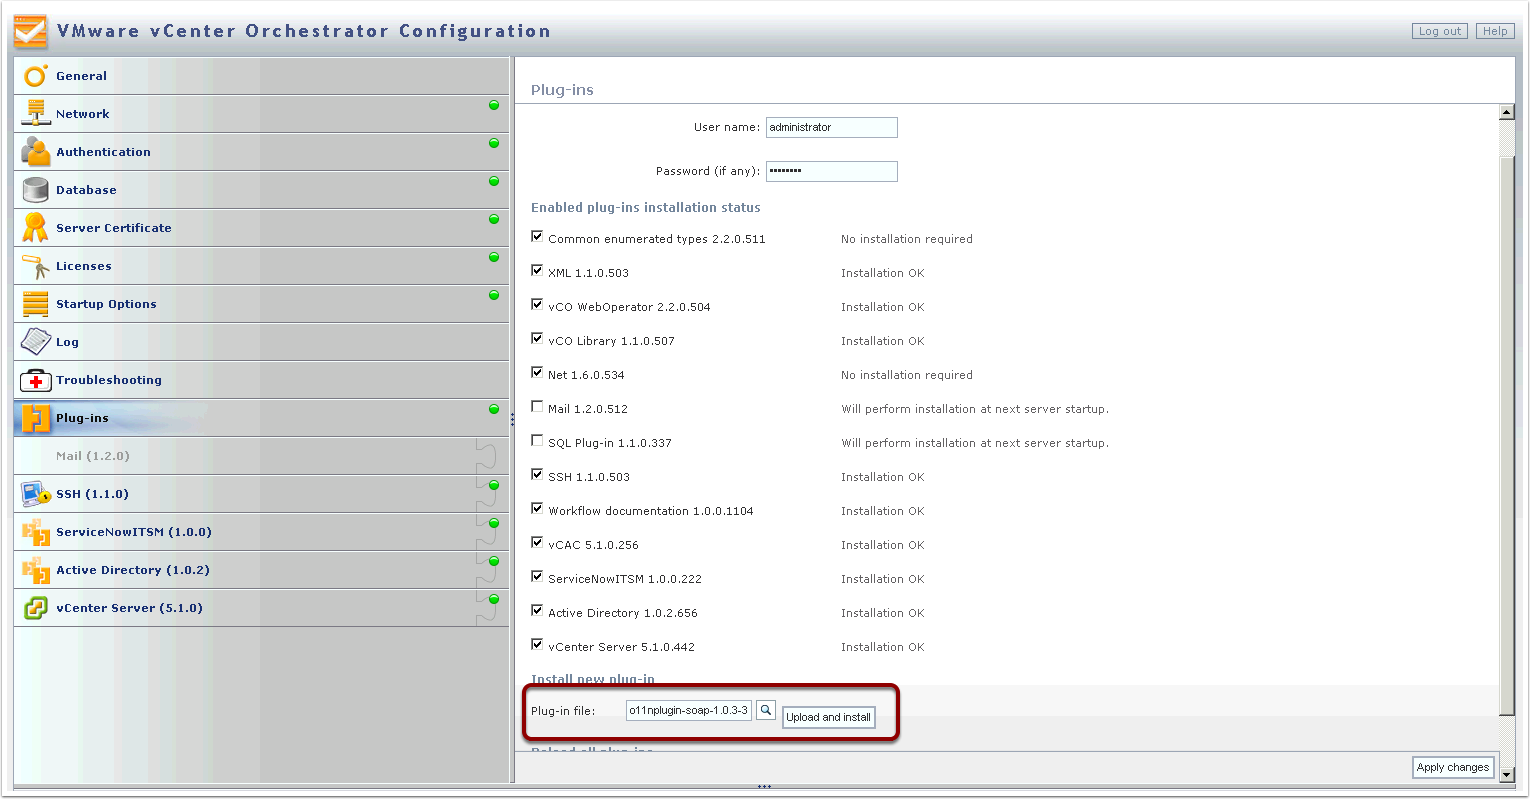
Login to your vCO configuration page via https://your_vco_url:8283 and then click on the Plug-ins tab on the left
Under Install new Plug-in browse to the file you downloaded called “o11nplugin-soap-1.0.3-334.vmoapp” and click Upload and install
Loading the vCO SOAP Plug-in
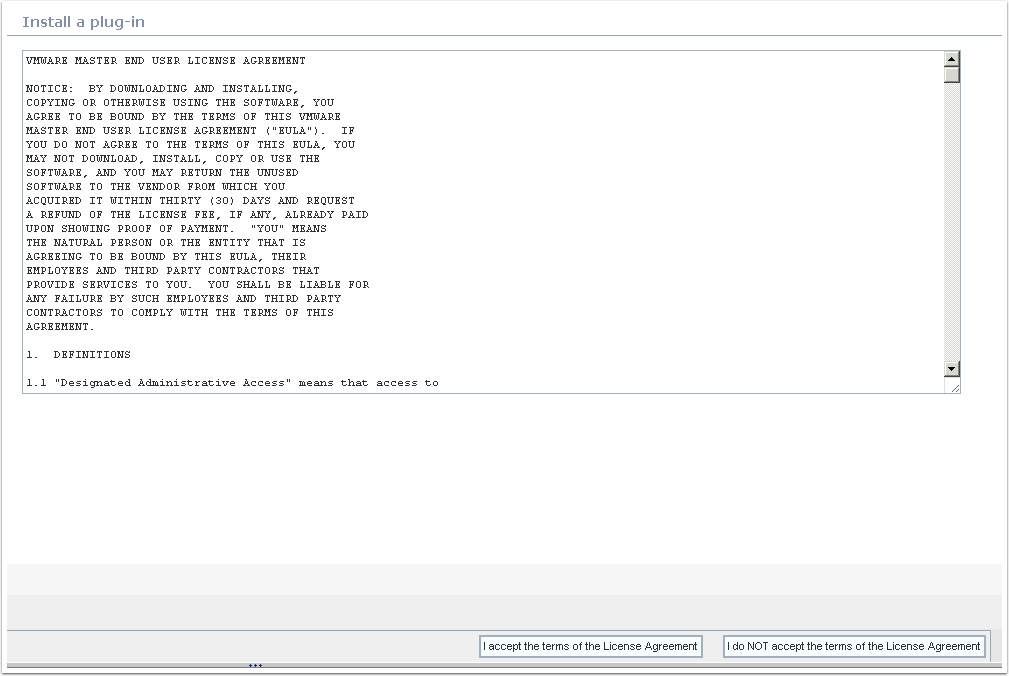
Accept the terms
Loading the vCO SOAP Plug-in
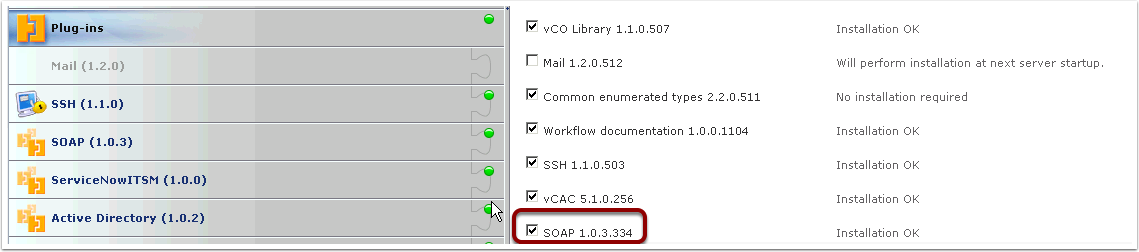
Once completed you should see a check box for the SOAP plug-in
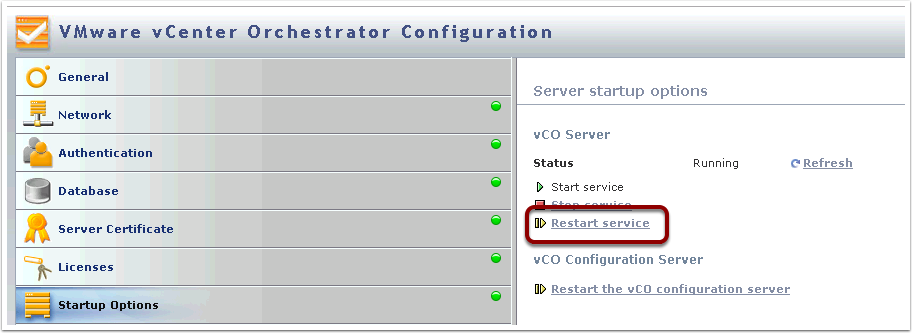
You must restart your vCO services to enable the plug-in

Loading the vCO SOAP Plug-in
Click Restart service and wait for this to complete
Loading the vCO SOAP Plug-in
After the vCO service has been restarted the SOAP plug-in check box should now read Installation OK
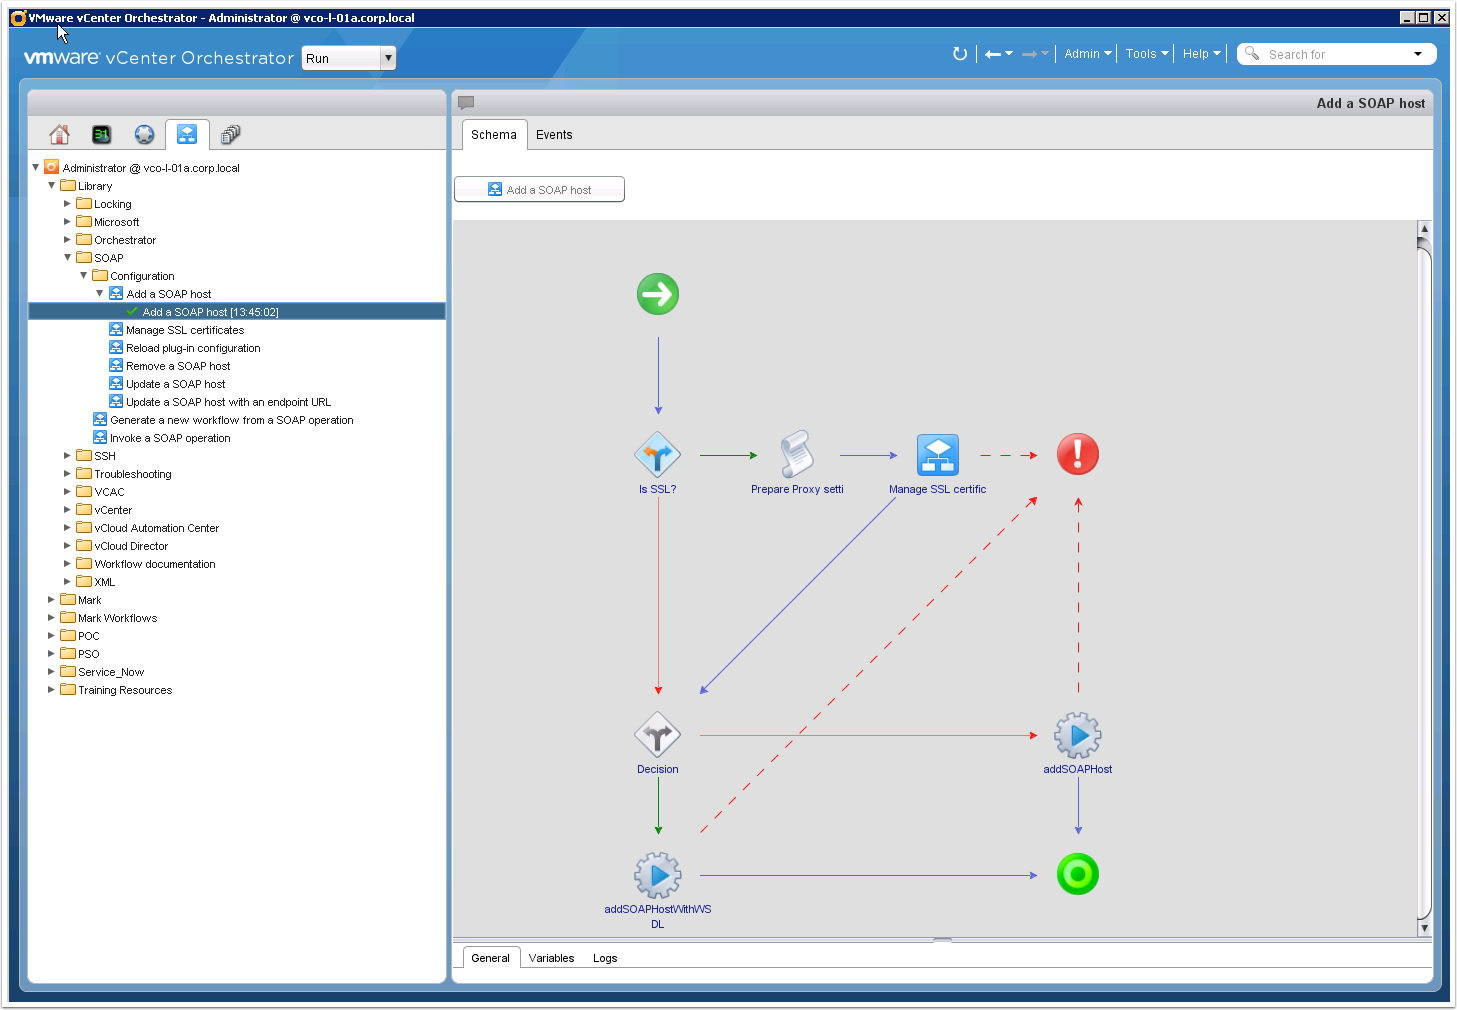
vCO SOAP Configurations and Workflow Creation
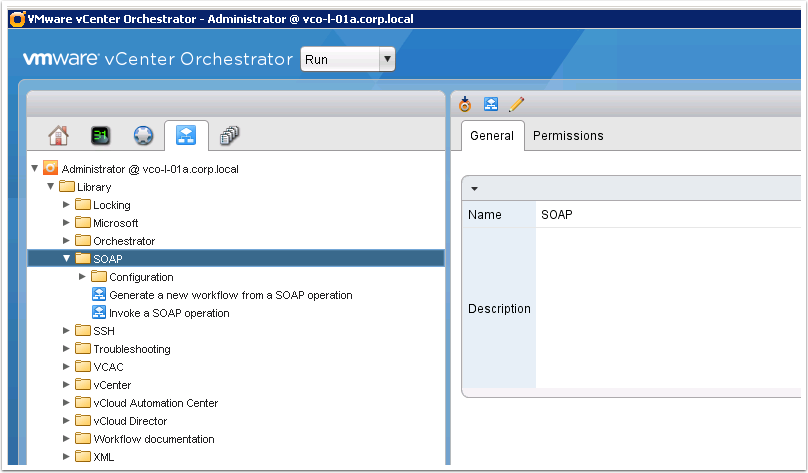
Login to your vCO client and you should now see a new folder with OOTB SOAP workflows
vCO SOAP Configurations and Workflow Creation
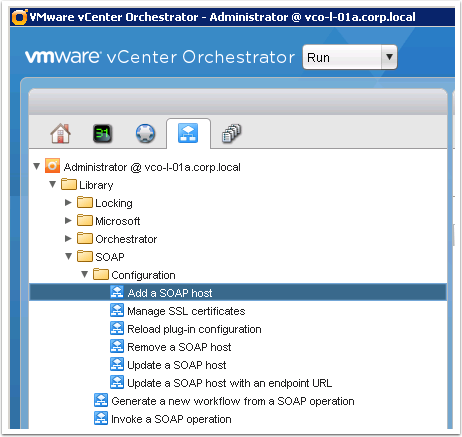
Let’s run the Add a SOAP host workflow. vCO has already built this workflow for you so it’s a snap to build your own unique workflows
vCO SOAP Configurations and Workflow Creation
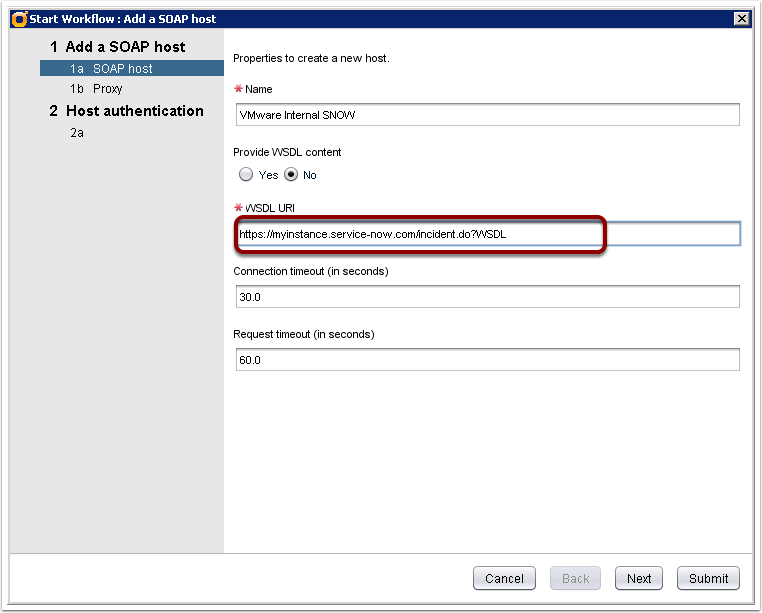
Enter a name for your SNOW host. Choose No to have vCO grab the WSDL content for you automatically.
Provide the WSDL URL for Incident to your specific SNOW incident.
Click Next
vCO SOAP Configurations and Workflow Creation
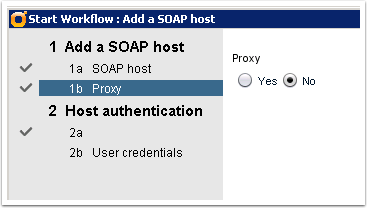
Choose No for proxy unless you have this as a requirement
vCO SOAP Configurations and Workflow Creation
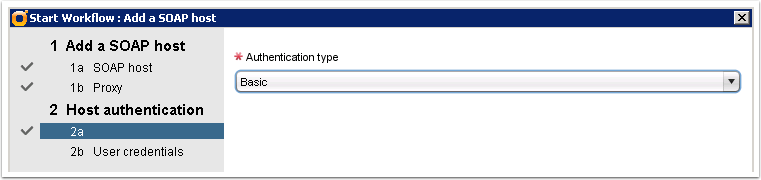
I’m using Basic authentication with a service account that I created called vcac in my internal SNOW instance
vCO SOAP Configurations and Workflow Creation
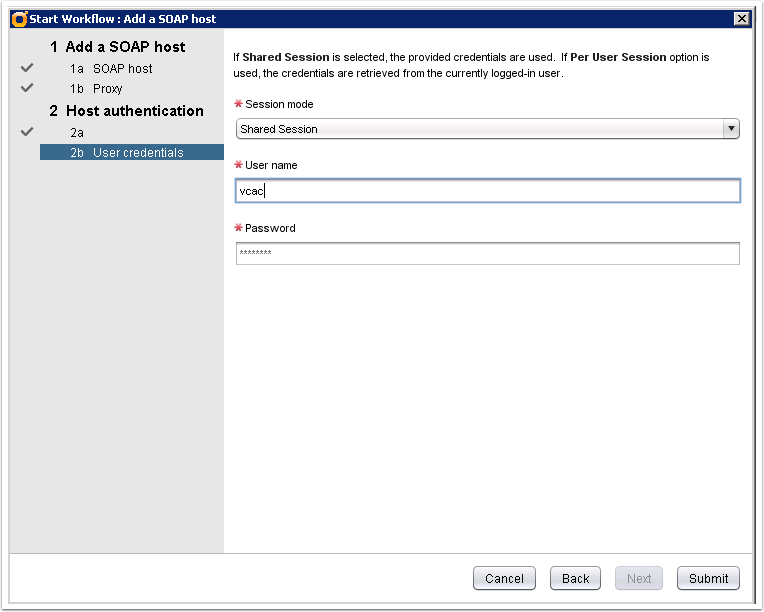
Enter the service account and password and then Submit
vCO SOAP Configurations and Workflow Creation
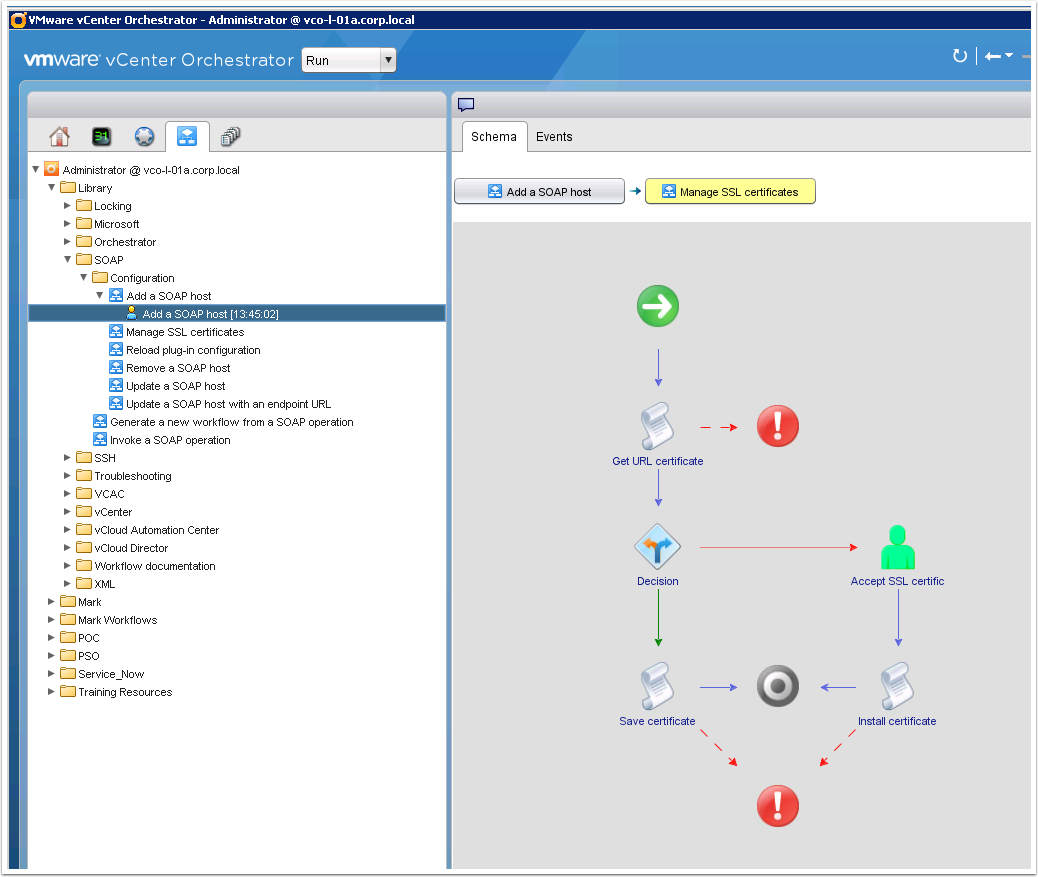
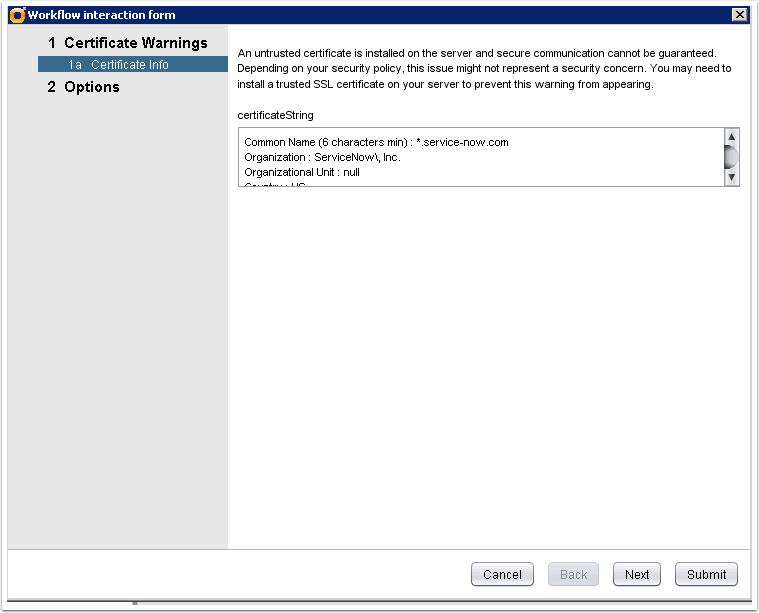
The workflow will run and should pause at the point of accepting the SSL certificate
vCO SOAP Configurations and Workflow Creation
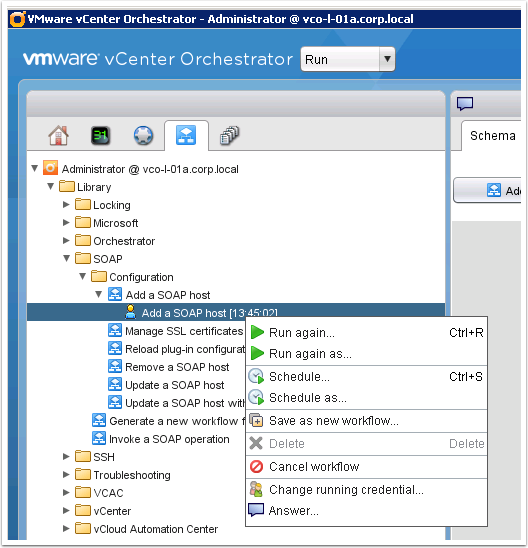
Right click the user interaction step and choose Answer
vCO SOAP Configurations and Workflow Creation
Click Next and review the certificate if you like
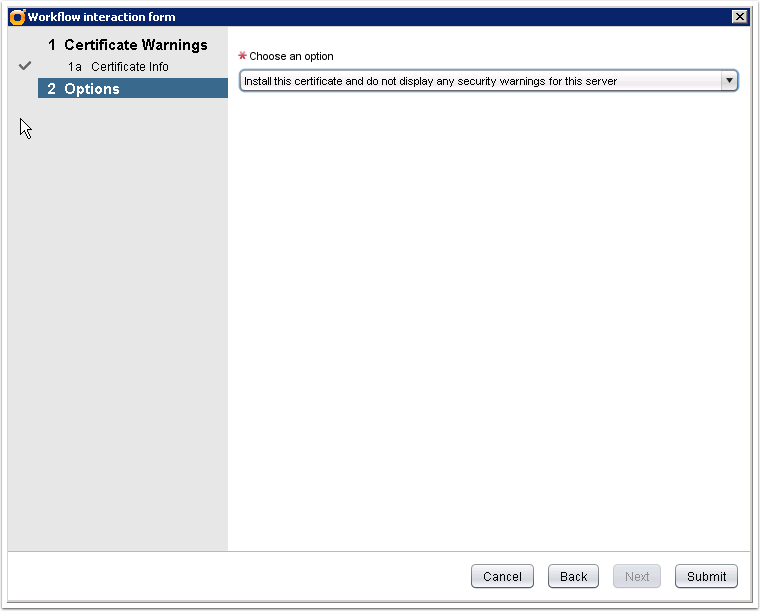
vCO SOAP Configurations and Workflow Creation
Choose Install this certificate and do not display…
Submit the workflow
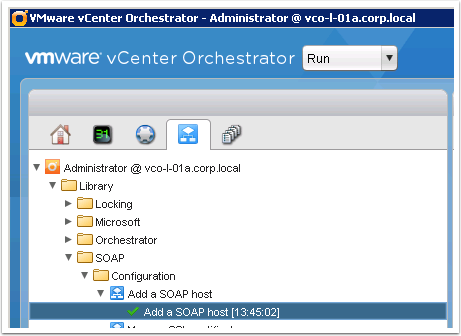
vCO SOAP Configurations and Workflow Creation
You should now see a successful token for your workflow
vCO SOAP Configurations and Workflow Creation
vCO SOAP Configurations and Workflow Creation
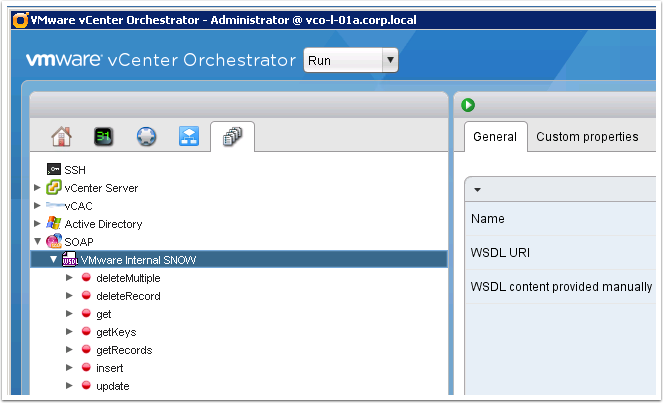
You can now browse the various methods that are exposed via the SOAP integration to your specic SNOW instance. We will be creating workflows for both insert and update. Please note these are all for the Incident WSDL that we specified when we added the SOAP host. We could do the same for Change and other methods as discussed earlier
vCO SOAP Configurations and Workflow Creation
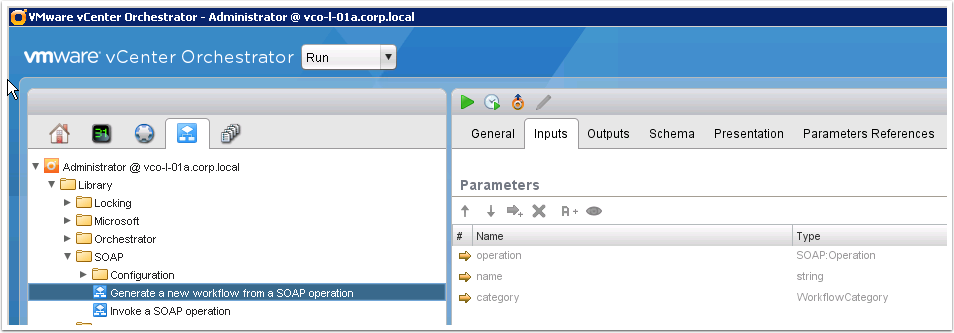
Now we will generate our vCO workflows for adding a new incident and then updating an existing incident
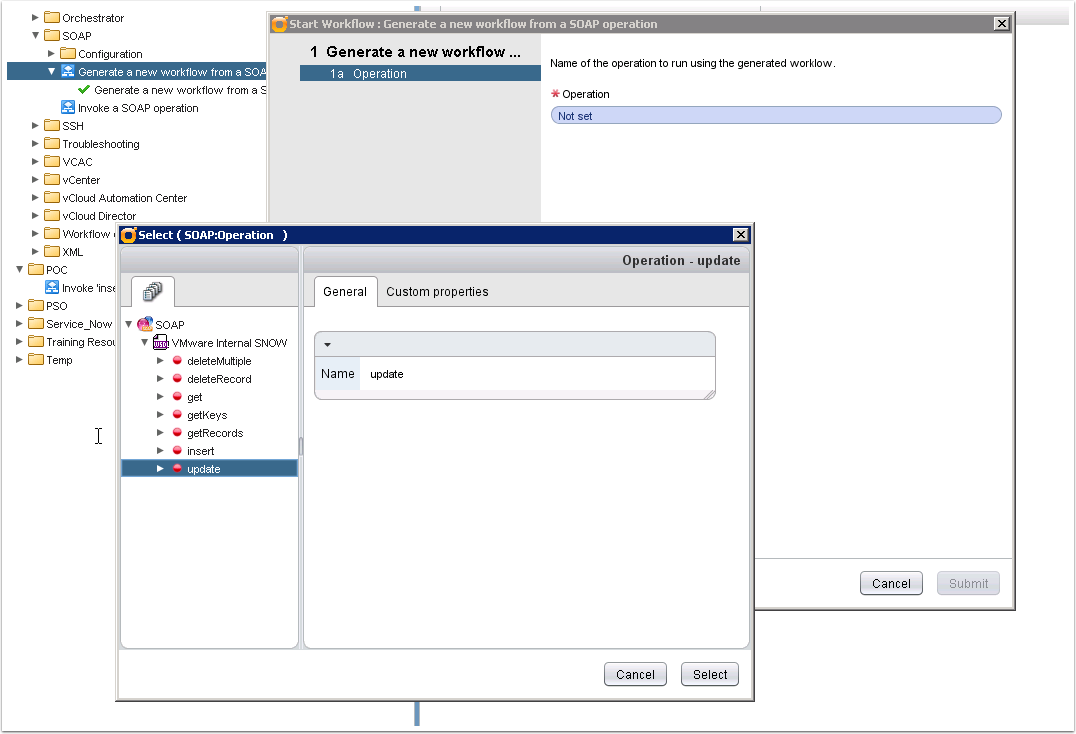
Run the Generate a new vCO workflow from a SOAP operation workflow
vCO SOAP Configurations and Workflow Creation
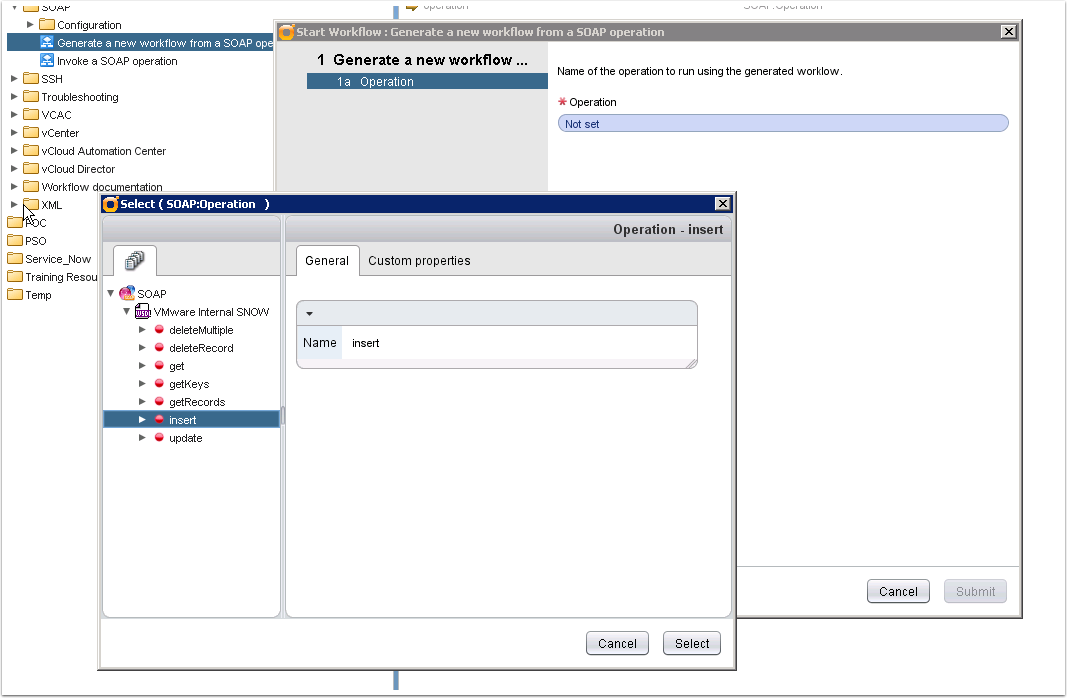
Browse and select the insert method
vCO SOAP Configurations and Workflow Creation
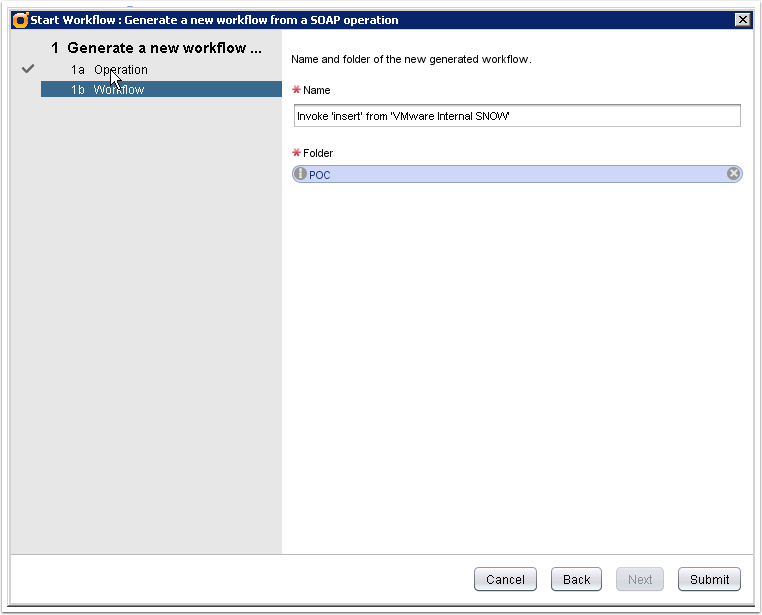
Name your workflow and choose a vCO folder for placement
vCO SOAP Configurations and Workflow Creation
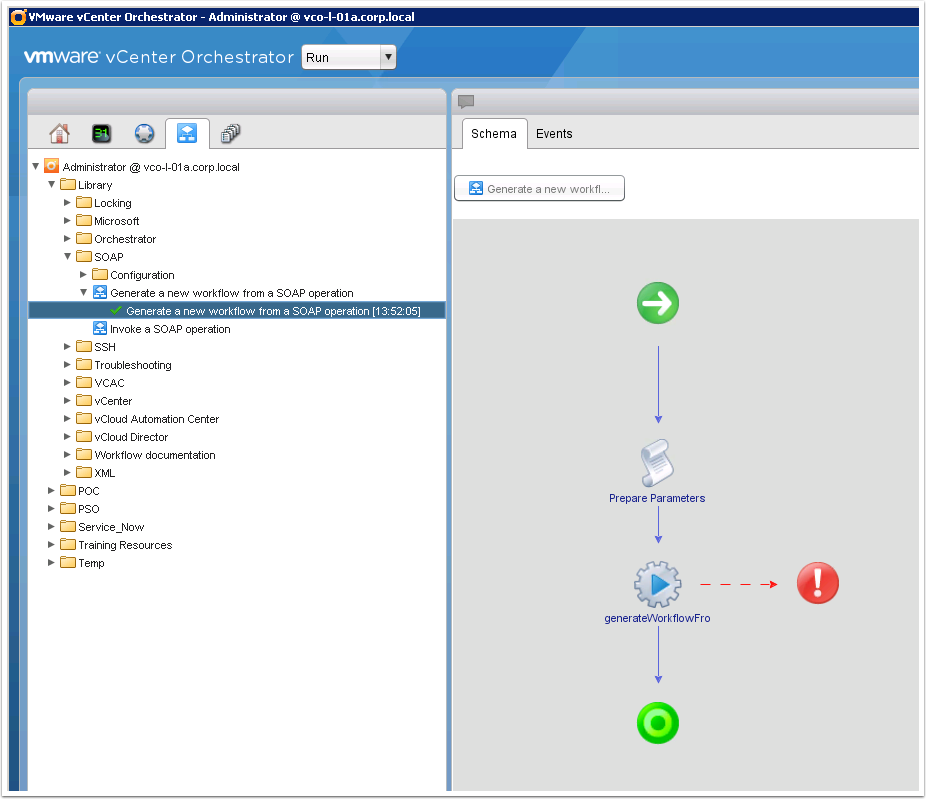
You should see a green check mark for a successful token
Congrats! You have automatically generated a workflow for creating an incident in your own SNOW instance
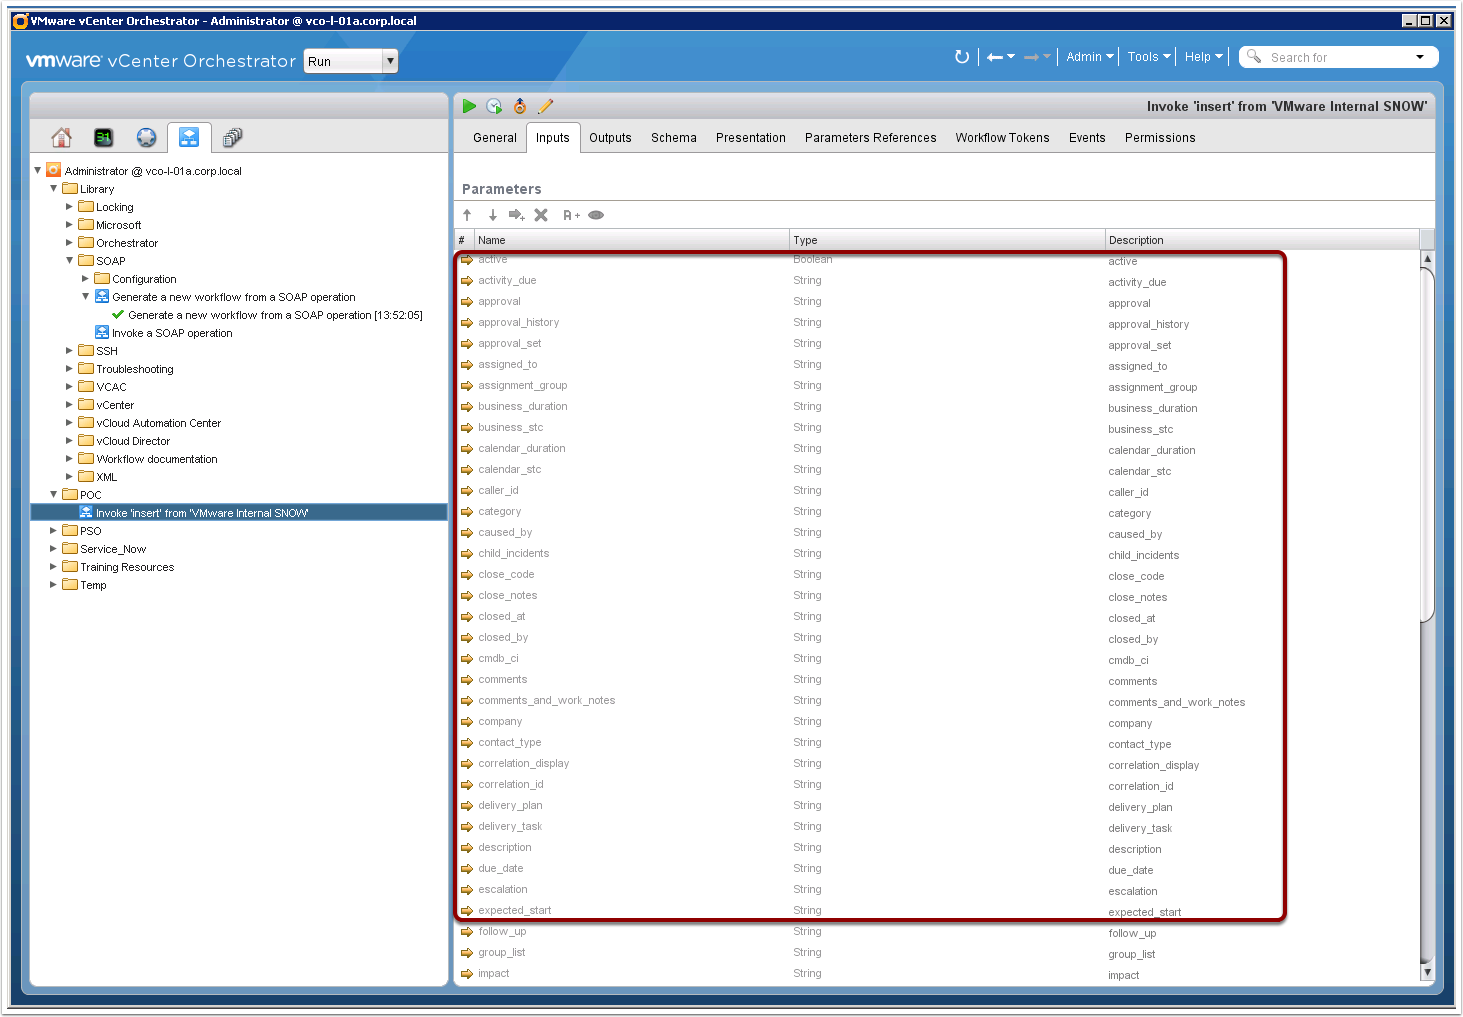
vCO SOAP Configurations and Workflow Creation
Notice all of the input parameters for each of the fields exposed by the Incident WSDL. You can now interact with any of these fields by assigning them as Parameters, Inputs, or Outputs.
vCO SOAP Configurations and Workflow Creation
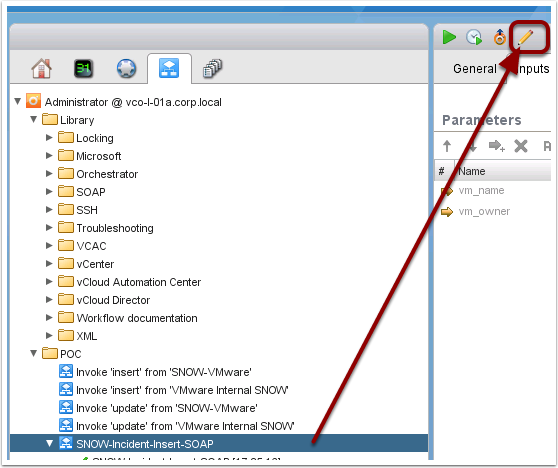
Let’s edit our workflow to map our parameters accordingly.
Please note I’ve renamed my workflow to SNOW-Incident-Insert-SOAP here
vCO SOAP Configurations and Workflow Creation
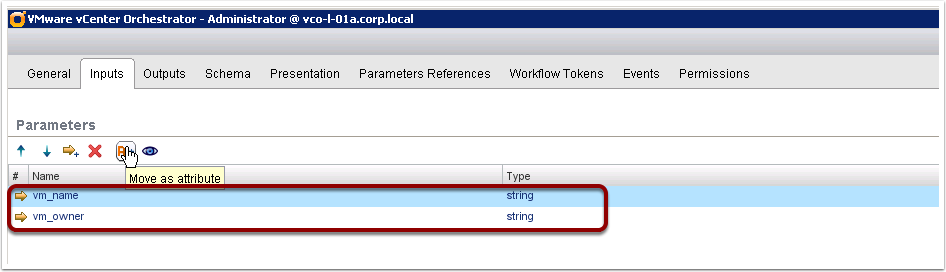
Click on the Inputs tab
Select all of the Parameters that you do NOT intend to use as inputs from vCAC and choose Move as attribute.
This will allow us to assing static values to some Parameters later.
Please note, that you can pick and choose any fields you like for your specific use case.
Create 2 Input Parameters for vm_name and vm_owner which we will be sending from vCAC as inputs.
vCO SOAP Configurations and Workflow Creation
Click back on the General tab and assign a static value to short_description

vCO SOAP Configurations and Workflow Creation
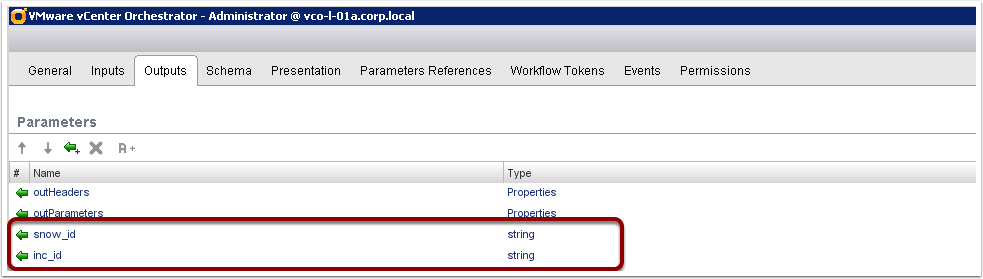
Click the Outputs tab and create 2 Parameters for snow_id and inc_id.
These will be sent back to vCAC as outputs from our vCO workflow
vCO SOAP Configurations and Workflow Creation
Now you must bind your Input and Output parameters as shown here.
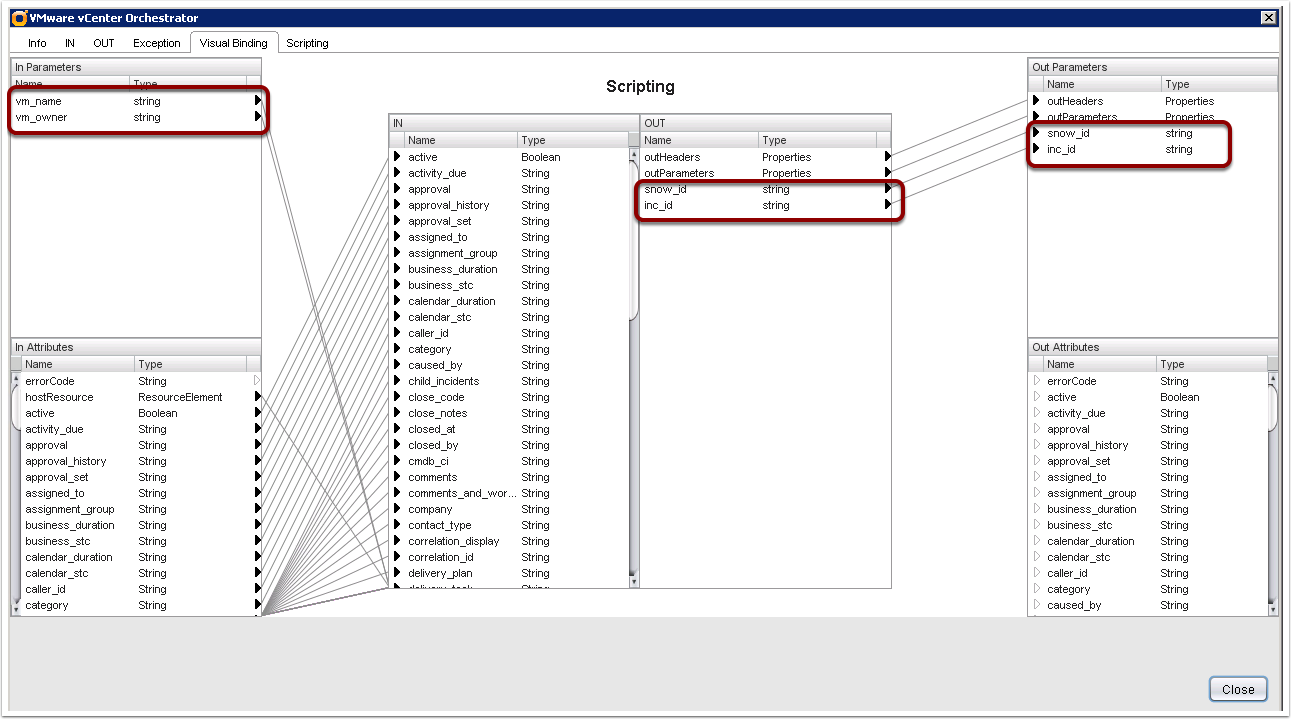
vCO SOAP Configurations and Workflow Creation
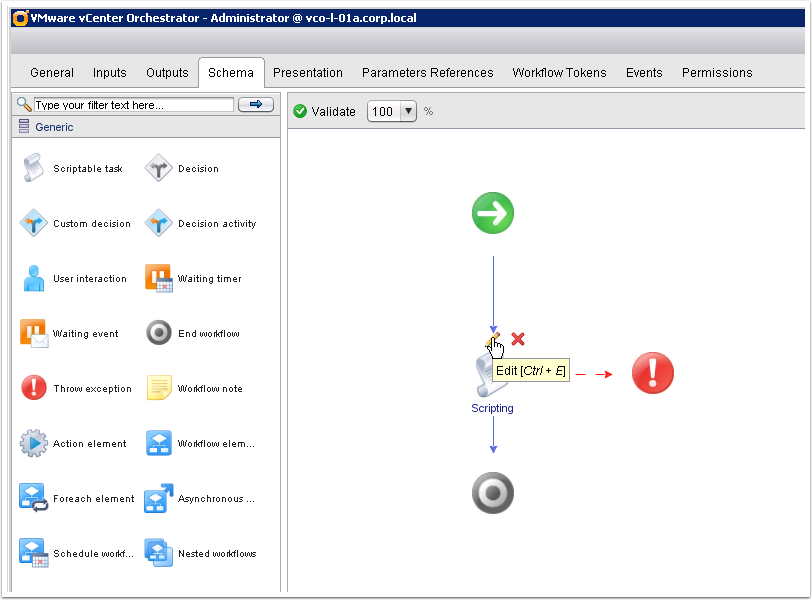
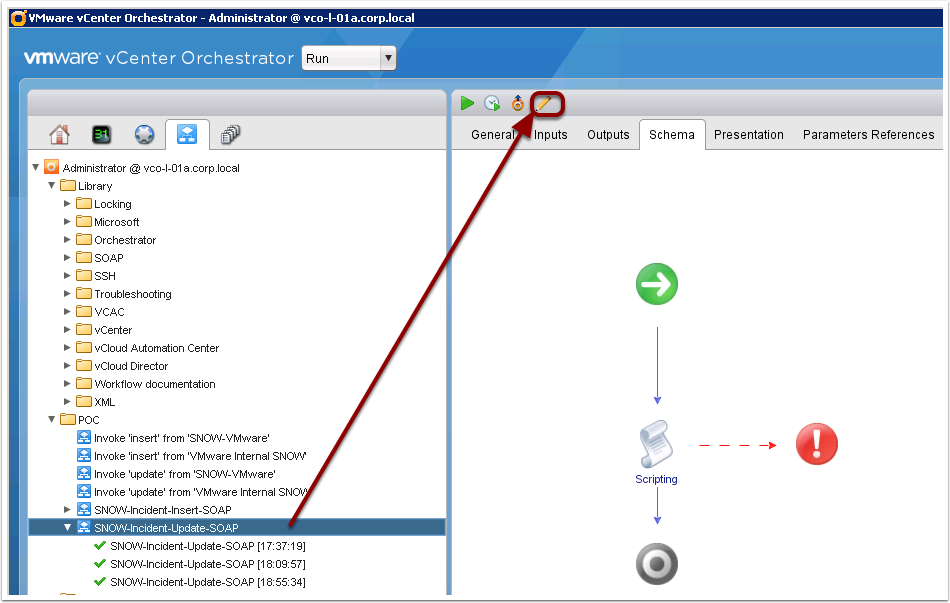
Now we must make a few changes to our scriptable task element.
Change to the Schema tab and edit the scriptable task element
vCO SOAP Configurations and Workflow Creation
Add a note to the beginning of your code as seen below:
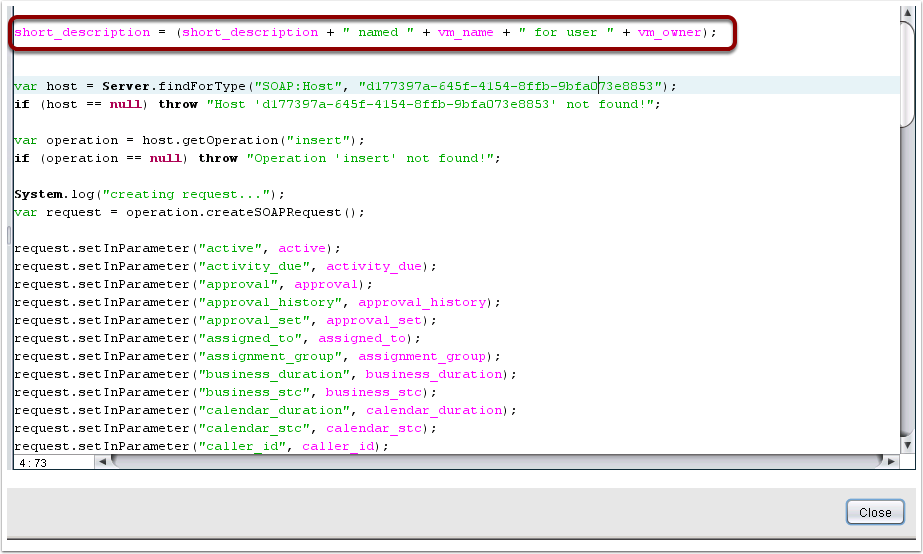
vCO SOAP Configurations and Workflow Creation
Add a note to the end of your code as shown below.
This is grabbing the sys_id and incident number from the SOAP output and assiging them to your output variables for snow_id and inc_id
Close and save your workflow

vCO SOAP Configurations and Workflow Creation
Now we will generate a workflow for the update method, in the same manner as insert from above
vCO SOAP Configurations and Workflow Creation
Select your newly created workflow for updating an Incident.
Again I have renamed my workflow here to SNOW-Incident-Update-SOAP
Let’s edit this workflow as we did before with Insert
vCO SOAP Configurations and Workflow Creation
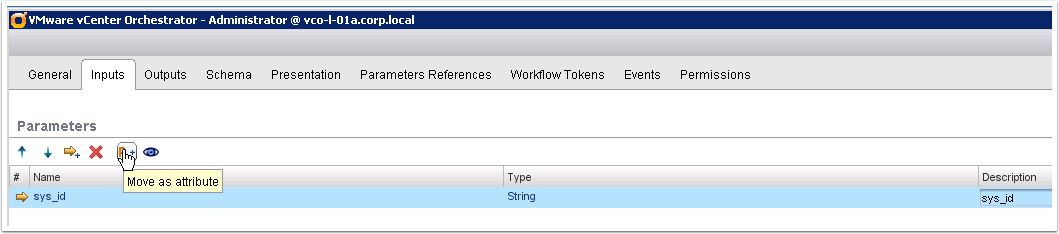
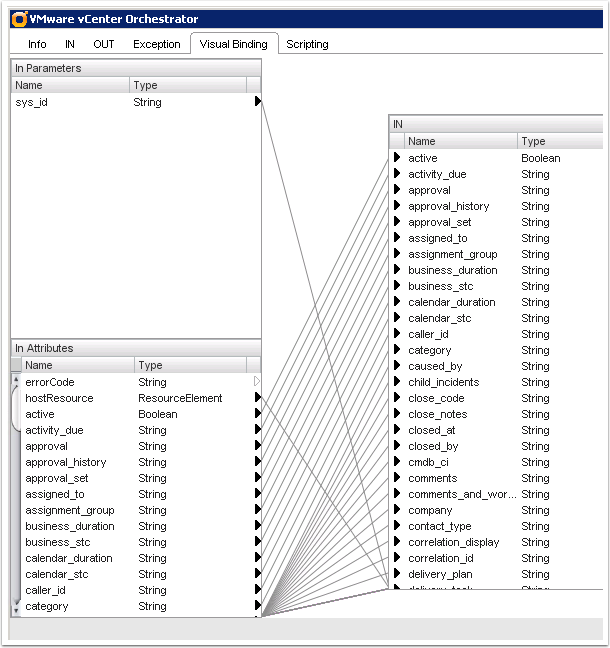
As we did before, navigate to the Inputs tab and select and move all of the Parameters EXCLUDING sys_id to attributes.
sys_id will remane as an input and is necessary for vCAC to pass this parameter to our workflow
vCO SOAP Configurations and Workflow Creation
Navigate to the General tab and provide a value for comments. This will be added as an Activity to the SNOW incident log.

vCO SOAP Configurations and Workflow Creation
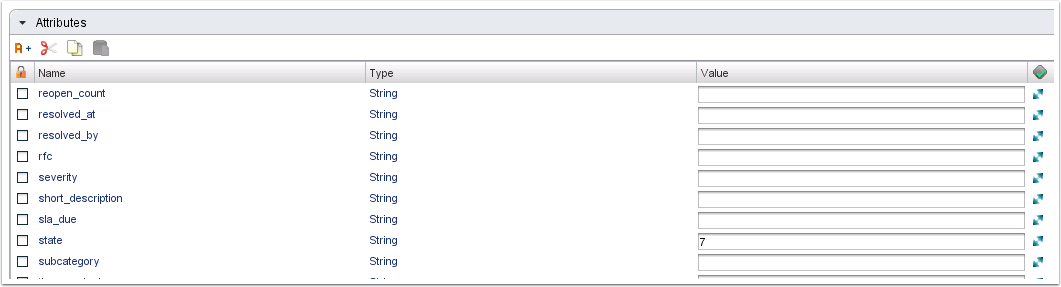
Now update state to a value of 7. This will update the state in the incident to Closed.
Please refer to the ServiceNow web services documentation for details on Incident states and any other detailed field information
Please note there are no changes to Outputs for the update workflow
vCO SOAP Configurations and Workflow Creation
Please note there are no changes to scripting code for updating an Incident.
Edit the scriptable task and validate that sys_id is bound to a local variable for sys_id as well
Save and close your workflow and proceed to your vCAC administrators portal.
Pingback: How vCAC integrates with Service Now | VMtoCloud.com
Pingback: Integrating vRealize Automation with ServiceNow | VMware Cloud Management - VMware Blogs
Pingback: Integrating vRealize Automation with ServiceNow - VMware Cloud Management