
Have you every wanted to be sure that every part of vRA, vRO and vCenter were working and functioning properly? Oh, and before a user tells you that provisioning failed? While there are many resources available to monitor vRA services and logs, how do you really know until you provision a blueprint and it fails. The only way to know your car works is to drive it right? In this guide I show you a technique to proactively monitor all the components involved in provisioning so you will know if there is something wrong prior to a user opening a support ticket or standing over your desk. In this guide I will show how to create a simple blueprint with vRO extensibility that will provision itself and then destroy itself over and over again. This way you know without a doubt that all parts of vRA are working. You can use this as a building block to mimic your most critical blueprints. For example this could also test that your integration with IPAM is working or with your CMDB. So let’s get started.
Pre-Reqs
- vRealize Orchestrator 7 or newer installed and configured
- vRealize Automation 7 or newer installed and configured
- A jump box with cloud client installed and configured with autologin, the download and instructions are here
- The vRO Golden Ticket workflow package downloaded from here
- A quiet place where you will not be interrupted see my guide here
Overview of what this solution does:
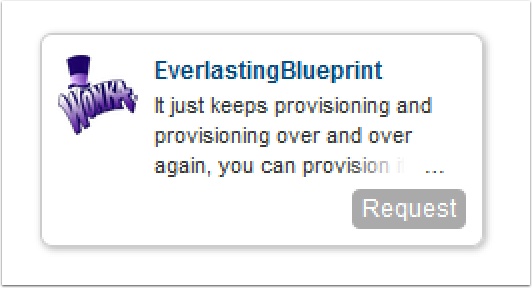
- Request the Everlasting Blueprint from the vRA portal
- vRA Provisions the blueprint and creates a VM in vSphere
- vRA Event Broker calls vRO to run a workflow
- The vRO Workflow executes a script on the jumpbox you configured in the workflow
- The script runs which invokes cloud client to login and make a request to destory the Everlasting blueprint deployment that you just provisioned
- The script waits a few minutes until the destroy action is complete
- The script then invokes cloud client to login and make a request for the Everlasting blueprint again, this starts the loop!
If the blueprint ever fails, check the logs to see what part of the provisioning process has failed and fix it, hopefully before your users call in to complain!
Create a new blueprint with the following:
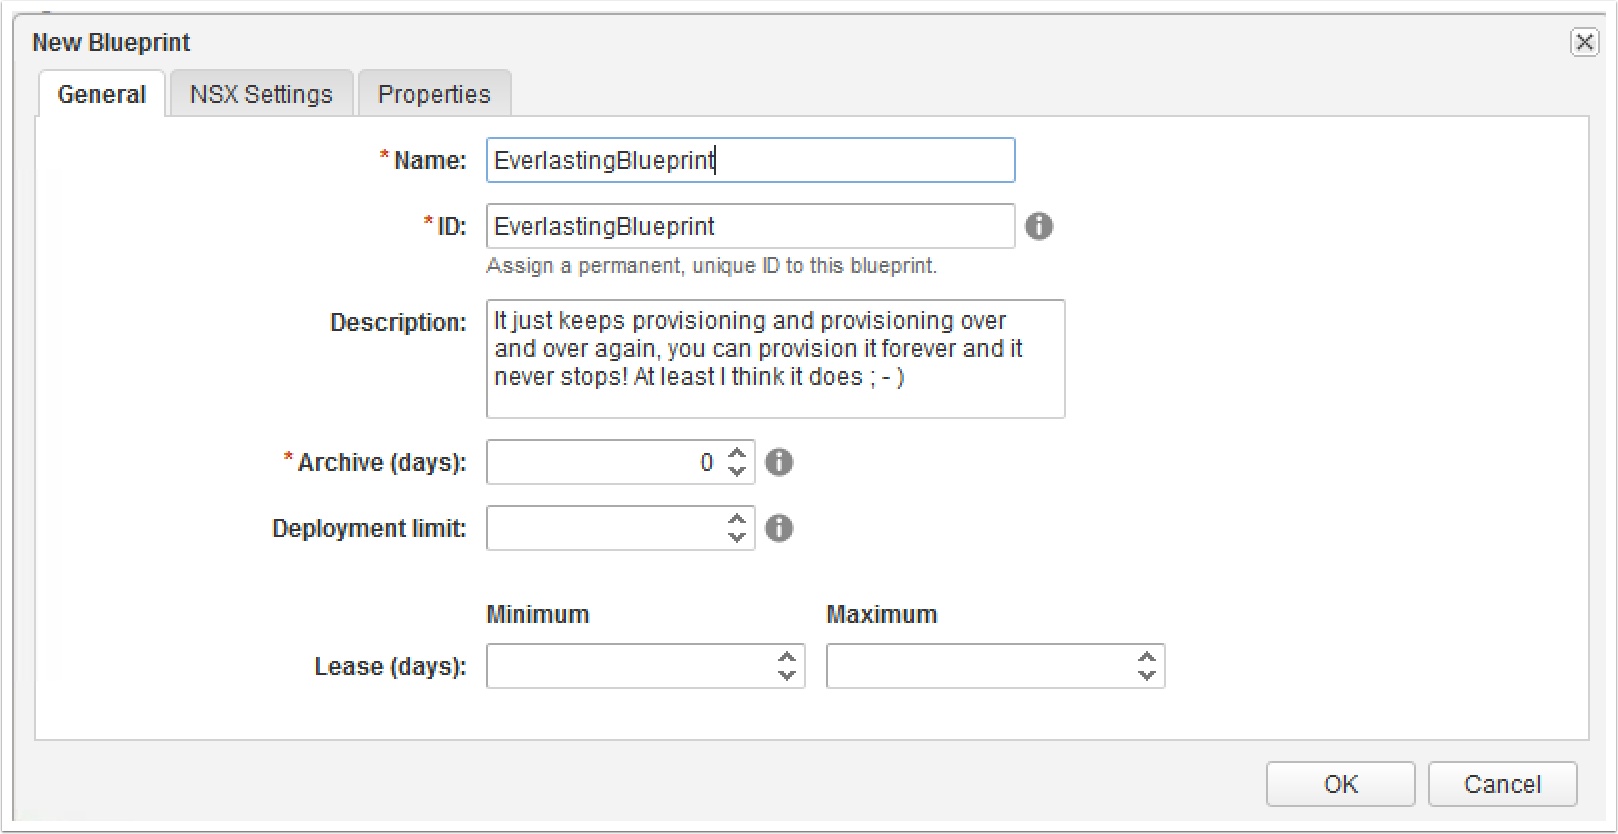
Enter the following Custom Property and press OK

_deploymentName gobstopper
Create a basic linked clone or full clone machine
I used CentOS6 but the OS here doesn’t really matter, this could be your most common OS that you provision

Enter the following Custom Properties and click finish
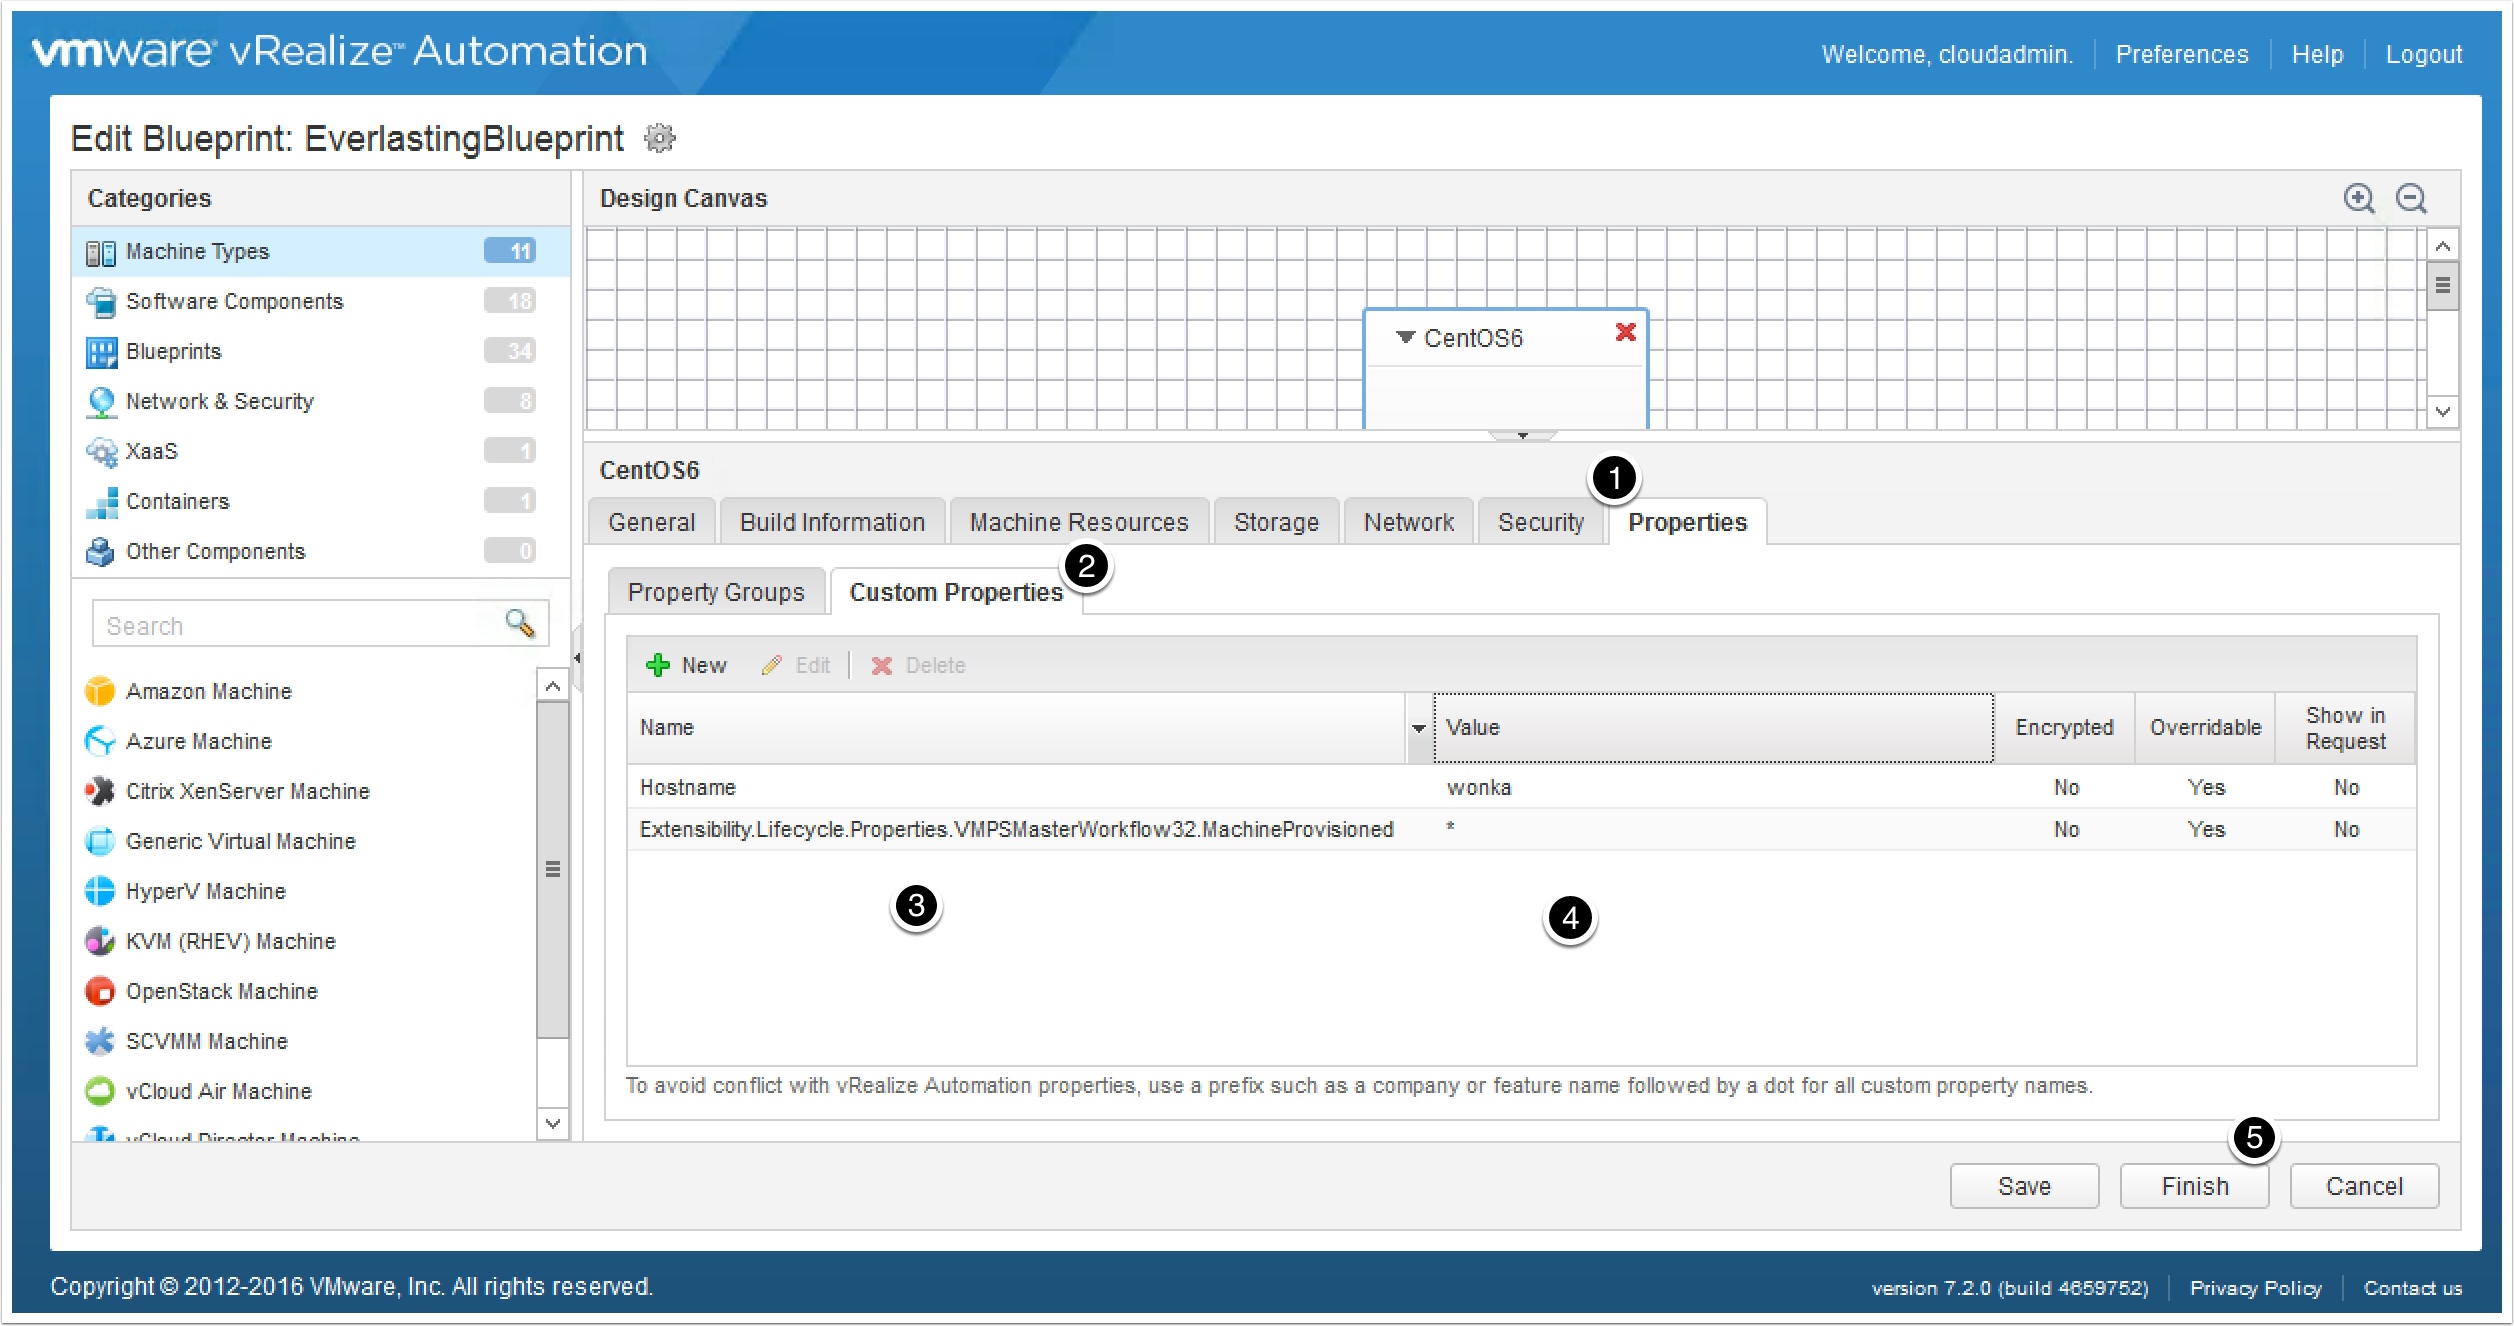
Hostname   wonka
Extensibility.Lifecycle.Properties.VMPSMasterWorkflow32.MachineProvisioned  *
On your jump box machine create the following shell script
Notice the first part just changes to the directory where you have cloud client and this script installed
The second part runs the commands to destroy and then request the everlasting blueprint.
Below the image there is code you can copy and paste. I highlighted in red the entries you may need to set for your environement. Also note you may need to modify the sleep timing depending on your setup and the blueprint your deploying.
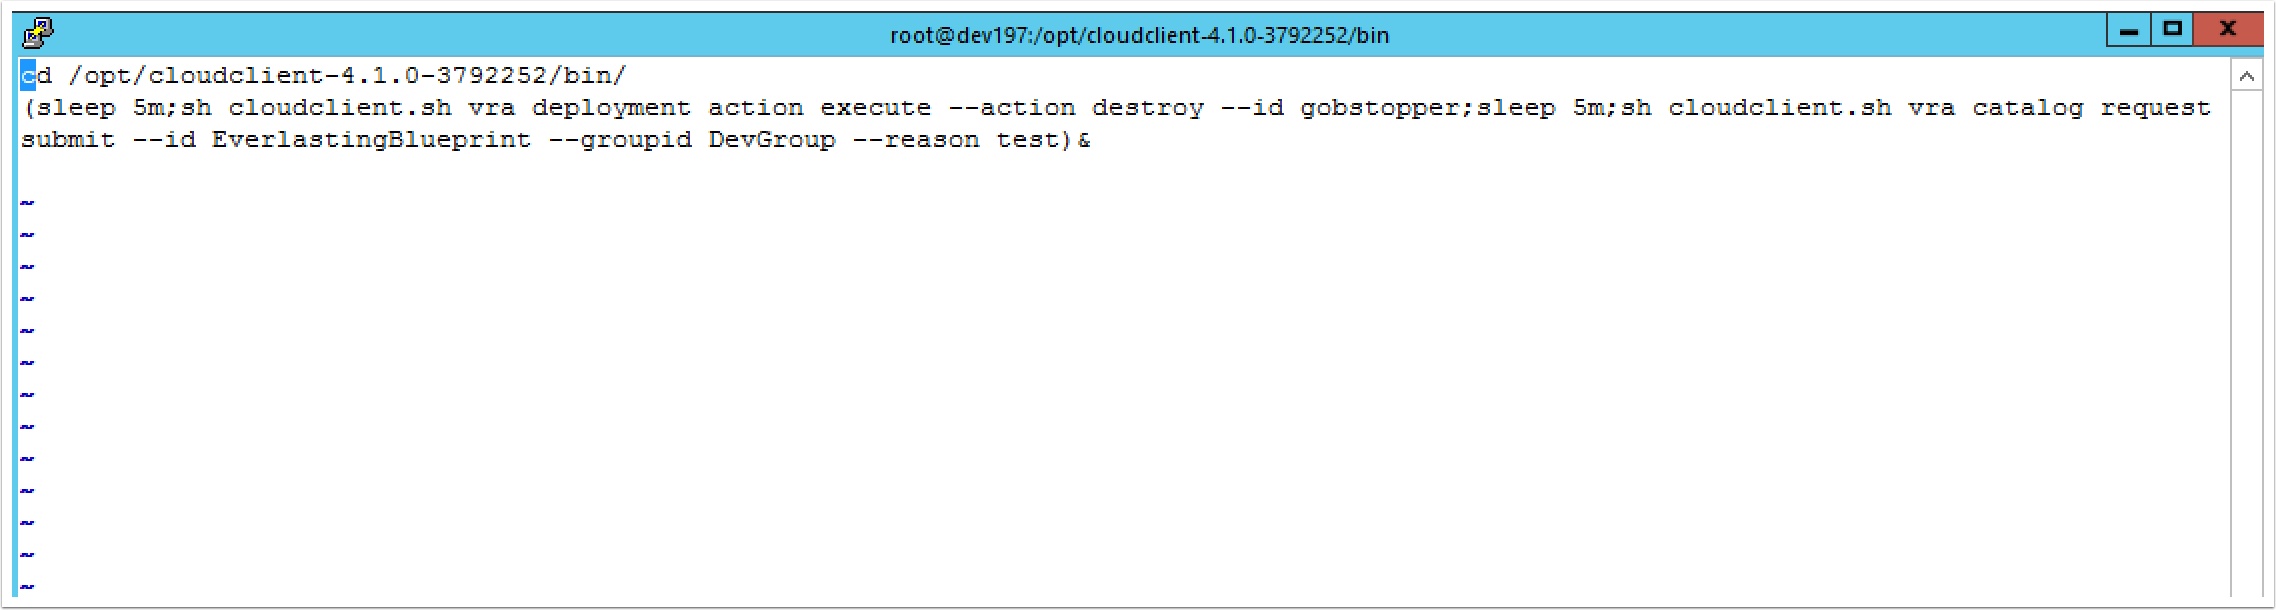
cd /opt/cloudclient-4.1.0-3792252/bin/
(sleep 5m;sh cloudclient.sh vra deployment action execute --action destroy --id gobstopper;sleep 5m;sh cloudclient.sh vra catalog request submit --id EverlastingBlueprint --groupid DevGroup --reason test)&
Open the vRealize Orchestrator client and import the workflow package I provided
- Change to administer
- Change tab to Packages
- Click import package
- Select the package you downloaded earlier
- Click import

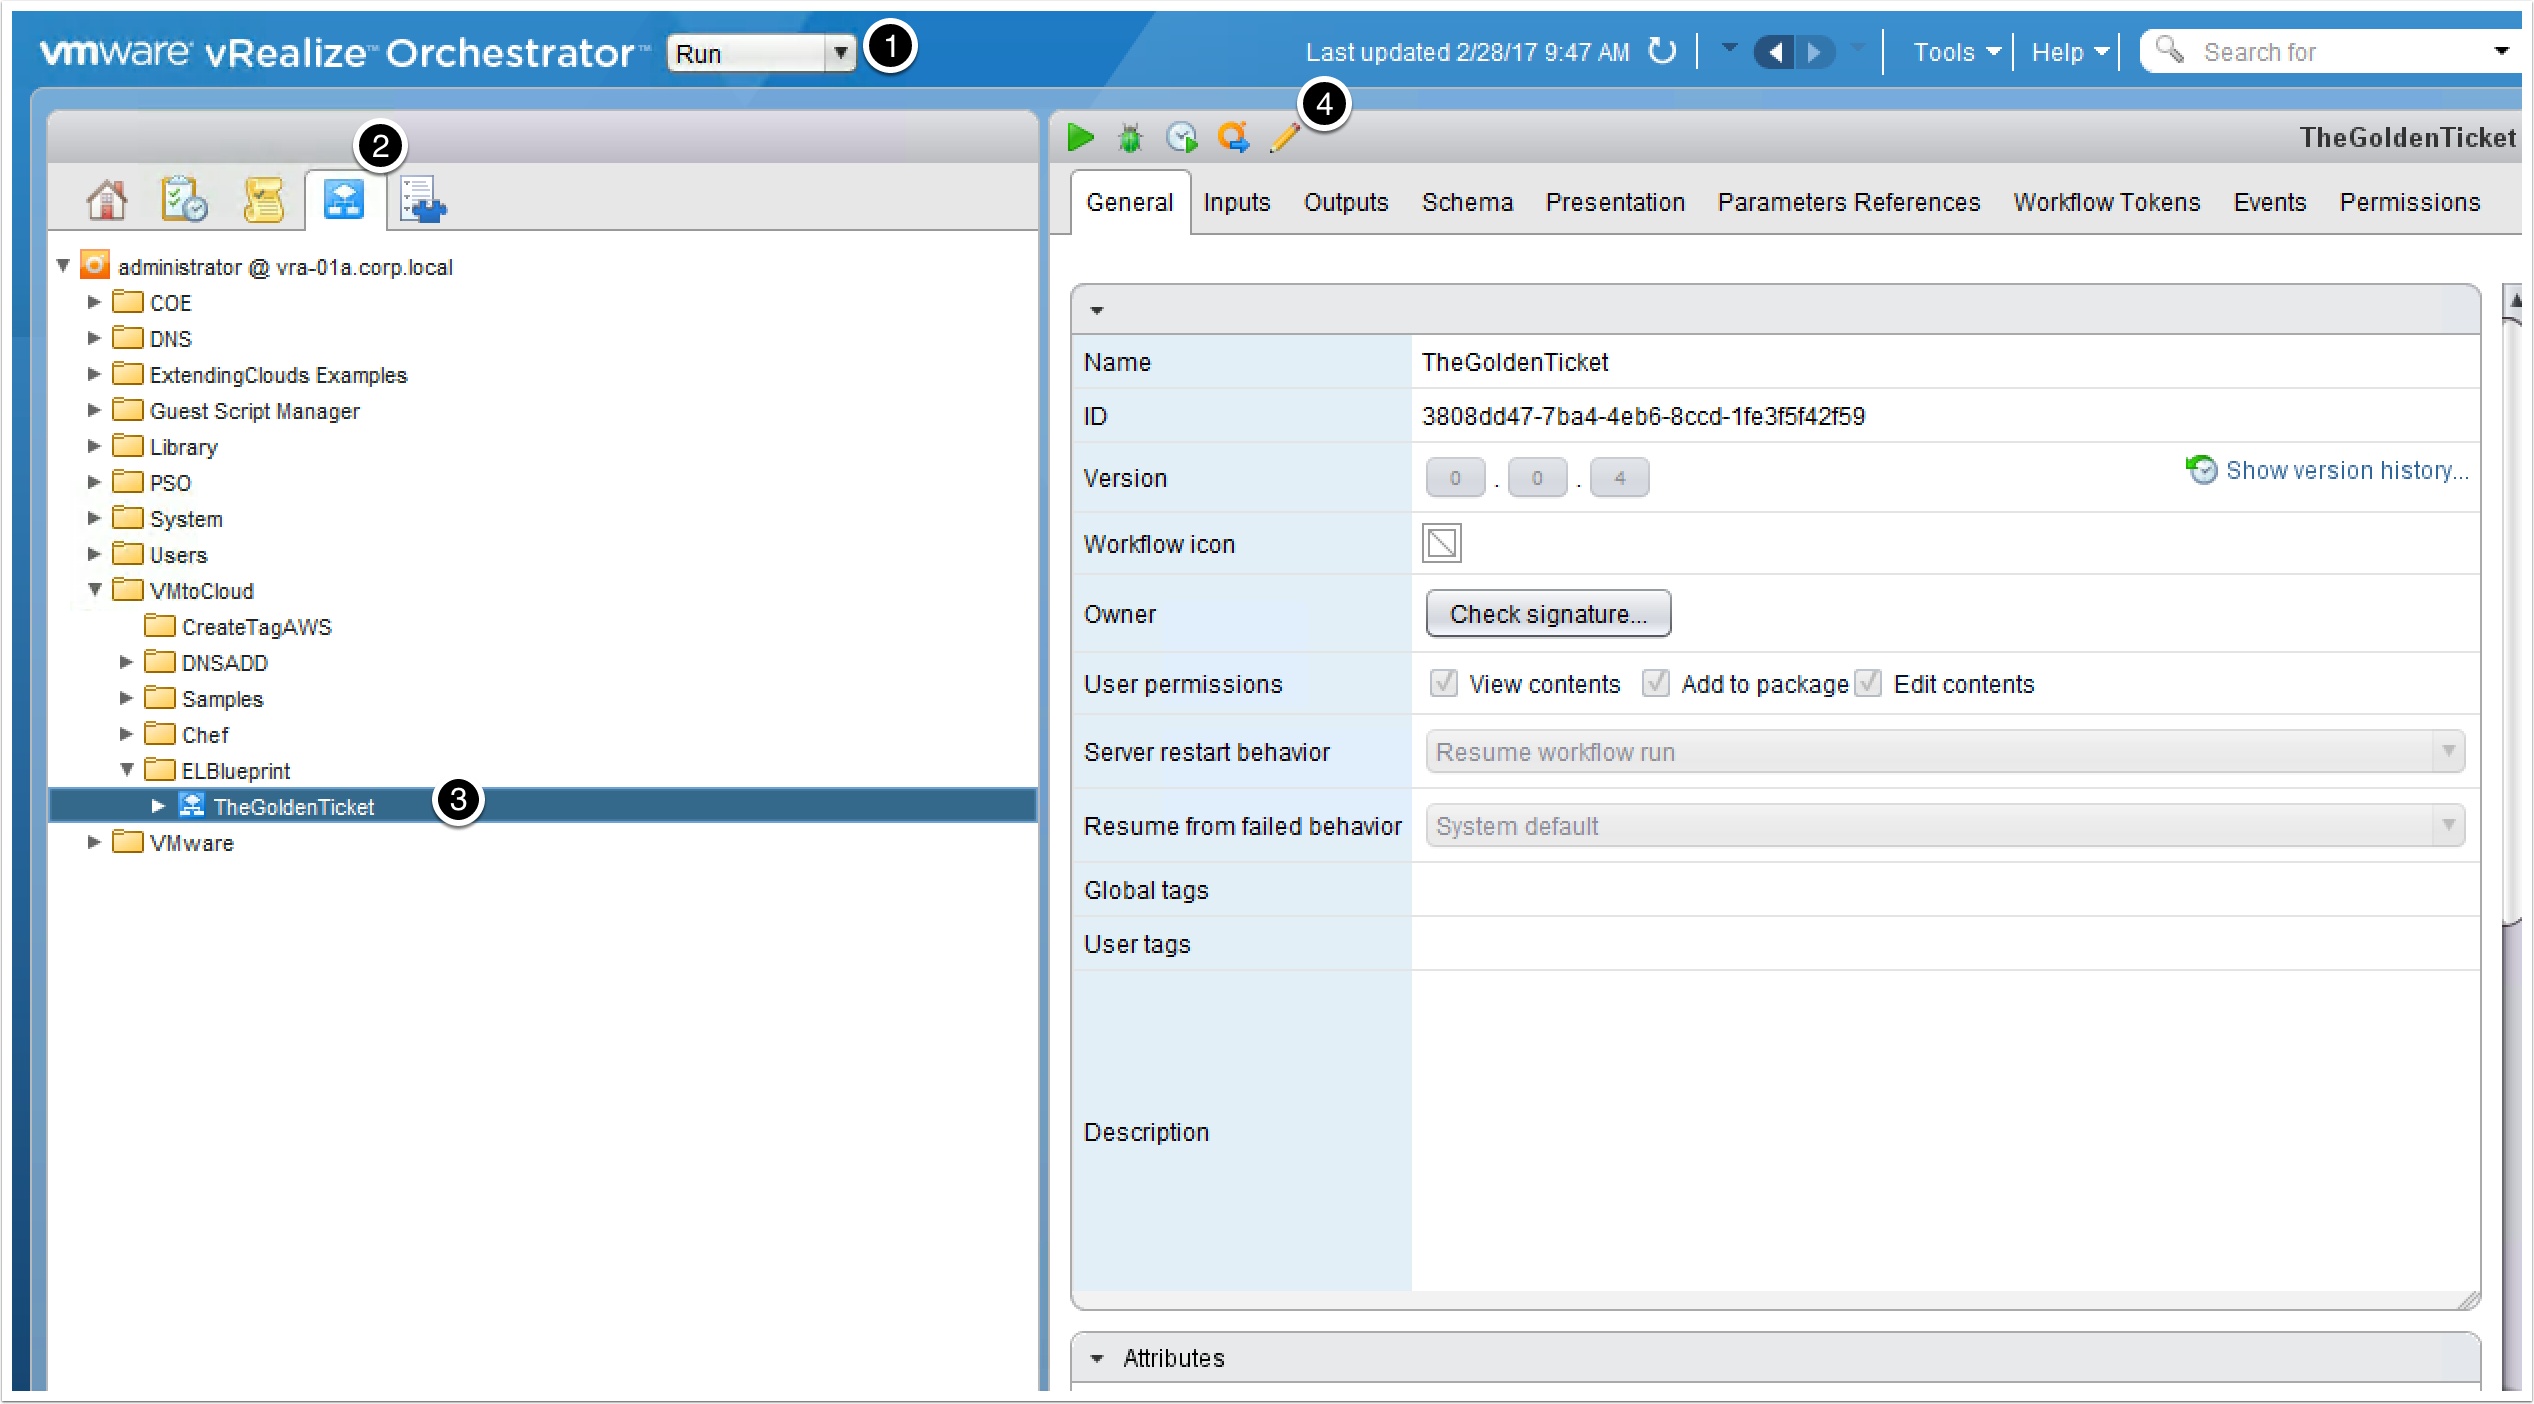
Now let’s edit the workflow for your environment
- Click run
- Click workflows tab
- Browse to and select the GoldenTicket Workflow
- Click edit
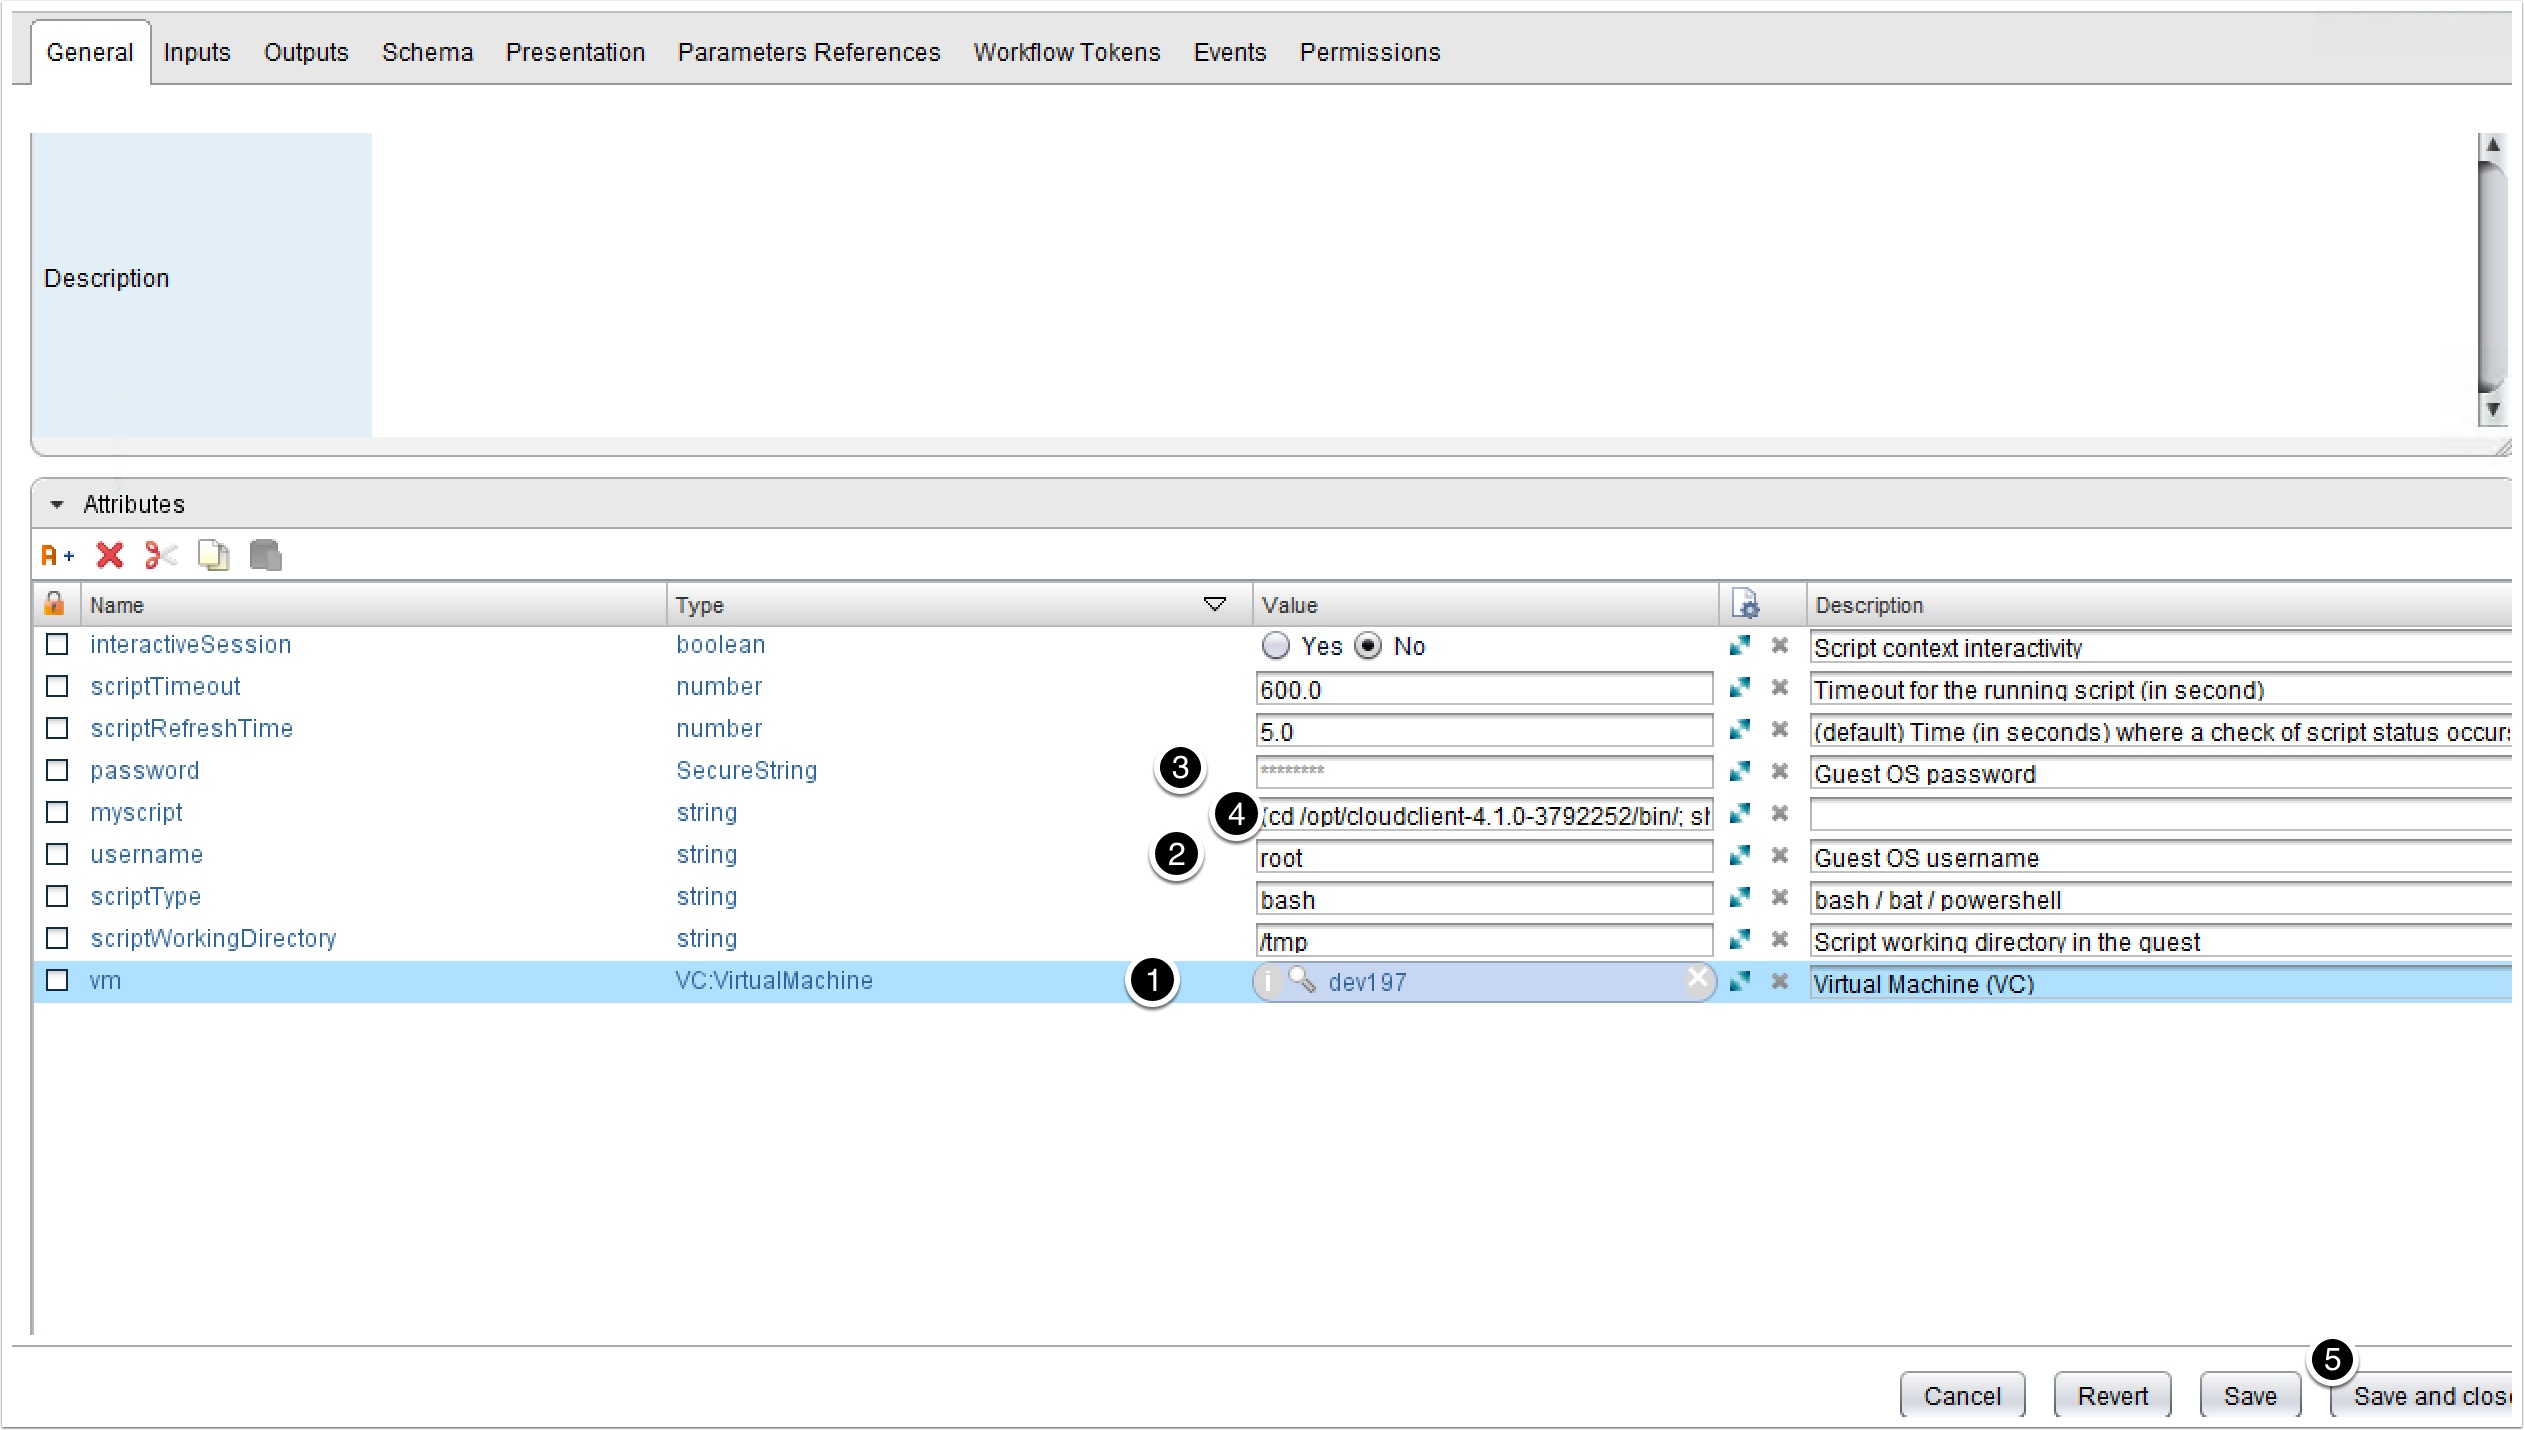
Edit settings for your environment
- Select the jump box server that you installed Cloud Client on and the script we created earlier.
- Enter the login name
- Enter the password
- You may need to modify the script if you installed cloud client and the goldenticket script in a different directory.
- Click Save and Close
Now let’s create and publish the event broker subscription
- Click Administration
- Click Events
- Click Subscriptions
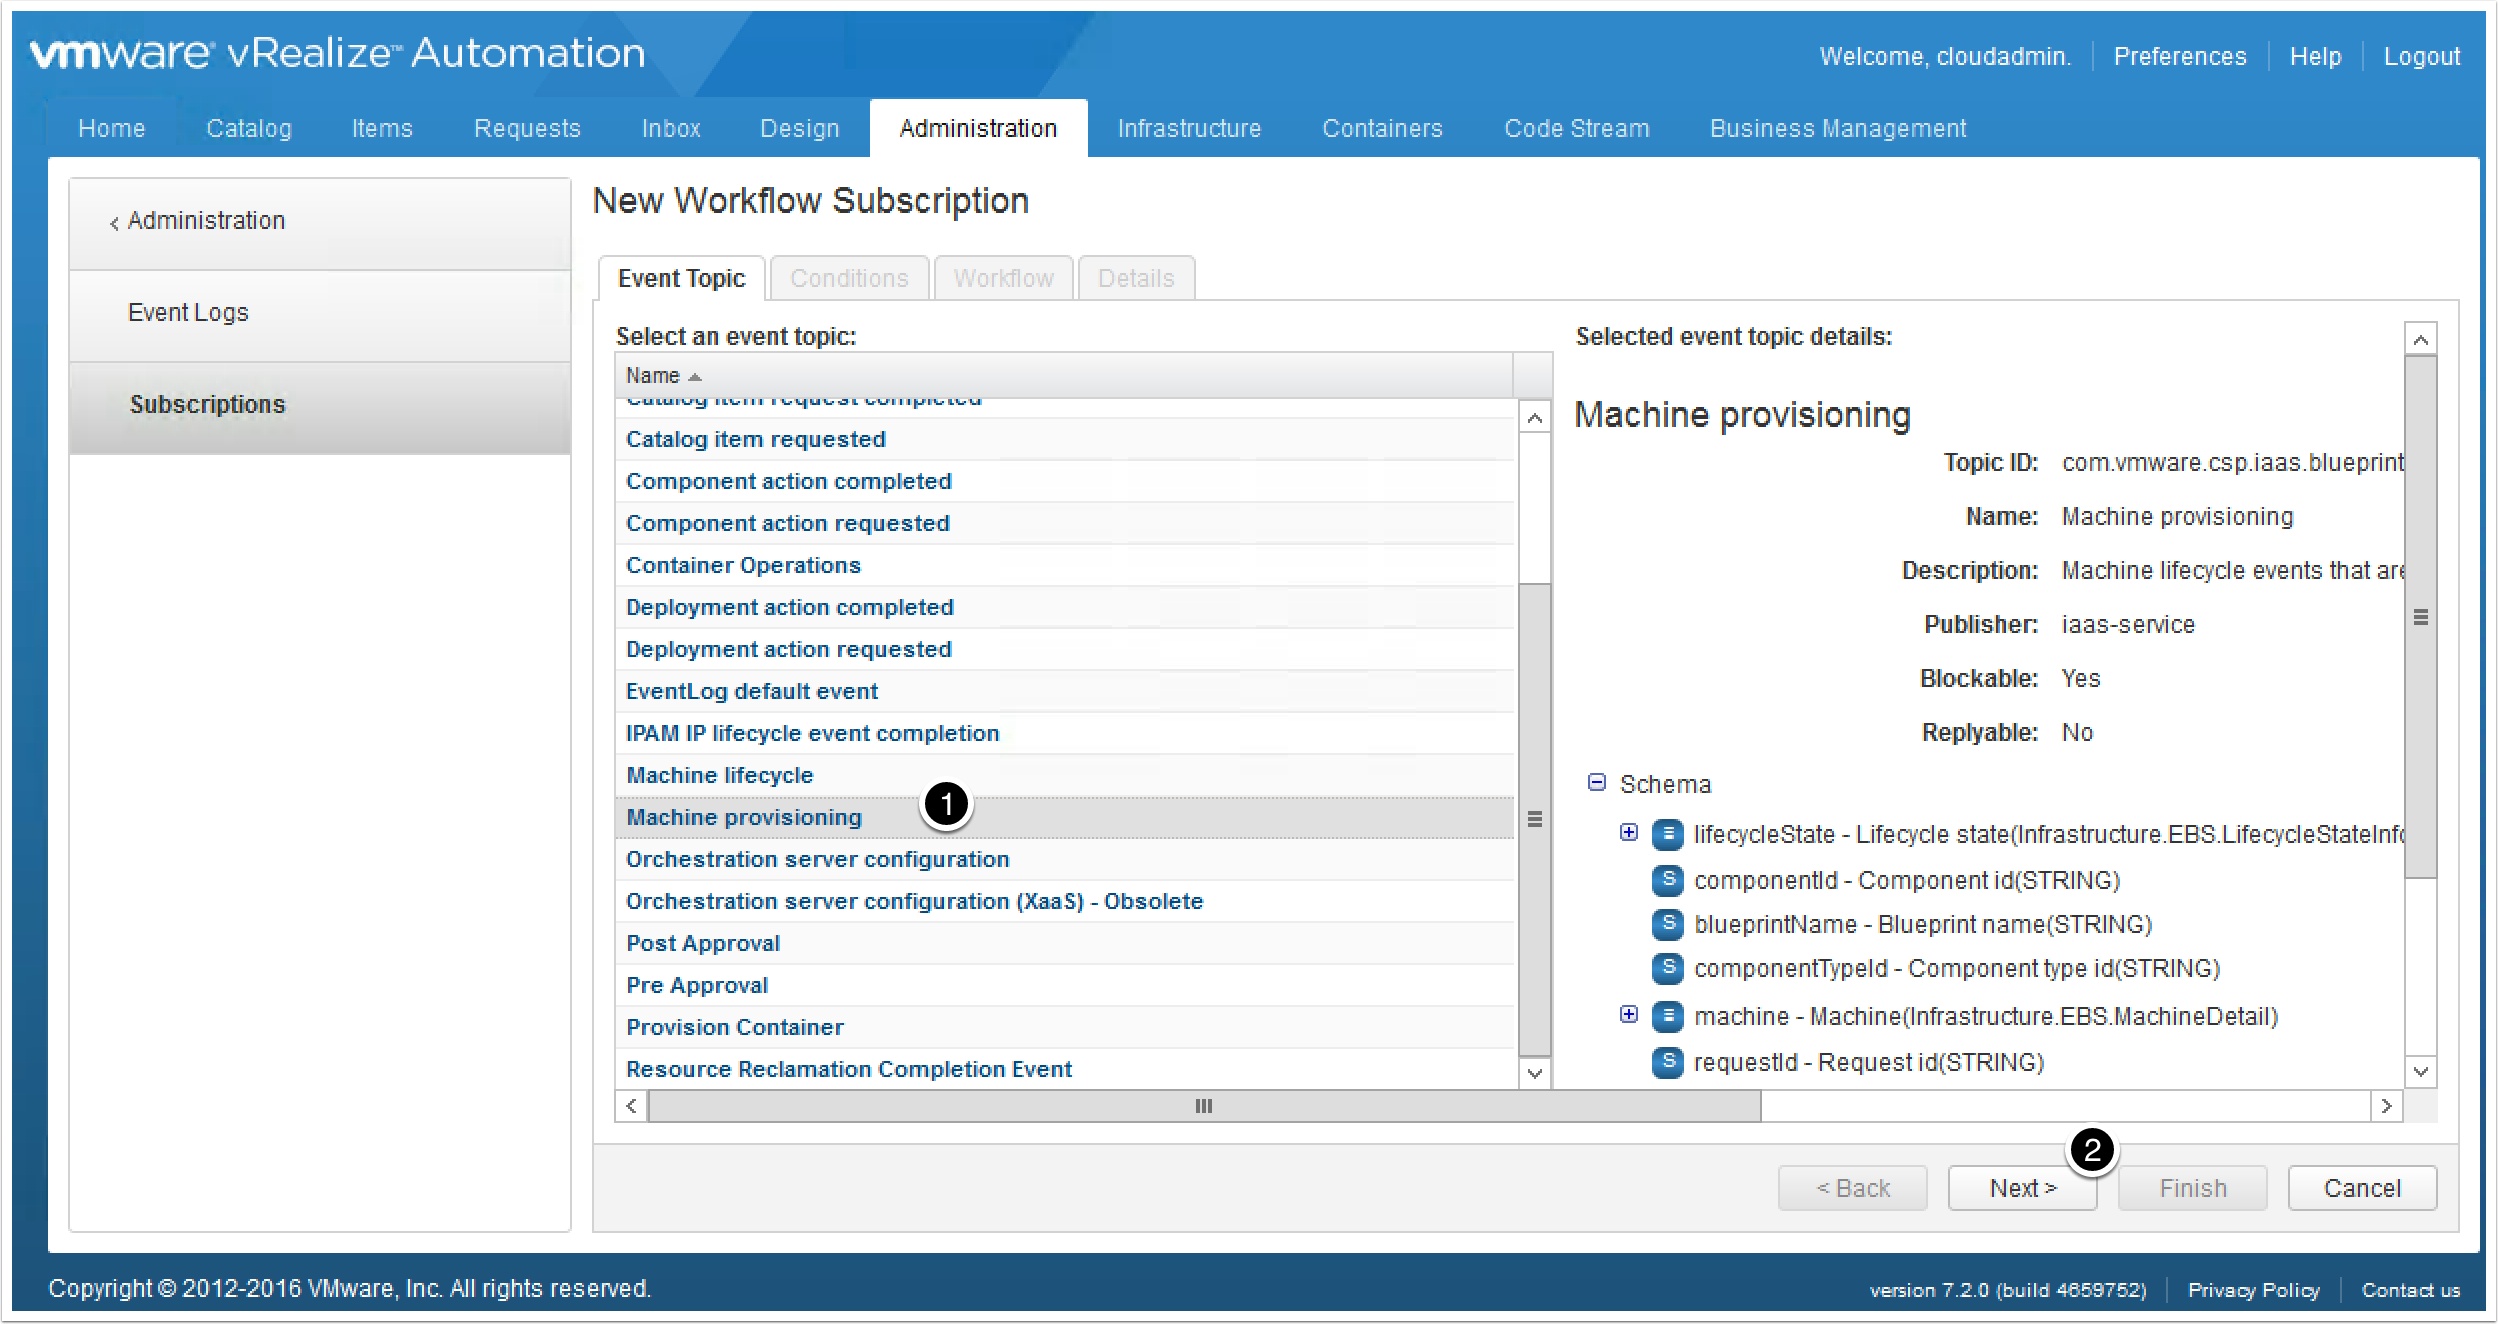
- Click +New

Select Machine Provisioning then next
Enter the following
- Run based on conditions
- All of the following
- Data > Lifecycle state > Lifecycle stage name => Equals => (Constant) VMPSMasterWorkflow32.MachineProvisioned
- Data > Lifecycle state > State phase => Equals => (Constant) POST
- Data > Blueprint name > Equals > EverlastingBlueprint
- Click next

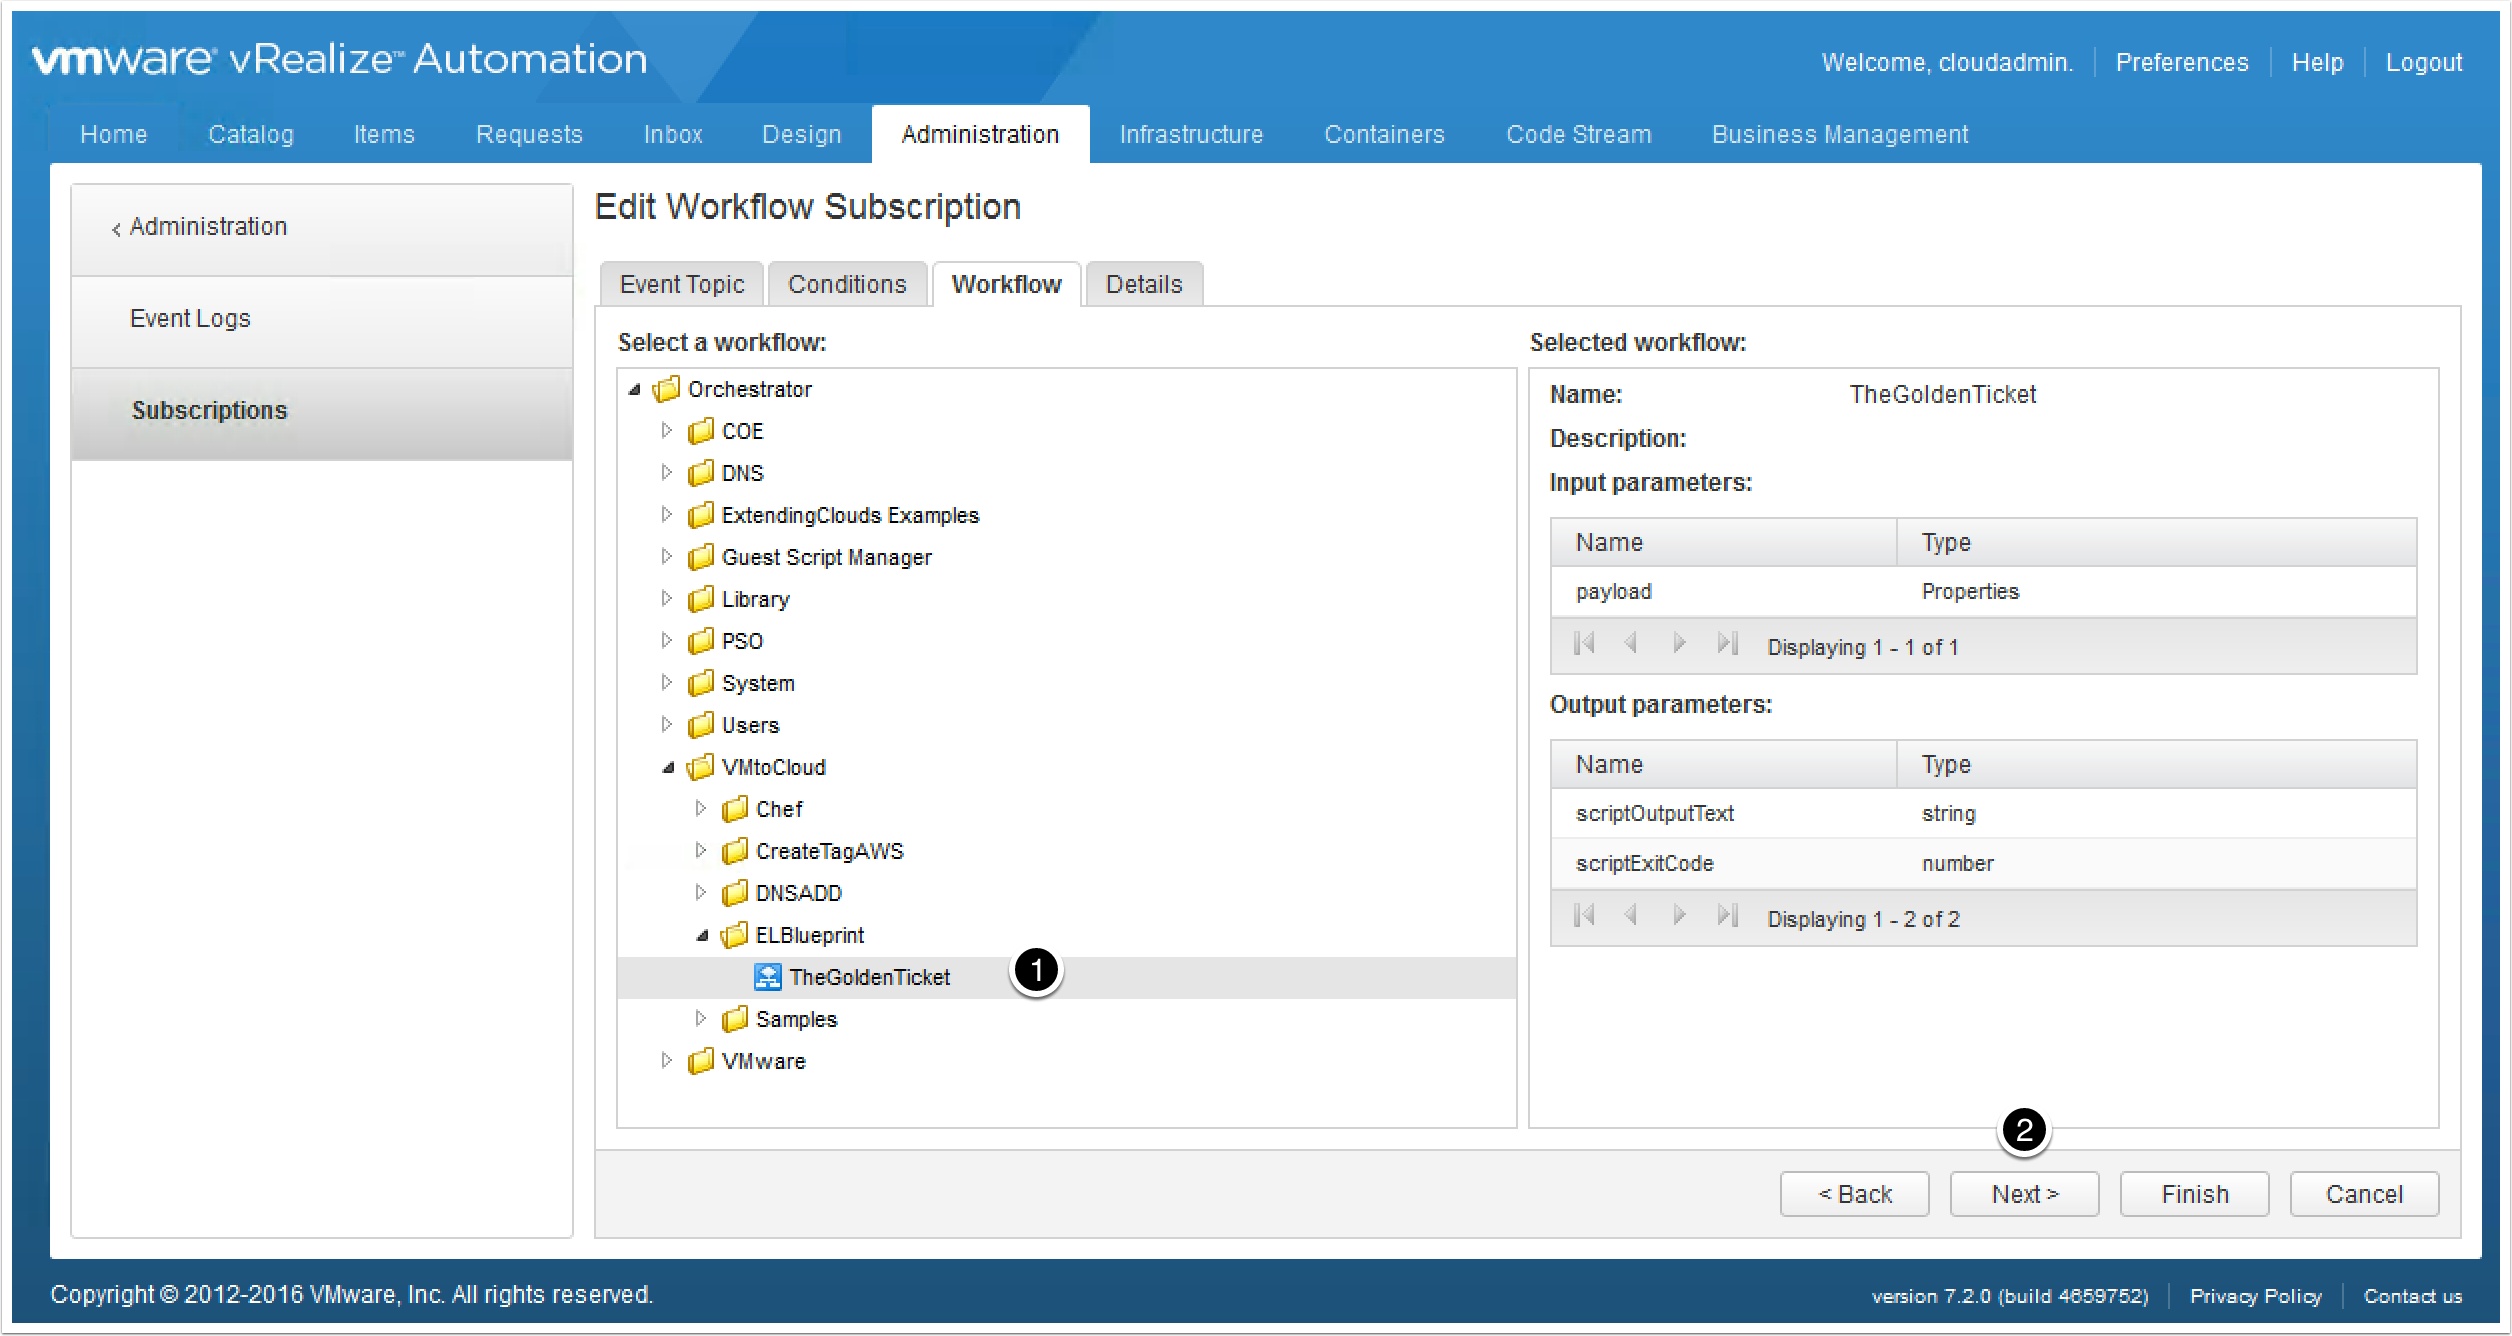
Select the workflow we uploaded earlier and click next
Enter the following and click Finish
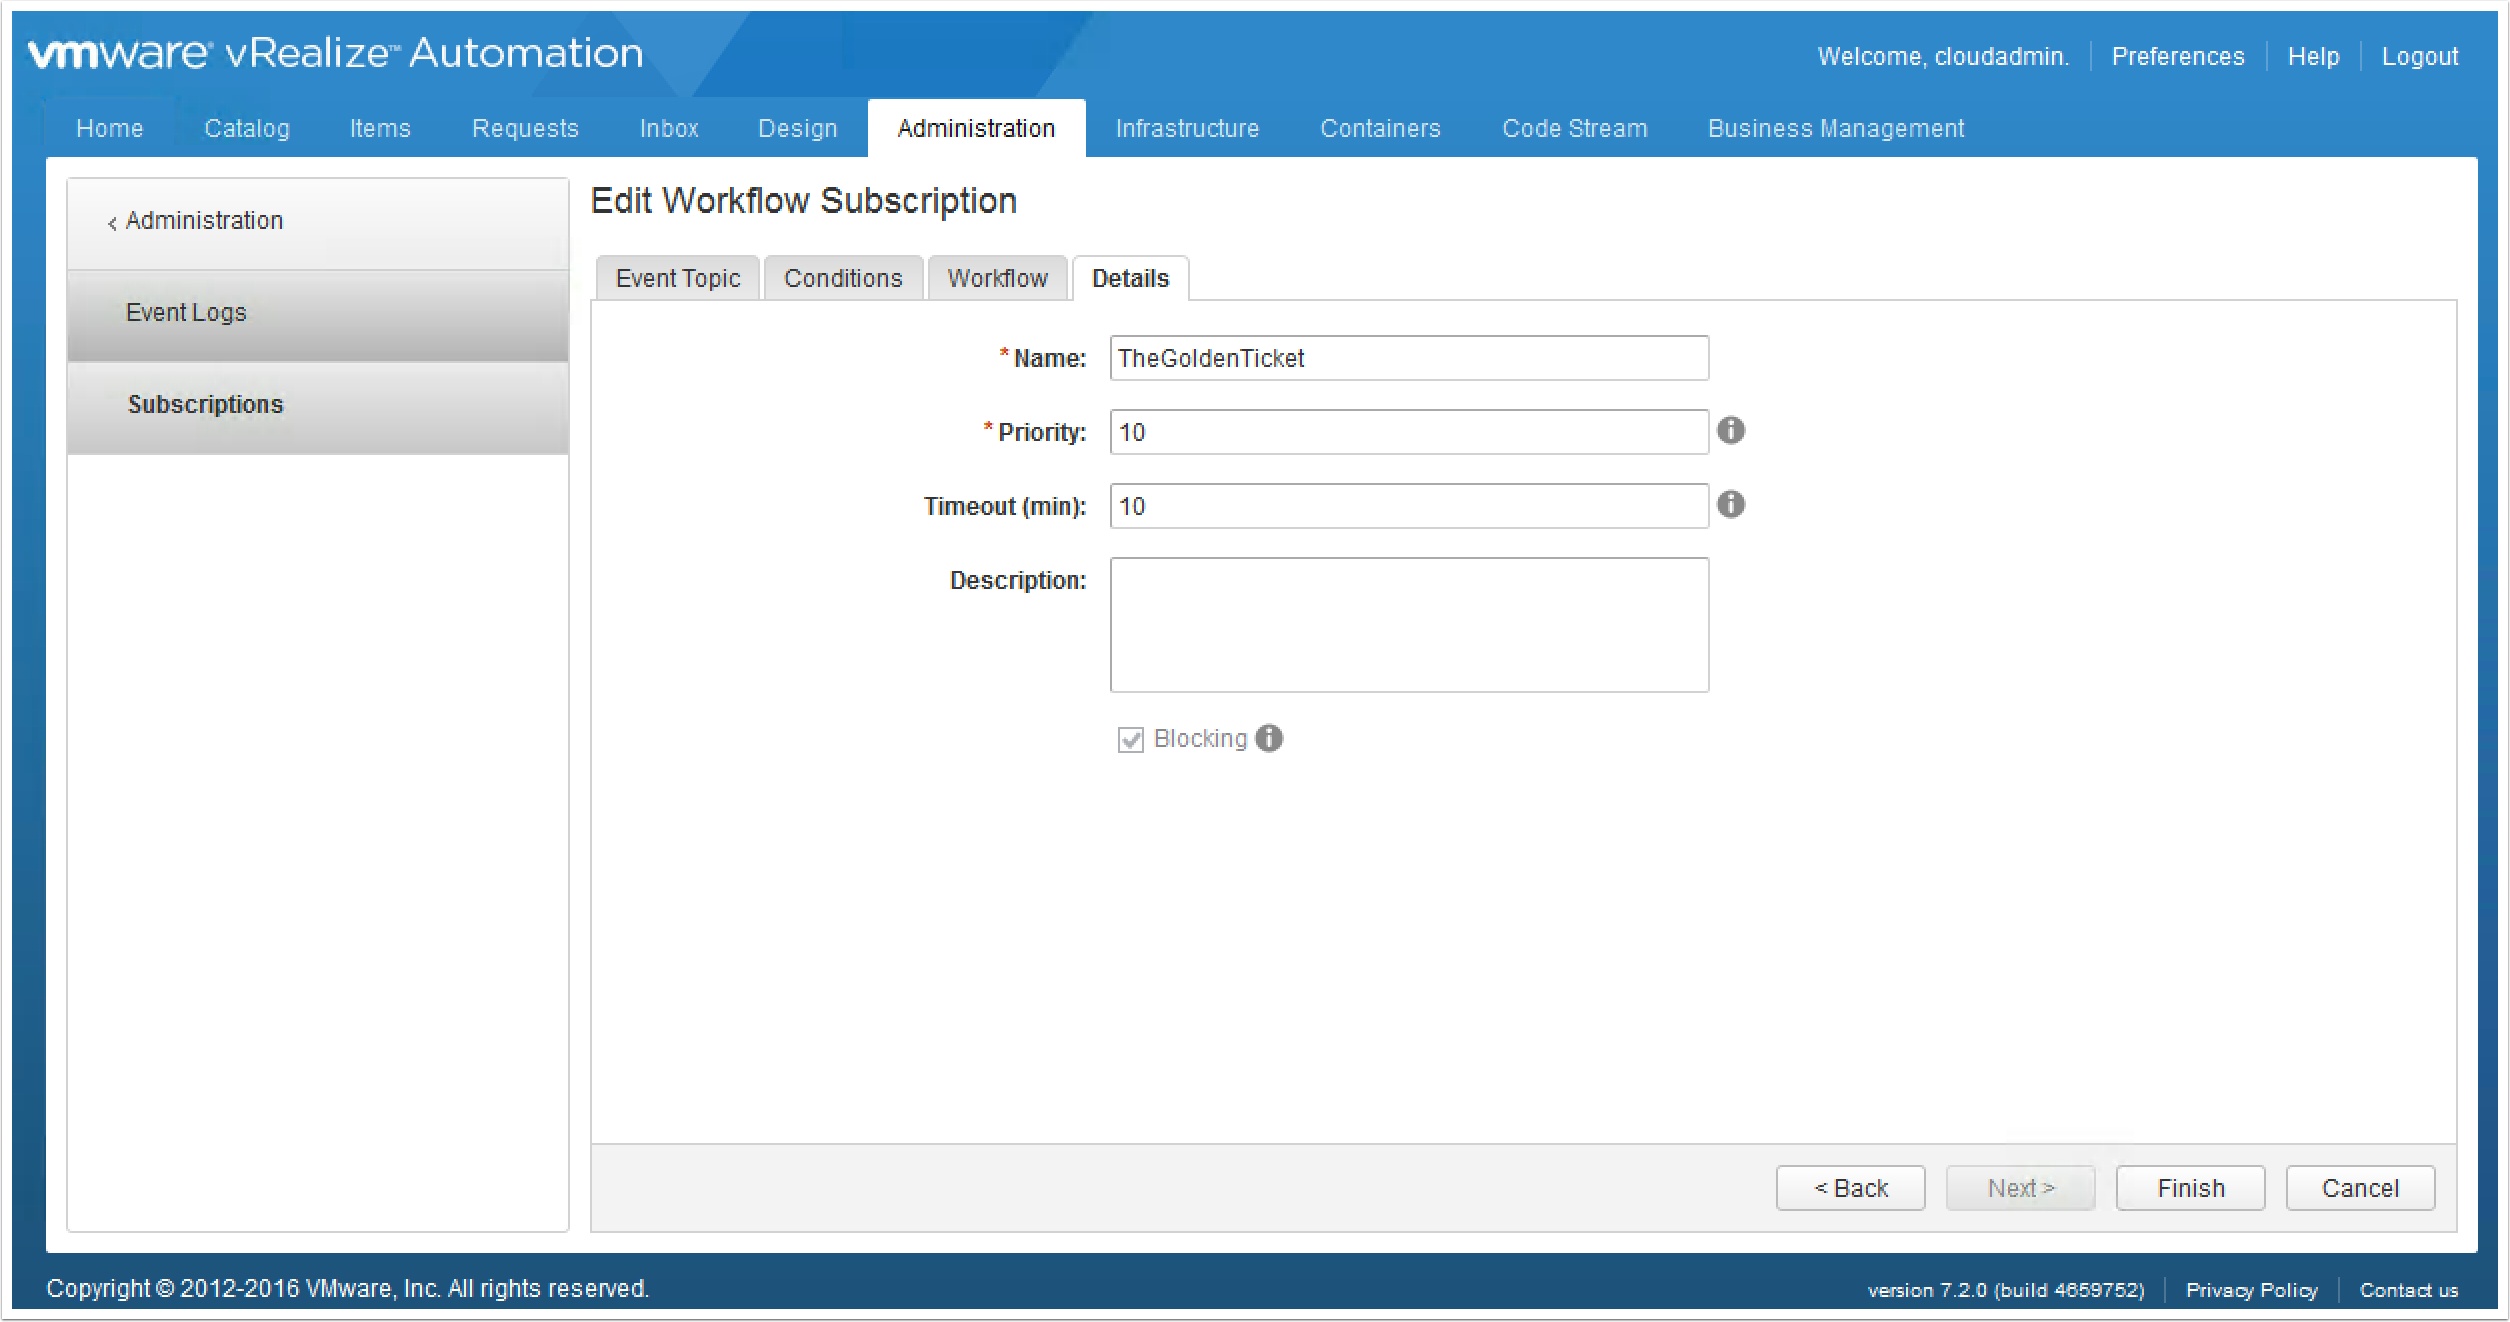
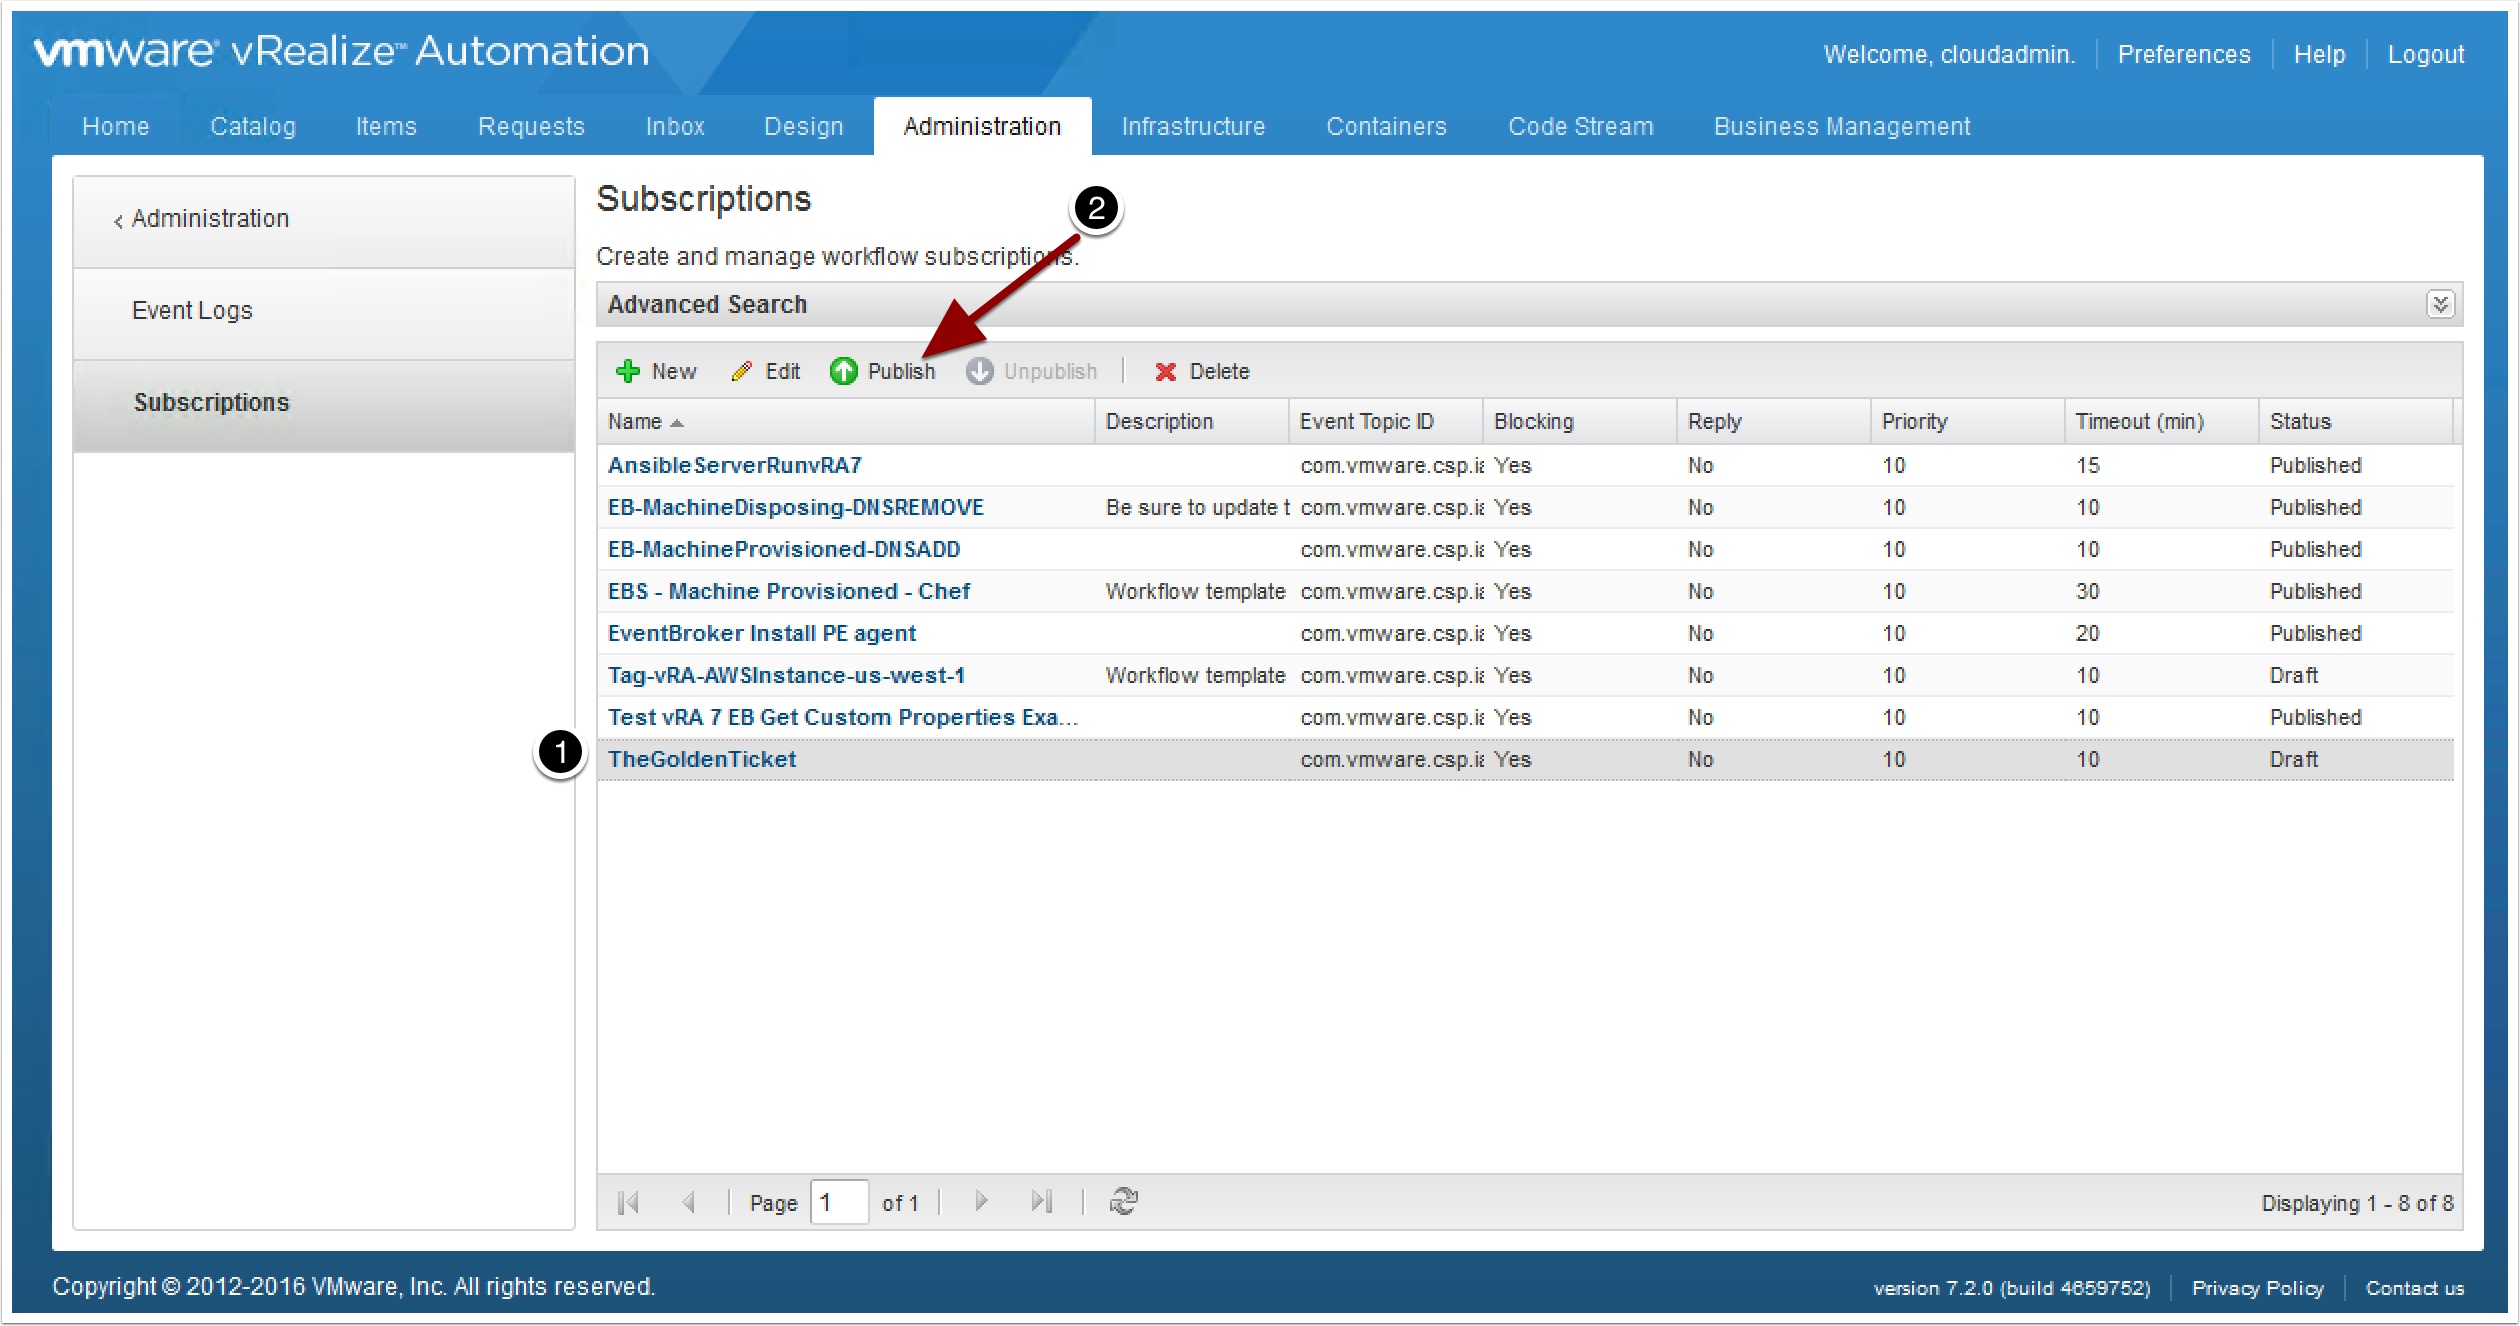
Publish the subscription
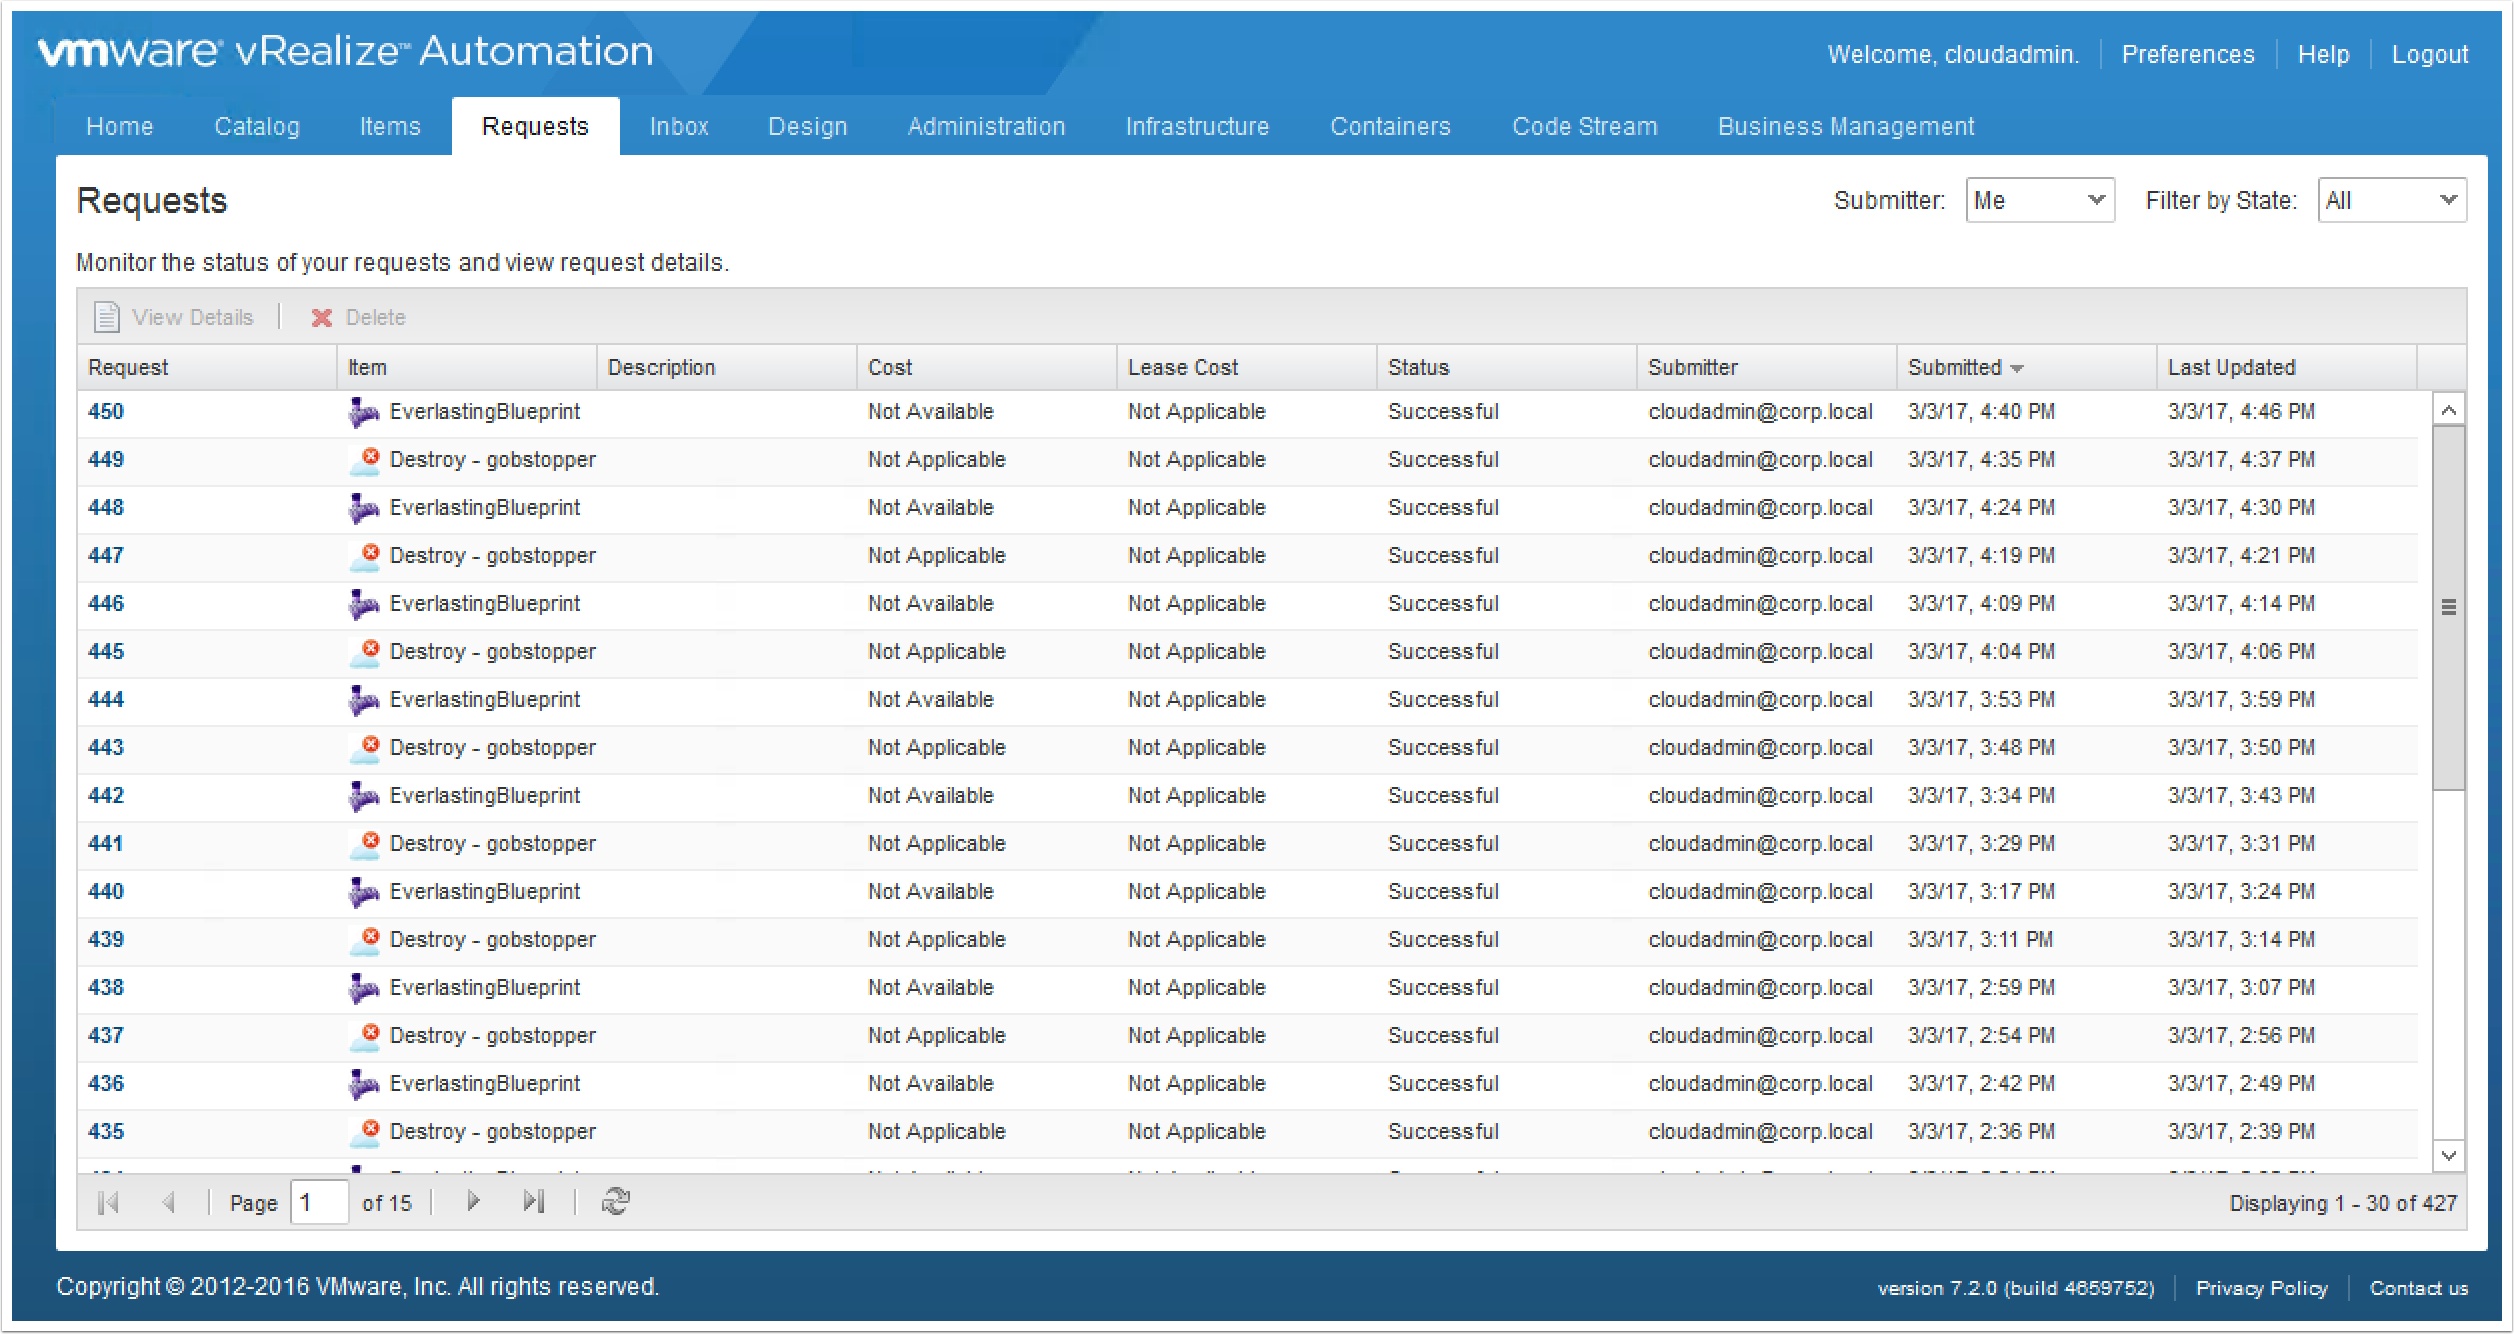
Entitle the blueprint in the catalog and fire off a request

If all is working as expected you should see the blueprint request and destroy itself over and over
Note: You may need to modify the cloud client script we created for timing issues, adding more minutes to the sleep timers helps as it may try to run before the blueprint destroy or cteate requests are actually complete. This will cause it to fail.
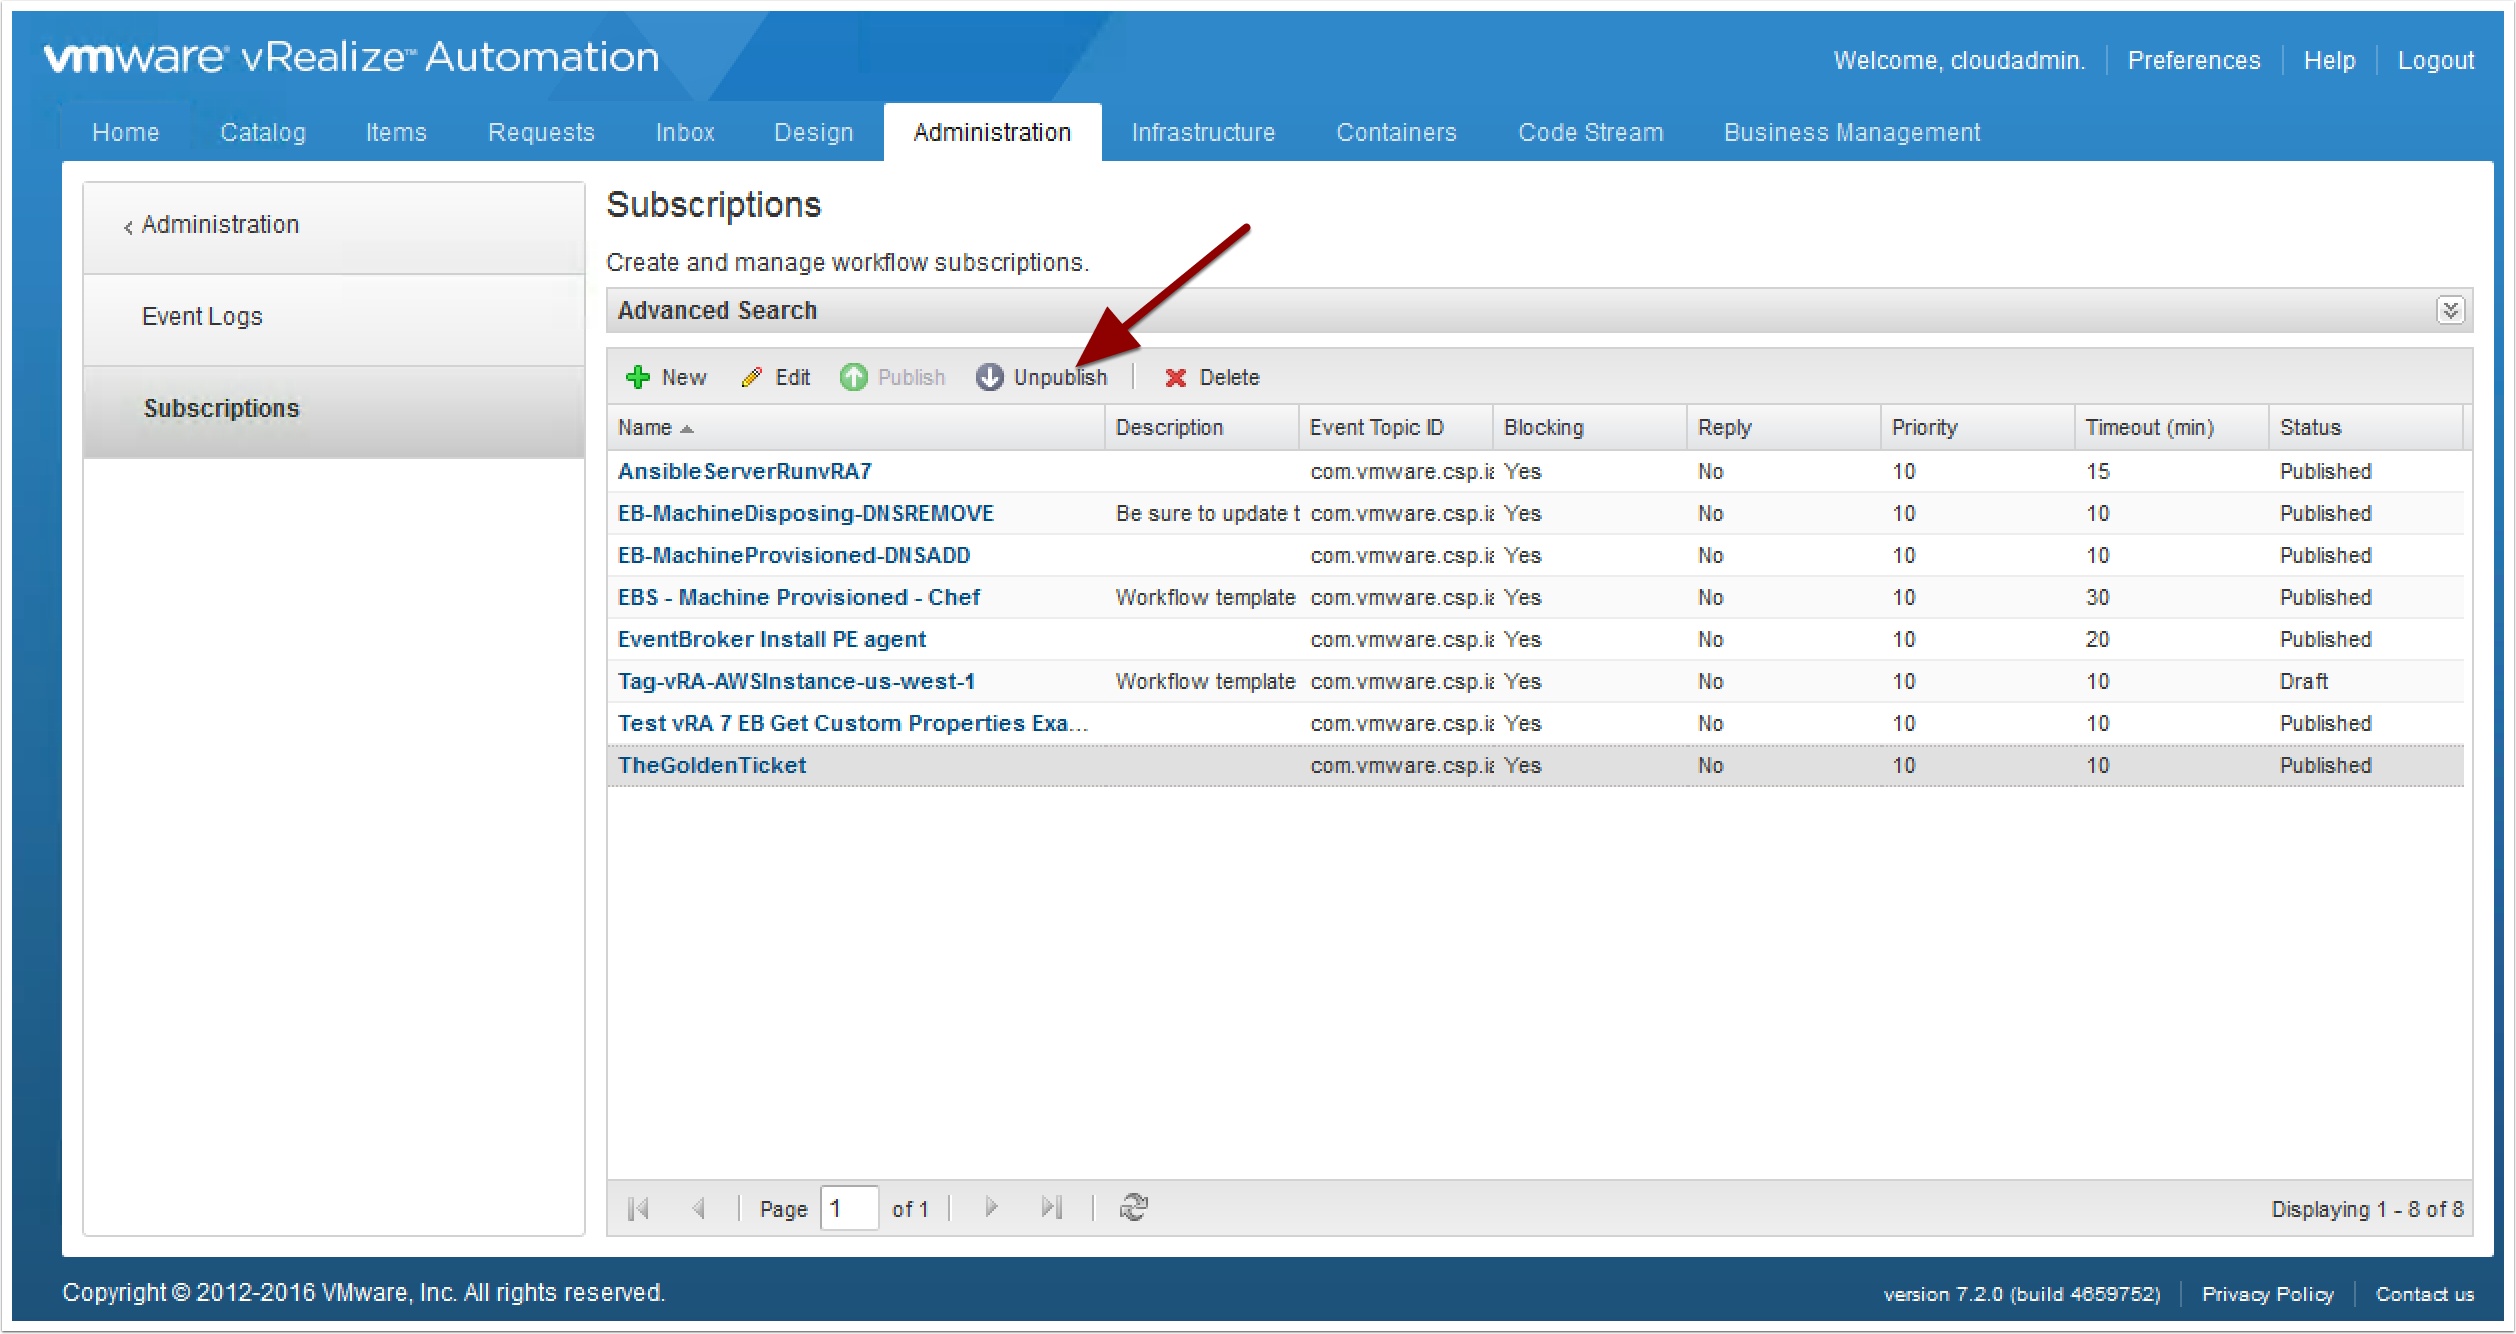
To make it stop just go to the Event Subscription and unpublish it
Pingback: The vRA Everlasting Blueprint – VMtoCloud.com
Pretty cool idea. Never thought of this before but makes total sense bro.
Why not using a vRO workflow that does all the dirty work of cycling through the requests. This way we get rid of this additional machine runningcloud client.
Pingback: Getting started with vRealize Cloud Client – VMtoCloud.com