
This is for vCAC 6.0 and 6.0.1 and ID appliances 6.0 and 6.0.1
Please take a snapshot of both appliances prior to this procedure. Non-functional DNS resolution can result in loss of system functionality.
After you have deployed the vCAC appliance and ID (SSO) appliances you may need to update their DNS settings. By design you can’t change them in the management interface. You also can not change them by logging in as root and editing /etc/resolve.conf. Doing so will result in the previous settings remaining in effect after a reboot of the appliances.
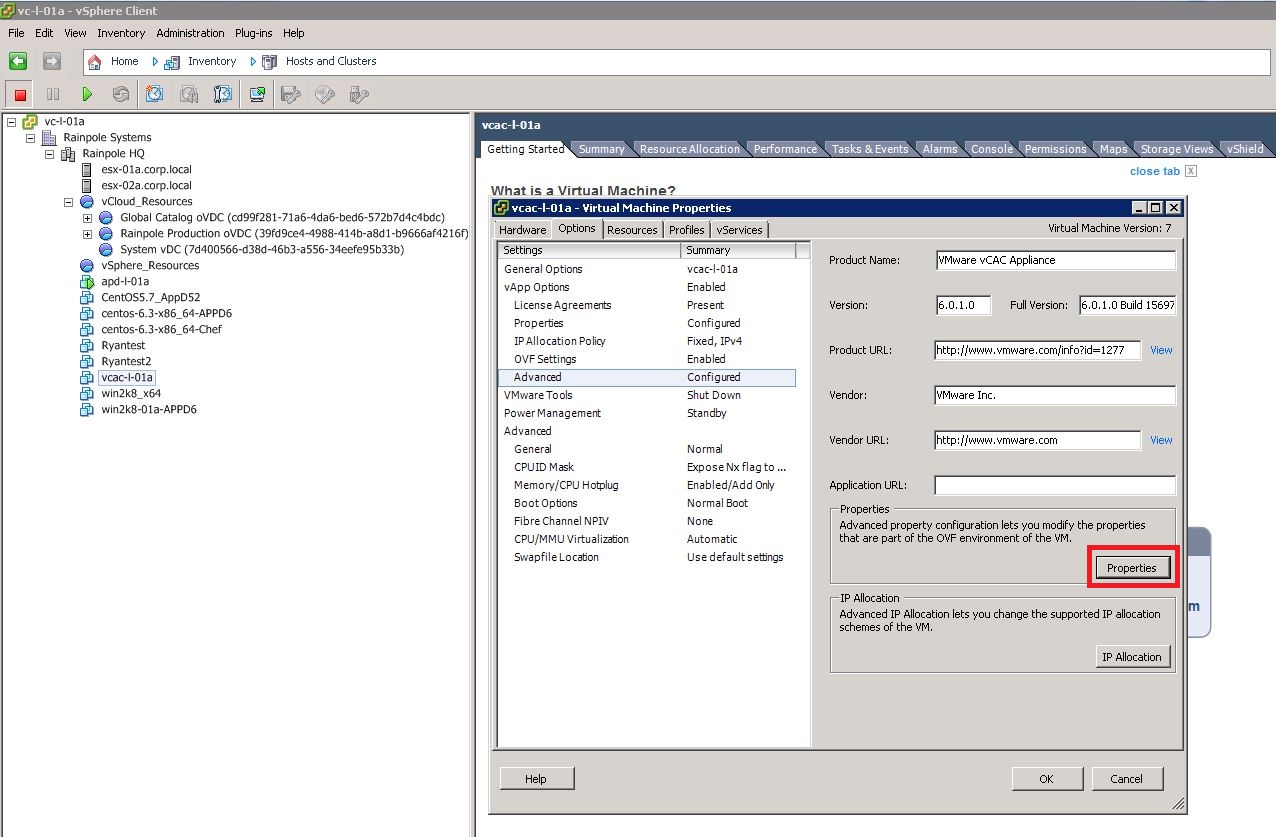
First you will need to shut down the appliance and power it off in vCenter. Then in vCenter client, edit settings of the appliance VM and go to the options tab. Now select the Advanced line under vAPP options and click properties on the right.
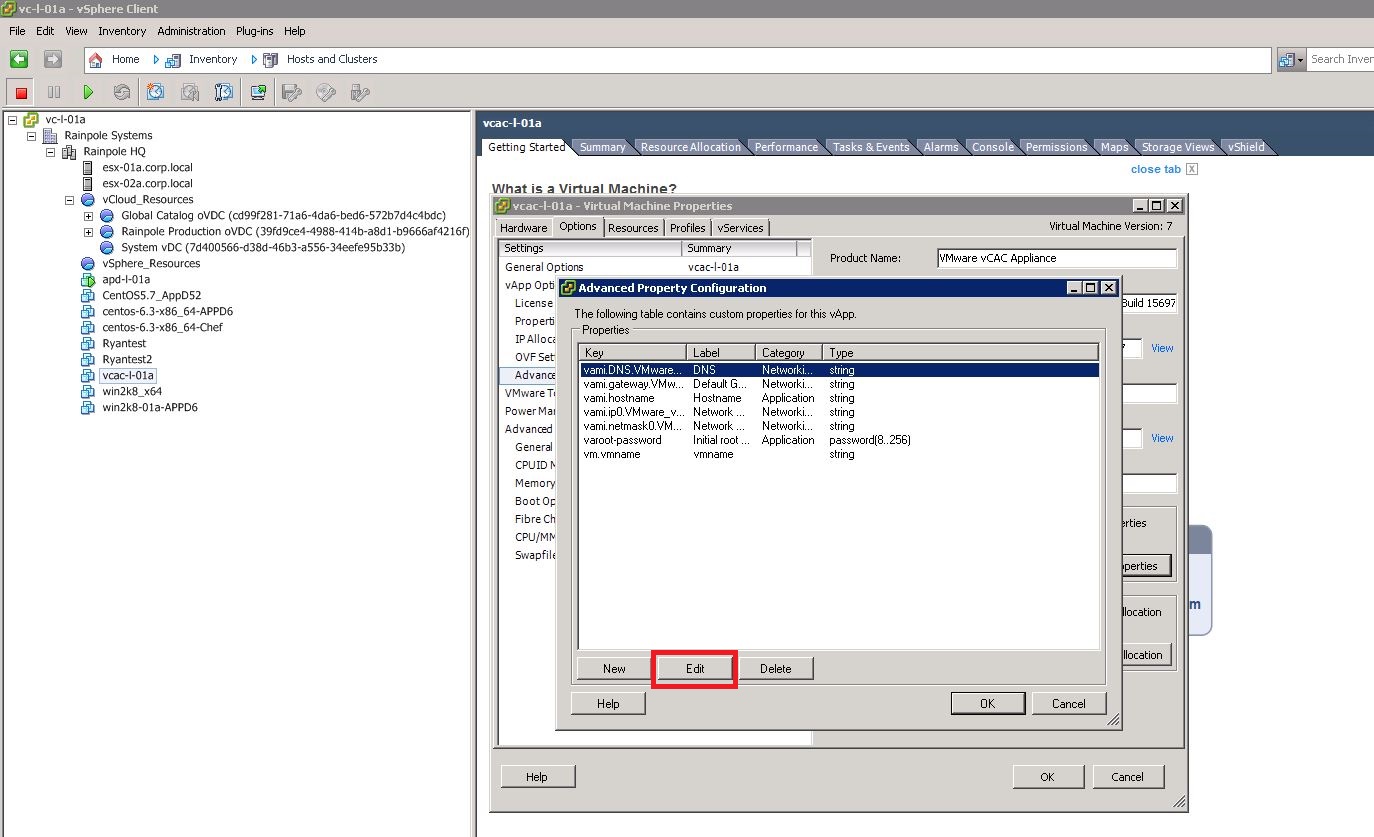
Now highlight the VAMI.DNS line and click edit
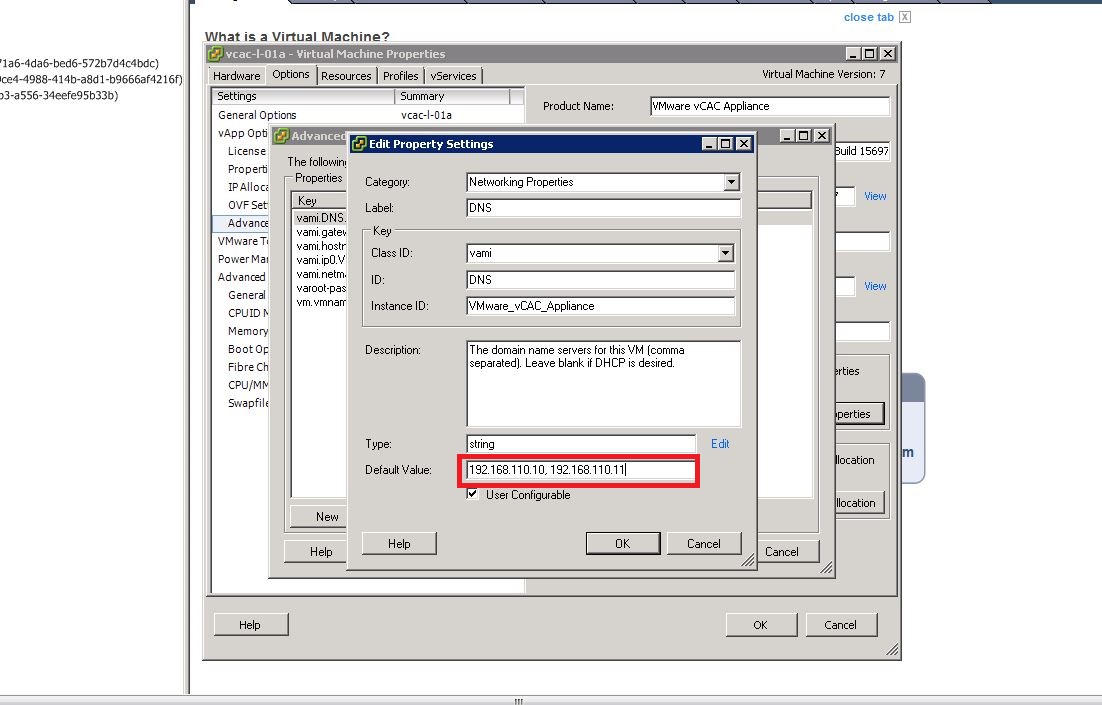
Now enter your new DNS servers separated by comma and a space
Now click Ok on each of the menus and power on your appliances again. The DNS should now be changed and shown in the management interface.
assuming FQD does not change, is it possible to change the IP address of the vcac identity and vcac appliance AFTER they are installed? Will anything break? Will self signed certs still work if they were created using FQDN?
jgershater, I needed to do this too. I did the same thing as mentioned above except the key called vami.ip0.VMware_vRealize. Also, I think to get it to work I had to select the IP allocation option (under properties you clicked first). Select OVF Environment. That changed the IP for me.