
This guide will show you how t configure and use vCO to extend the out of the box vCAC provisioning work flows. All this without ever using vCAC design center. This enables you to do things like call out to other systems that may need to be updated as part of the provisioning process, run scripts in the guest VM, open firewall ports or configure a load balancer.
For this guide you will need the following:
- vCAC 6 installed and configured to provision to vSphere See the guide here
- A Linux or windows based Blueprint Published to the vCAC catalog
- vCAC configured to connect to the embedded vCO client See my guide here
- vCAC Plugin for vCO configured and connected to vCAC See my guide here
- vCenter Plugin for vCO configured to connect to the vCenter that hosts your vCAC reservations and blueprints.
The following diagram shows what this will enable. We are basically going to modify the vCAC workflow stubs to call a vCO workflow instead of using the Visual Studio based design center to extend vCAC provisioning workflows.

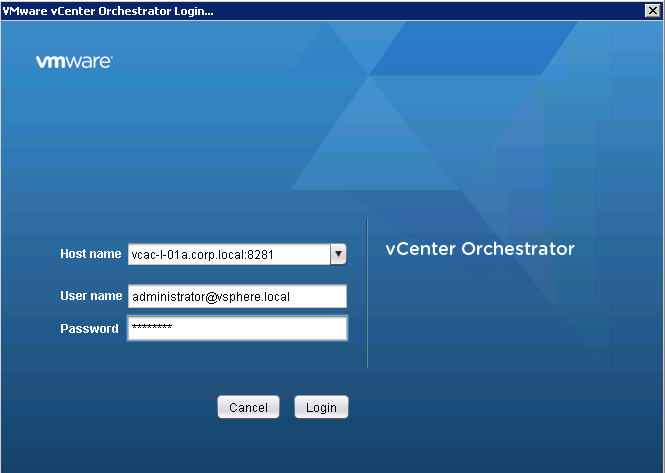
The first thing we need to do is verify that the vCenter plug-in and vCAC plug-ins are installed and working properly. Login to the vCO client from the vCAC appliance web page
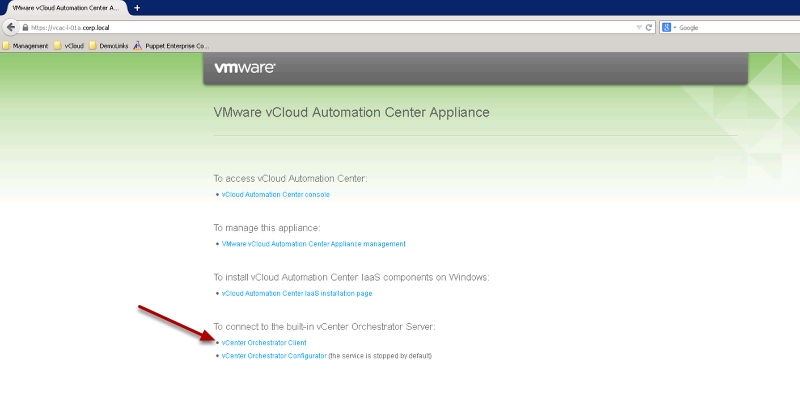
Login as administrator@vsphere.local and the password you set during the vCAC ID appliance installation
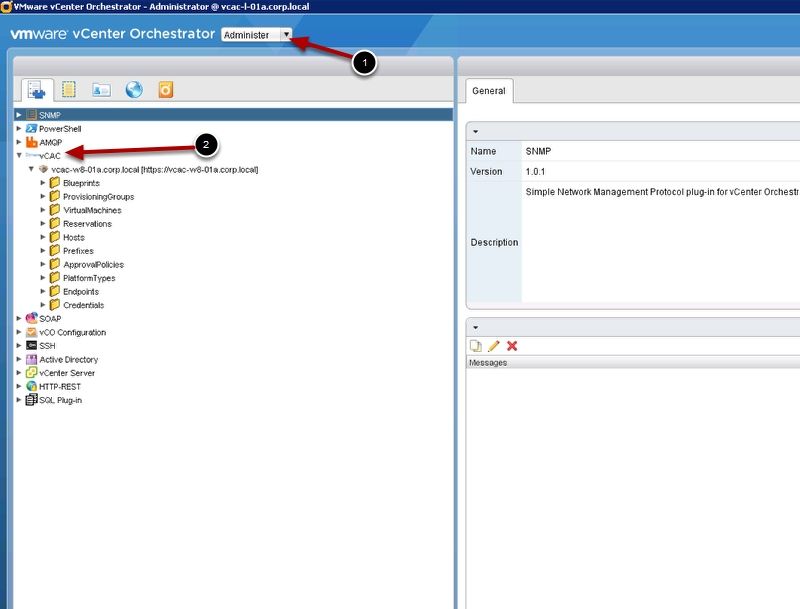
Change to Administer view and browse the vCAC plugin to verify you are talking to your IaaS server.
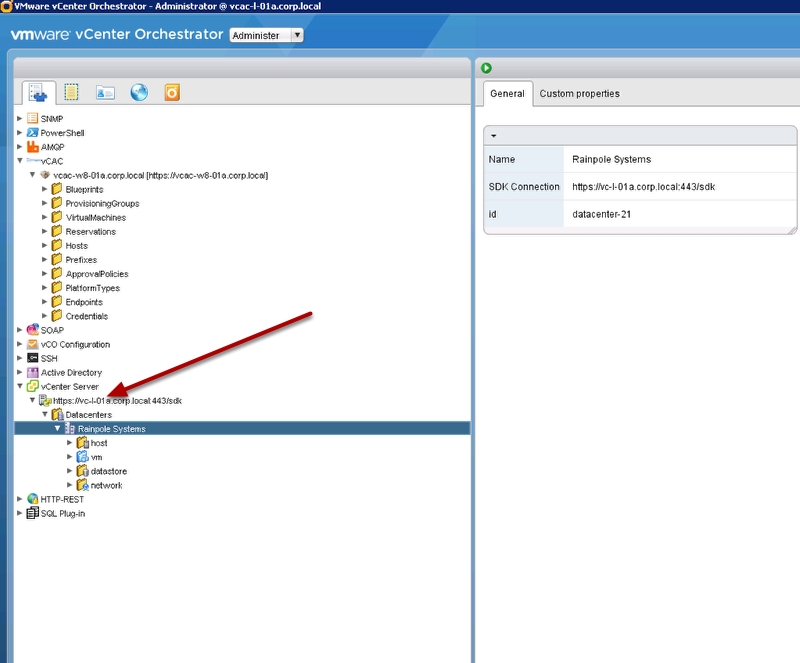
Now let’s check the vCenter Plugin, make sure you can see the datacenter and clusters that you are provisioning Blueprints to.
Now let’s install the vCAC extensibility to modify the vCAC workflow stubs to run vCO workflows at machine states. Change the view to Run, then change to the workflows tab, then browse to the Install vCO customization workfow. Right click on it and select start workflow
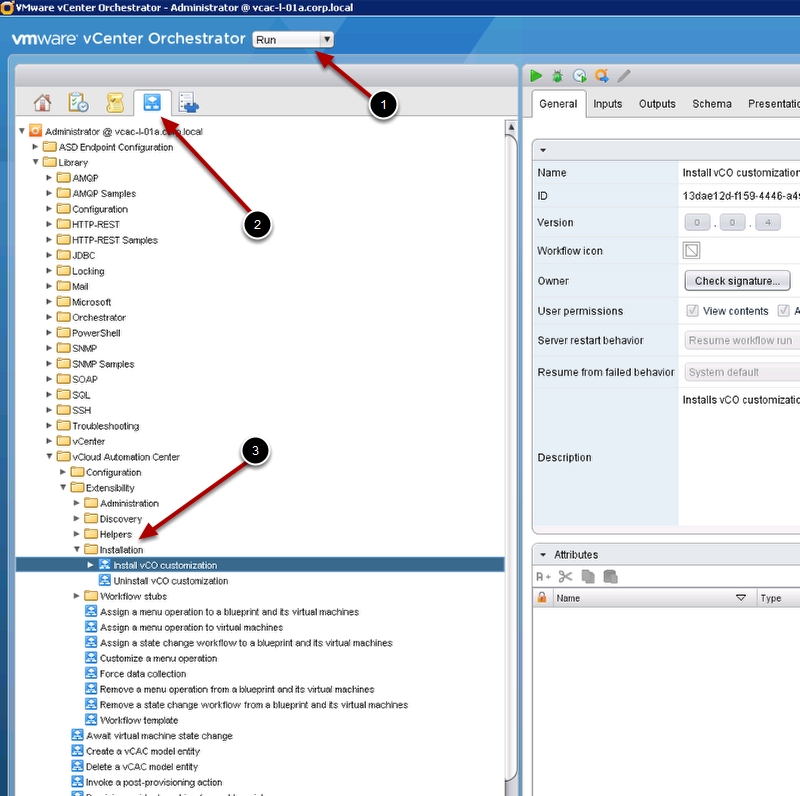
Please Note: The following steps will modify your vCAC workflow stubs. If you have done work in design center already those workflows will no longer run. If you would like to continue to use workflow stubs you will need to manually modify the stubs in design center and add the vCO customization manually.

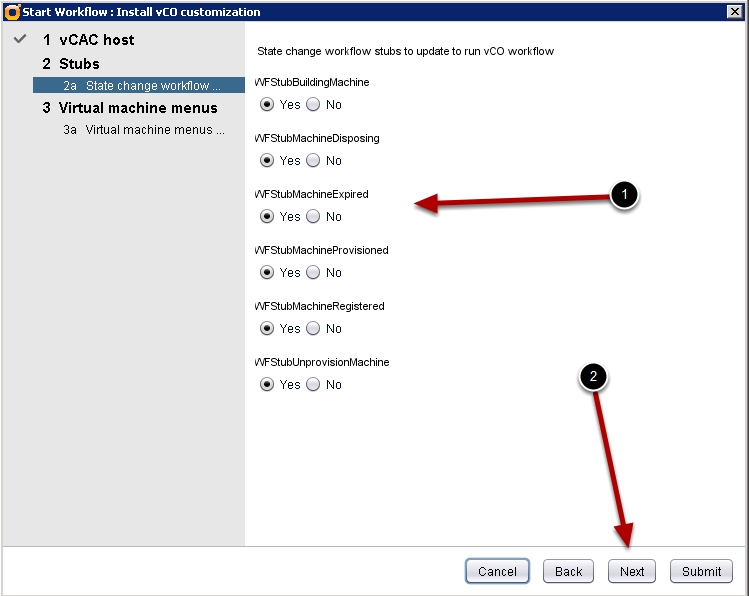
Now that we got that out of the way, let’s proceed. Select you vCAC host from the list.

Now select the Worflow stubs you want to modify and click next
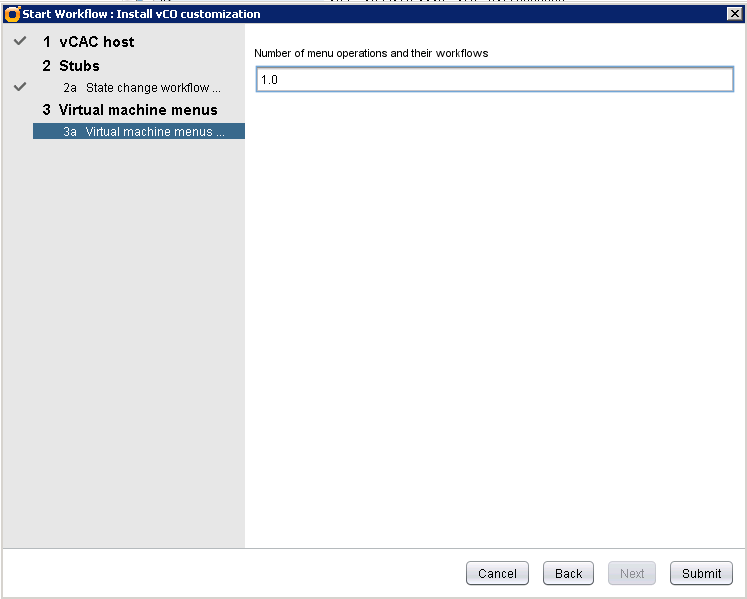
You can make the Number of Menu Operations 1.0 and click submit. We actually don’t use this anymore as of vCAC 6
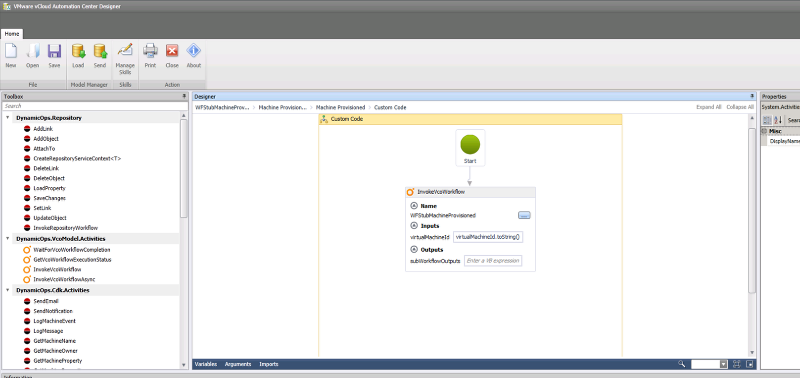
Now when you look at the stubs in vCAC Design Center they should look like this:
Pingback: How to extend vCAC with vCO Part 2 – Hello world Script in Guest | VMtoCloud.com
Pingback: vCAC to vCO Magic Secrets Revealed | VMtoCloud.com
Really great toturial. Gave some really usefull insight into how vco works.
Except for the screenshots (which could use a higher resolution) everything went as it should following your examples.
However. when the blueprint is requested and the machine is up running, i see the vco workflow is running as expected. the log inside the vco client shows alot of information, but stops at.
[2014-06-18 09:37:01.586] [I] Trying to resolve a vCenter VM
[2014-06-18 09:37:01.588] [I] 1 sdk Connections found…
after 10-20minutes the machine is deleted from vcenter since vcac expects it to be finished but isnt, so its destoyed.
I can fully browse vcenter from the vco client. any suggestions how to troubleshoot this?
Regards.
As it happens from time to time, the solution is found after posting for help. it could actually not browse the vcenter – dont know why it suddently changed, but using another administrative user solved the problem.
please delete these posts.
No worries Dennis, your post has actually been useful to a couple other folks trying this integration. I can still delete if you want though.
Pingback: vCAC 6.0.x and vCO to rename a virtual machine | Chris Berry Blog
Pingback: How to tag EC2 instances provisioned from vCAC (vRA) | VMtoCloud.com
Pingback: Docker as a Service in vRA/vCAC part 2 – InstallPullandRun | VMtoCloud.com
Pingback: vRA/vCAC Chef Client Extension | VMtoCloud.com
Pingback: Dynamically updated request forms example with vRA, vRO and Chef | VMtoCloud.com
Pingback: How to create a Photon Blueprint in vRA/vCAC | VMtoCloud.com
Pingback: EMC Avamar Plugin for vRealize Automation - vMBaggum
Pingback: Extend vRealize Automation for Third-Party Imaging Technologies - VMware Cloud Management