After installing vCAC 6, you can utilize the built-in vCO workflows via the embedded vCO instance. Since the embedded vCO instance is installed on the vCAC 6 appliance, all you need to do is run the “Add a vCAC host” workflow from your for vCO client. Please ensure you have already created a vCO endpoint in VCAC per Ryan’s earlier article here:
https://www.vmtocloud.com/how-to-use-vcac-6-embedded-vco-with-design-center/
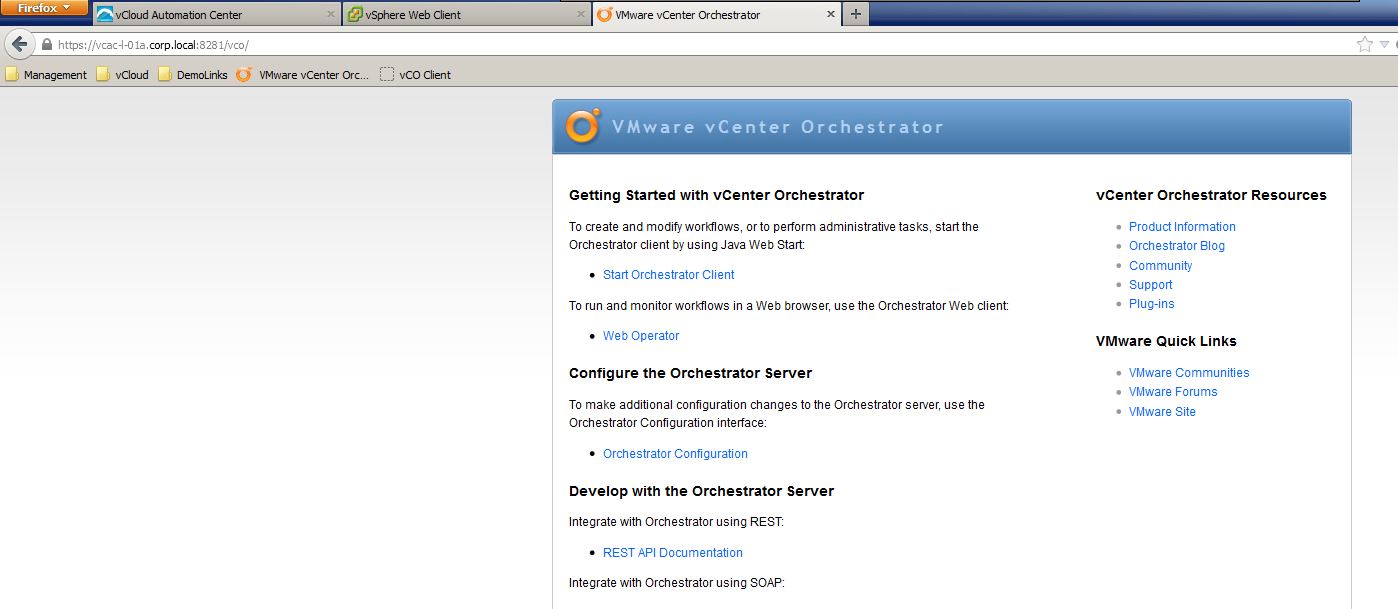
1) Launch the vCO client by connecting to the configuration page at https://vCACapplianceFQDN:8281/vco/
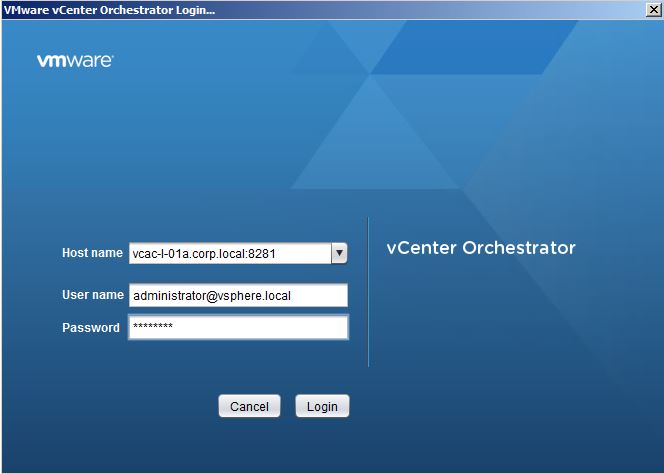
2) Click on the “Start Orchestrator Client” link and login as administrator@vsphere.local and the password you set during the vCAC installation.
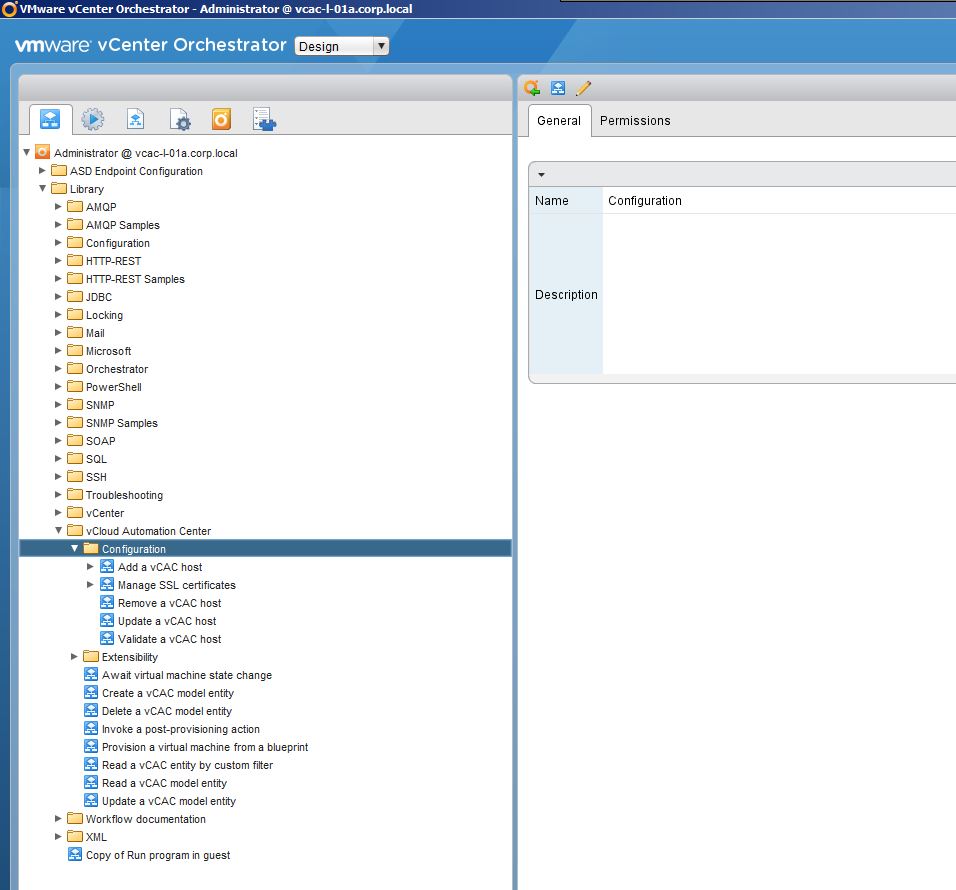
3) Navigate to the vCloud Automation Center folder/Configuration folder
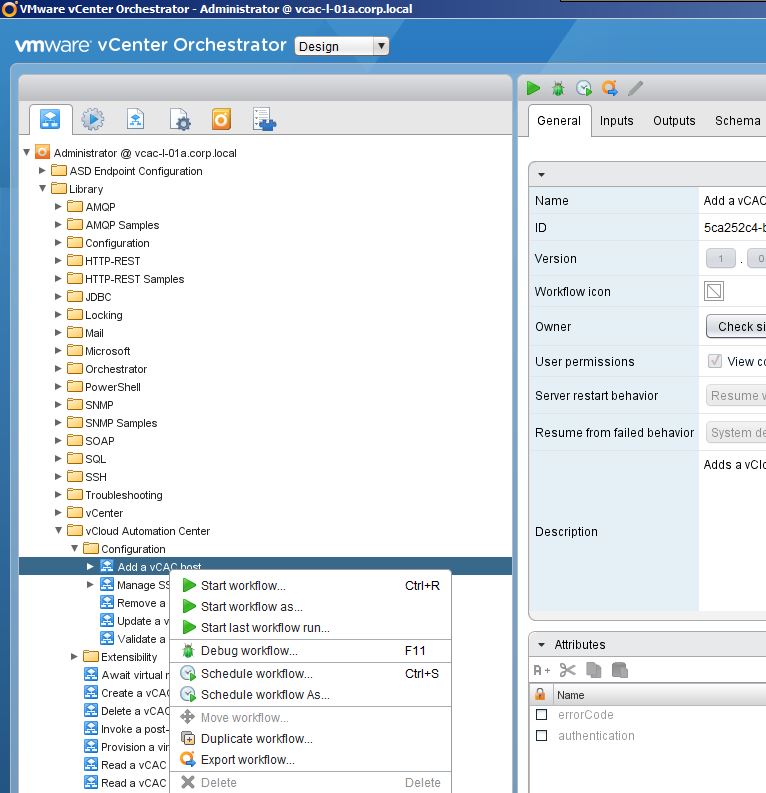
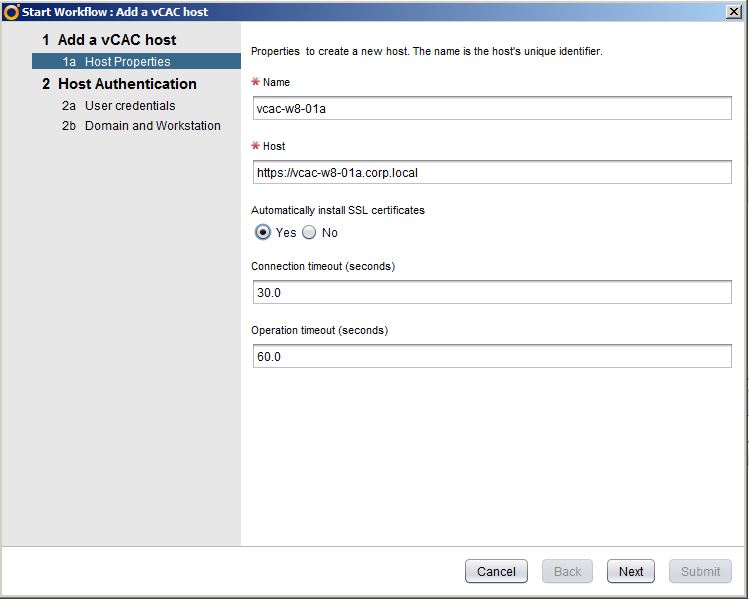
4) Run the “Add a vCAC host” workflow
5) Enter your host information, including the full url https://fqdn_for_vcac_iaas. Make sure you choose yes for importing the SSL certificate.
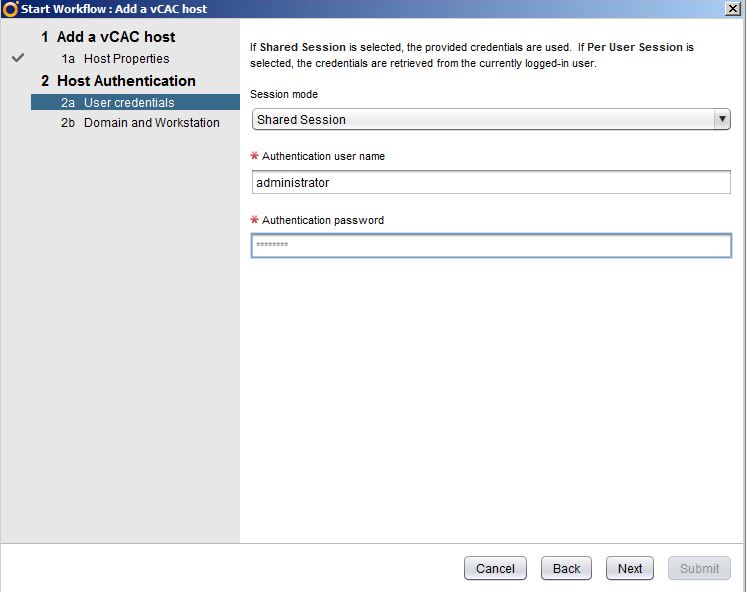
6) Choose Shared Session and enter username and password. Do NOT enter domain with your username. It should be in the format shown here
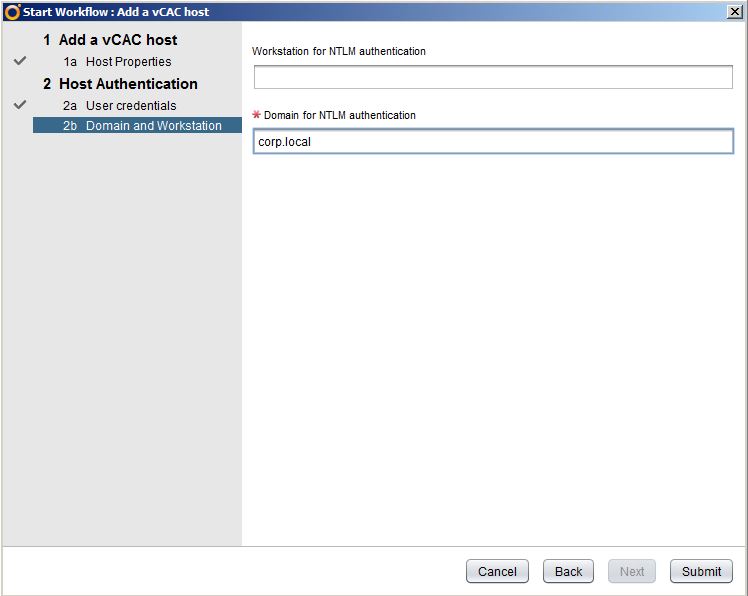
7) Enter your domain name and click submit
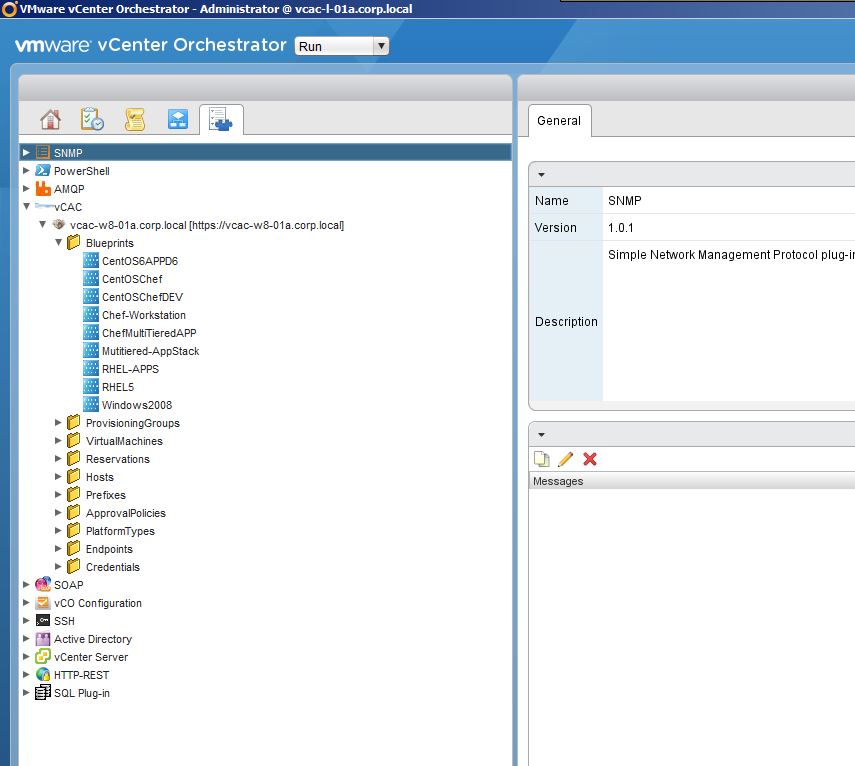
8) If you switch to the inventory view in your vCO client, you will now be able to browse your IAAS components such as Blueprints! You can now interact with these in a variety of ways but more to come on this.

