
vCAC is a powerful and extensible cloud solution. Many of the features of the product are available out of the box. Today I will show you some quick and easy customizations you can make to tailor the solution to your organizations requirements. A common request from customers is to require certain information about new machine requests. This information should then be available to approvers to determine if the machine meets certain requirements for that request. In this example I will show you how to create custom required fields in a request and then make those selections available in the approval e-mail as well as the vCAC approval portal. NOTE: This lesson is assuming you already have vCAC 5.2 installed and you have a working blueprint with Approvals and e-mail enabled.
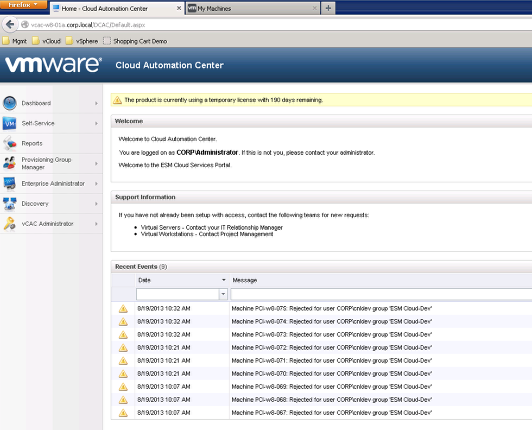
Login to the vCAC administrator portal as administrator
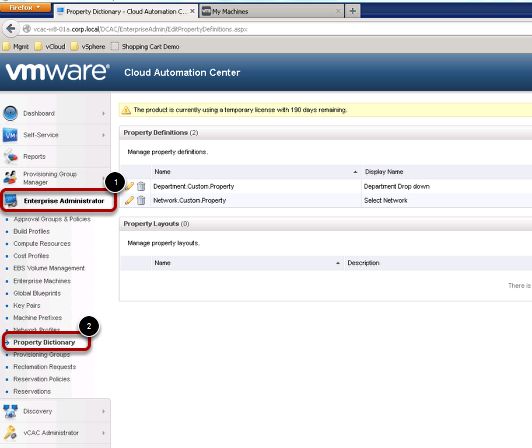
Click the Enterprise Administrators tab on the left then click Property Dictionary
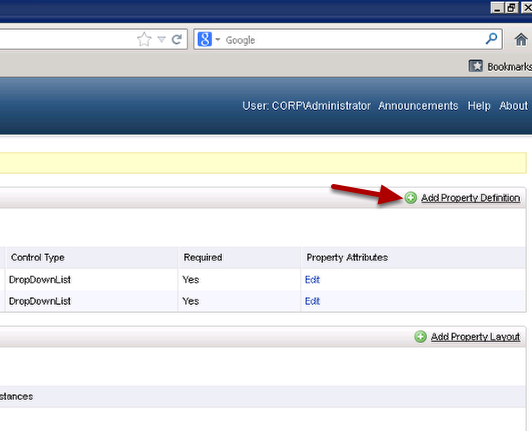
Now click Add Property Definition in the upper right
Let’s create a new Custom Property for Sensitive Data (Enter the following information:)
Now click the green check mark to save it
Now click edit under property Attributes next to the new property you created

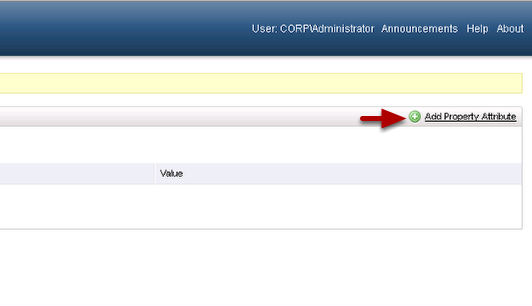
Click Add Property Attribute in the upper right
Enter the following information from the screenshot below (Make sure there is a space between each value after the comma.

Now click the green check box

Now click OK

We now have a Custom property with a drop down list that the requester is required to select. Let’s add it to a blueprint.
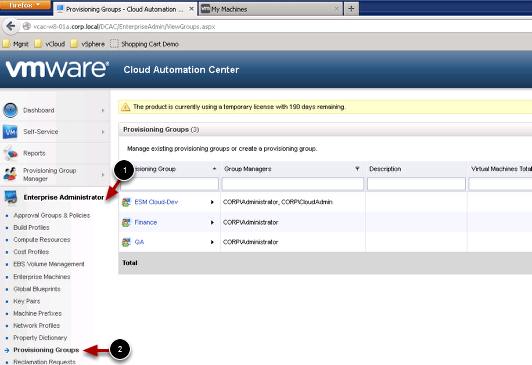
Click the Enterprise Administrator Tab then Provisioning Groups
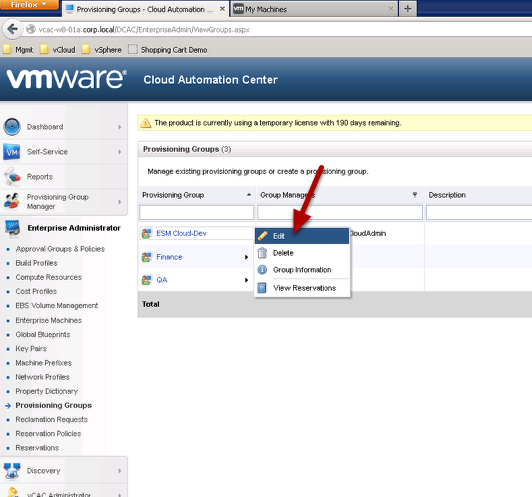
Now edit the provisioning group that you want the custom drop down added to
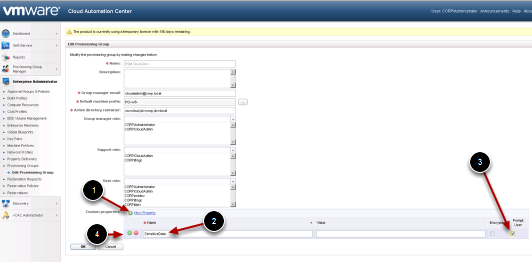
Click New Property, Enter SensitiveData as Name, Check to Prompt user and then click the green check mark
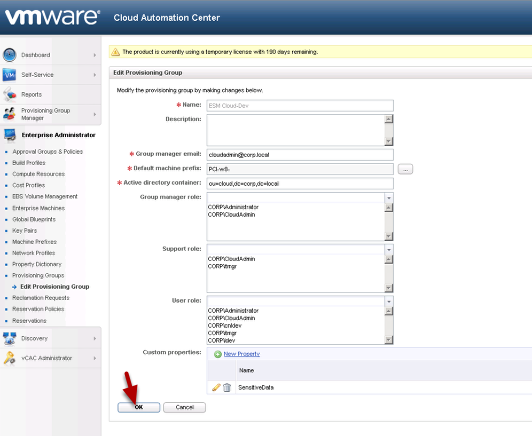
Now click OK
Ok, that will display the users selection in the vCAC request portal but now we need to also modify the e-mail template.
You will need to login to the vCAC server as an administrator or access the installation drive via the network
Change to the directory \Templates under %SystemDrive%\Program Files x86\VMware\vCAC\Server
Make a copy of ApprovalRequired.xslt and save it to a safe place
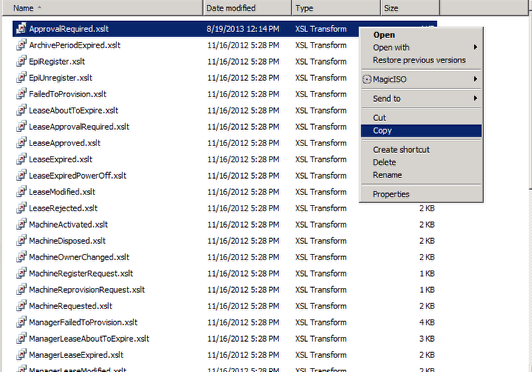
Open ApprovalRequired.xslt in Wordpad or Microsoft Visual Studio Tools for Apparitions (Better)
Scroll to the bottom and add the following text between </table> and </body> as shown
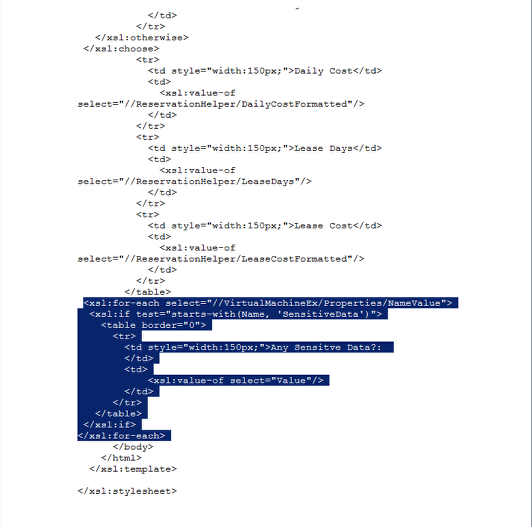
<xsl:for-each select=”//VirtualMachineEx/Properties/NameValue”>
<xsl:if test=”starts-with(Name, ‘SensitiveData‘)”>
<table border=”0″>
<tr>
<td style=”width:150px;”>Any Sensitve Data?:
</td>
<td>
<xsl:value-of select=”Value”/>
</td>
</tr>
</table>
</xsl:if>
</xsl:for-each>
NOTE: The item in blue is the custom property name you added to the Provisioning group. If it does not find this it will not display the additional field in the e-mail. This ensures you can use the same template for all different kinds of requests. The item in Red is the discription of the user selected data field. This can be whatever you want.
Now save the ApprovalRequired.xslt
Now lets see it all together in action
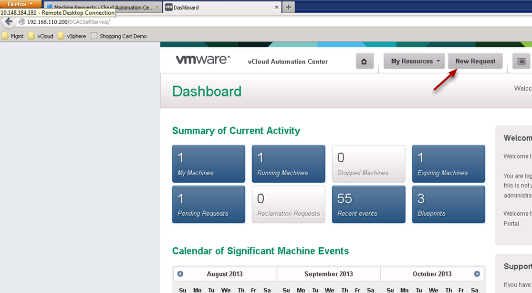
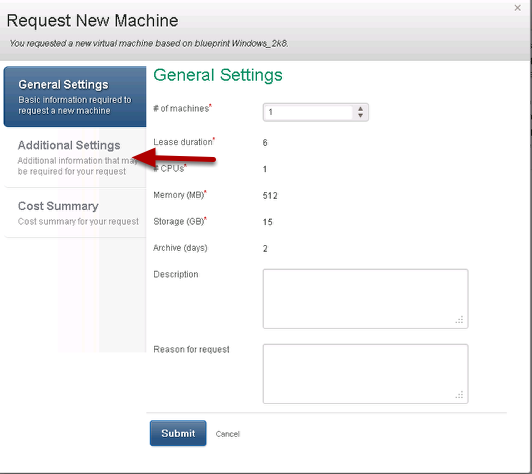
Login to the Self service portal as a user in the provisioning group we added the custom property to and click New Request
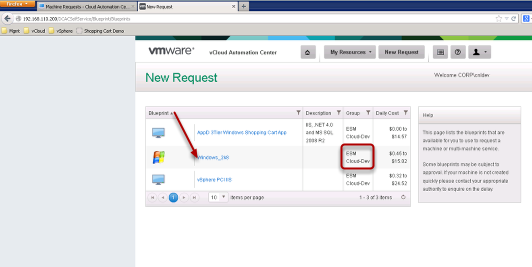
Click on a Blueprint that is part of the provisioning group that we added the custom property to
Notice a new tab for Additional Settings has been added
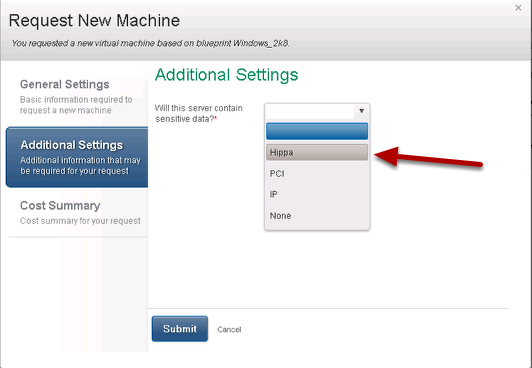
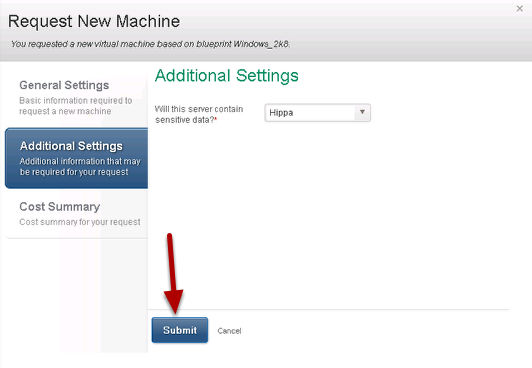
Click additional Settings and then choose an option from the drop down list
Now click Submit
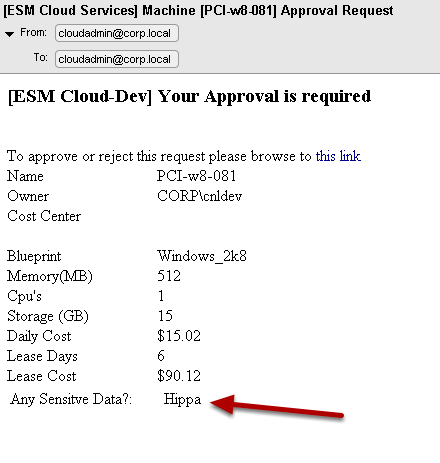
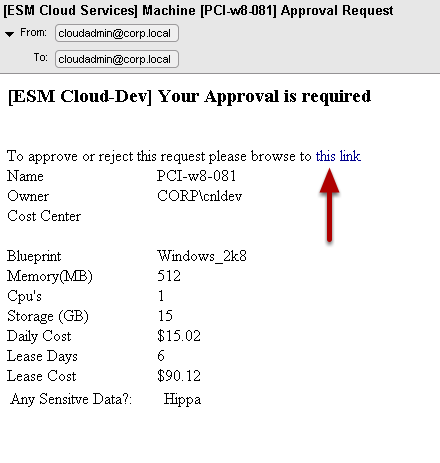
Now switch roles and check the e-mail of the approval group manager
Notice that the e-mail now shows information about the required field:
Now click the link to open the self service portal
Notice the self service portal also shows the custom property and their selection

It should have a way to display the field as a drop down list on the approval page too, like in the Self Service Portal, that would be much more safe. In this way if the approver changes the field it can mistype something and broke the provisioning workflow.