
UPDATE: Please note, this is the legacy method. Please see the following post for the vCO method of this integration. http://managesddc.com/2014/03/25/addremove-vcac-iaas-vms-tofrom-dns/
This guide will show you how to setup vCAC to automatically create a static host A record and a reverse look up pointer in your Windows based DNS. This is most often needed to be able to automate deployments of Linux machines as Linux does not play well with Windows Based DNS when you are using static IP address assignment. However, you can also use this with Windows machines if you don’t allow self registration of Windows on your network. Special thank you to Alex Ciunciusky @alexbhp for the help with this one.
This guide requires the following:
- You already have vCAC fully deployed and you are able to provision systems to vSphere.
- You are using Network profiles and a static IP pool and the DNS suffix information is entered.
- You have design center installed and functional.
- The account that you installed vCAC and specifically the DEM service also has rights to administer the DNS server or zone you are trying to automate
- This guide was tested with vCAC 6 but should also work with 5.1 and 5.2 (No guarantee though)
Let’s get started.
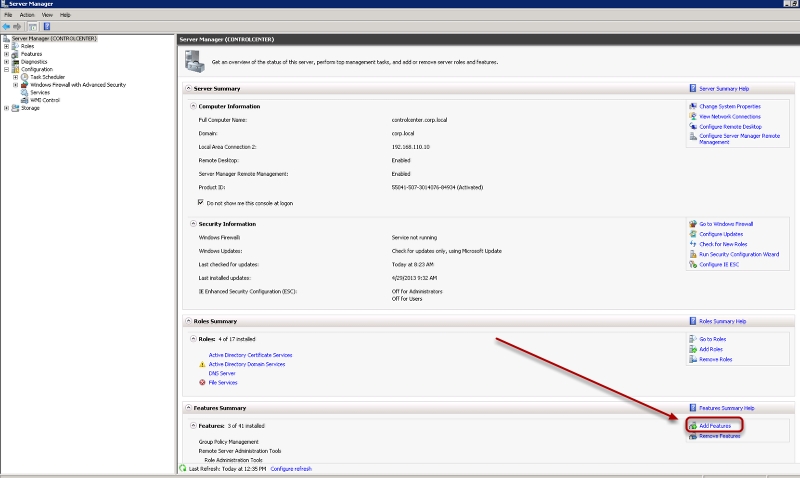
Step 1: We will need to be sure that DNSCMD.exe is present on the vCAC IaaS Windows Server. To install it, start by opening server manager, select server manager on the upper left and then on the right screen click on Add Features
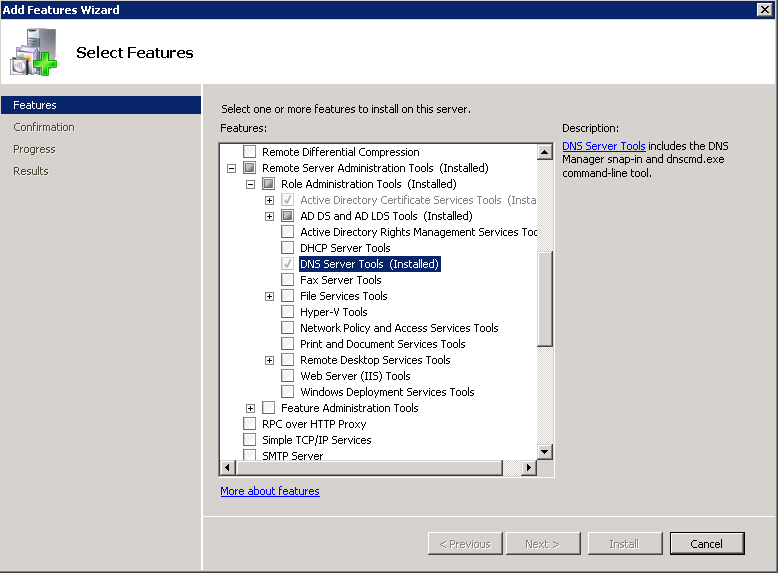
Step 2: Now scroll down to Remote Server Administration Tools, Role Administration Tools and check mark DNS Server Tools and click next to install it. (Note on some systems it may already be installed)
Step 3: Now we will need to create the window script we want to run each time a server is provisioned. Create a new script file with the following and save it to a folder on the C: drive of the vCAC windows server. You can also copy and paste this from the text below the image. NOTE that you need to replace controlcenter.corp.local with your DNS servers name or address.
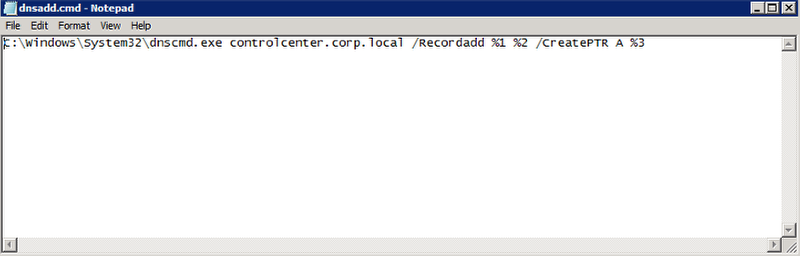
C:\Windows\System32\dnscmd.exe FQDNofmyDNSServer /Recordadd %1 %2 /CreatePTR A %3
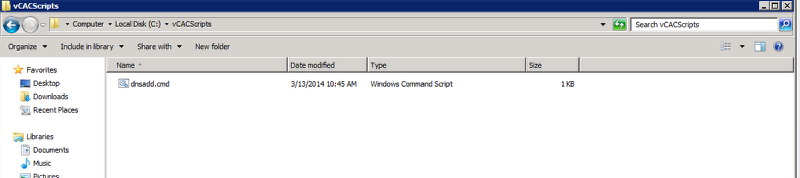
Step 4: Save this as a file type cmd to new folder named C:\vCACScripts. Be sure it is listed as type Windows Command Script. It should look like this:
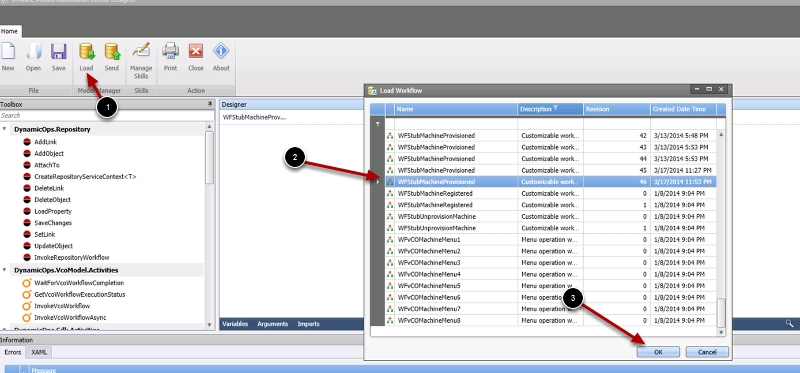
Step 5: Now open vCAC design center and we will modify the Machine Provisioned Workflow to call this script and pass it three custom properties of the DNSSuffix Hostname and IP address. Load the WFStubMachineProvisioned
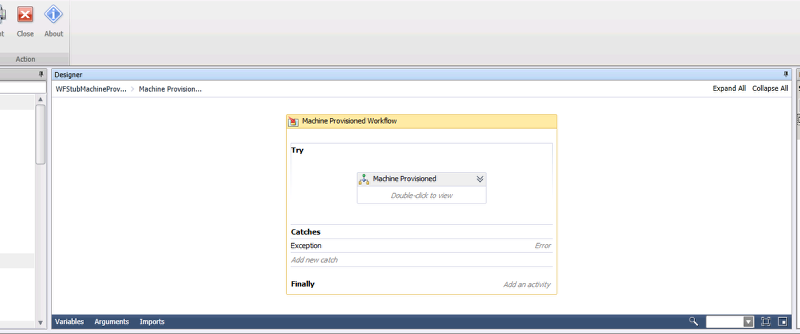
Step 6: Now click on Machine Provisioned
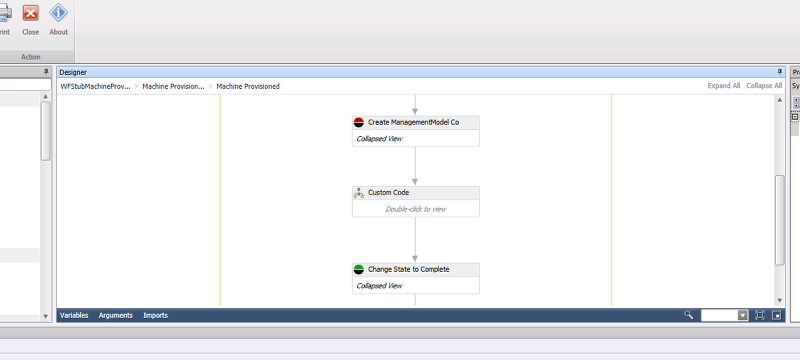
Step 7: Now click on custom code
Step 8: Now drag out and create the following flow
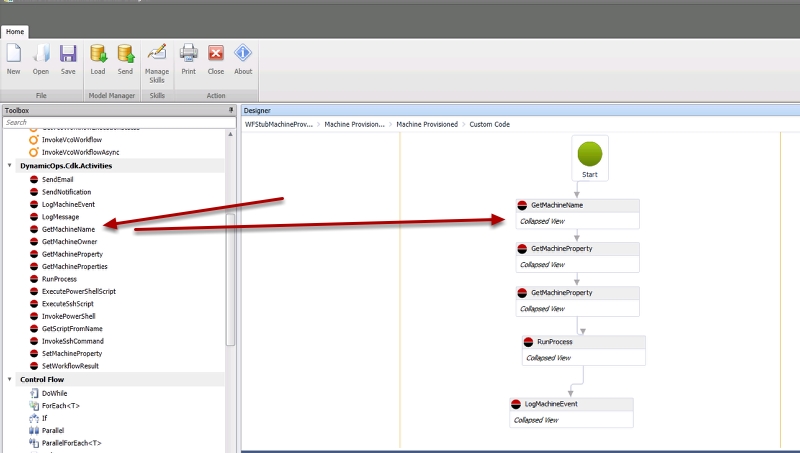
Step 9: Now create the following variables
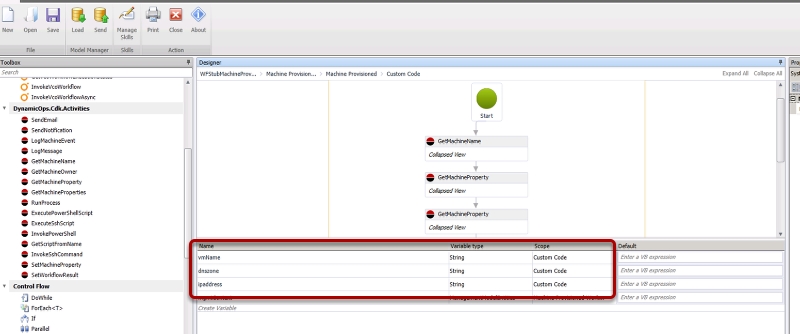
vmName
dnszone
ipaddress
Step 10: Now let’s build out the properties we want to pull from the request and convert to a string, double click on GetMachineName and enter the following, then click back to Custom code
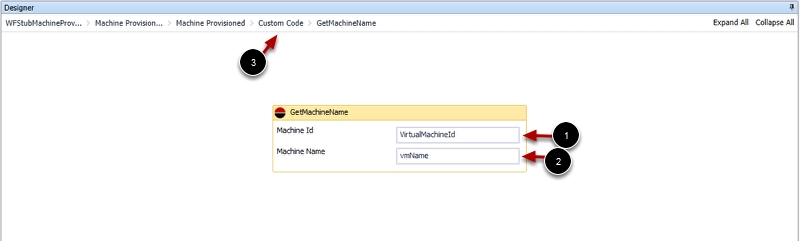
NOTE: The text above is case sensitive
Step 10: Now click on the first GerMachineProperty and enter the following: (See below image to copy and paste text.
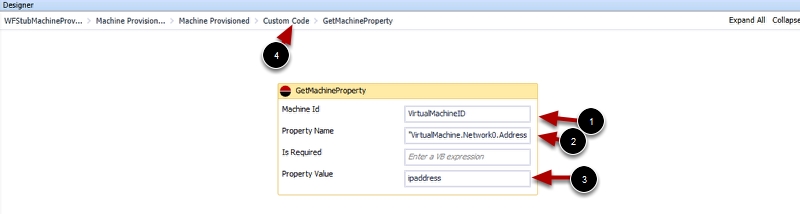
VirtualMachineID
 "VirtualMachine.Network0.Address"
 ipaddress
Step 11: Now click on the second GetMachineProperty and enter the following:
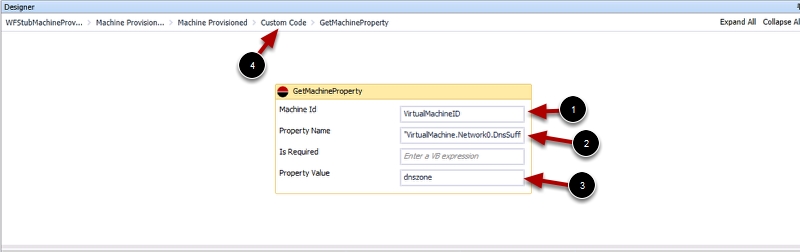
VirtualMachineID
"VirtualMachine.Network0.DnsSuffix"
dnszone
Step 12: We’re almost there, now click on RunProcess and enter the following:
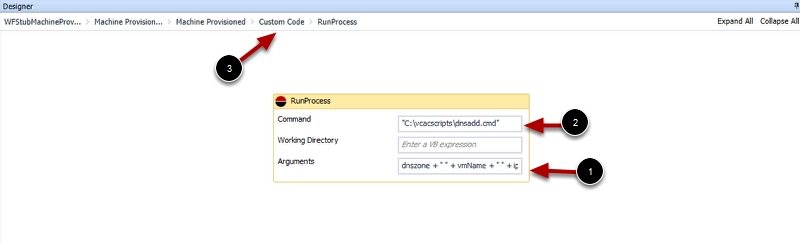
"C:\vcacscripts\dnsadd.cmd"
dnszone + " " + vmName + " " + ipaddress
Step 13: Now double click on LogMachineEvent and enter the following:
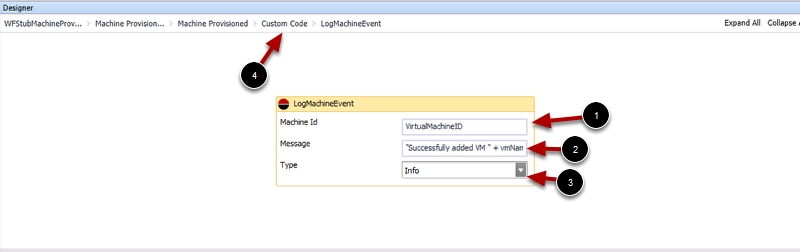
VirtualMachineID
"Successfully added VM " + vmName + " to the DNS"
Step 14: Now click send to save this back to vCAC

Step 15: Now create a build profile that calls the Machine provisioned Workflow stub.
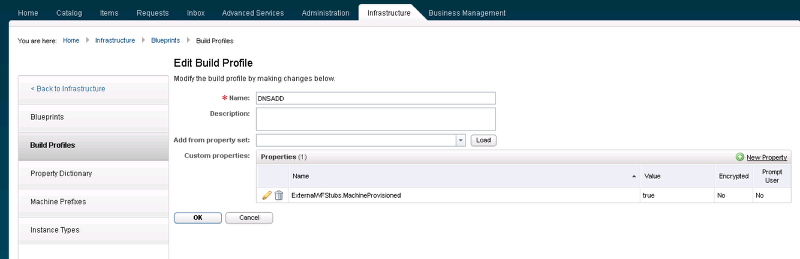
ExternalWFStubs.MachineProvisioned true
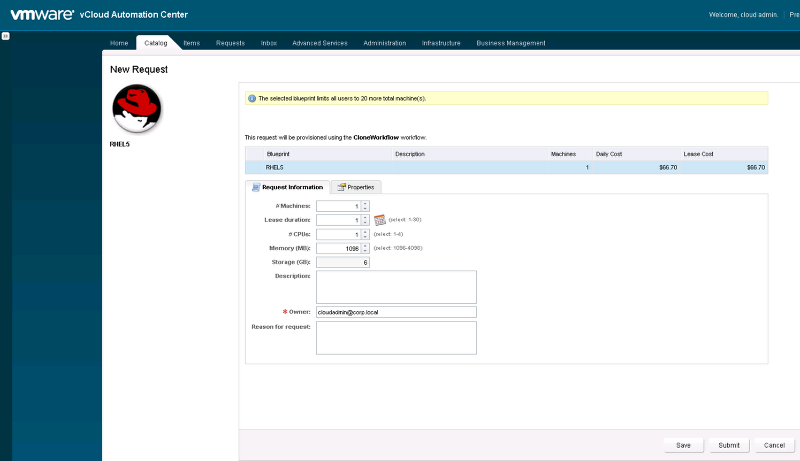
Step 16: Attach to a blueprint

Step 17: Fire off a new request and let the magic of automation begin!!
Thank you for the post – great info. For clarity – any options exist that might have accommodated vCO over vCAC Designer to frame the automation? Again, always appreciate your postings
Hi Michael, The vco way is right here: http://managesddc.com/2014/03/25/addremove-vcac-iaas-vms-tofrom-dns/