The Puppet Plugin 2.0 for vRealize Automation is here so let’s put it to good use by integrating it with vRealize Automation Blueprints!
Pre-Reqs:
- Puppet Plugin Installed and Configured. See my guide here
- A Puppet master server running Puppet Enterprise 2016.4 or newer, or open source Puppet 4.6.2 or newer
- vRealize Orchestrator 7 or newer
- vRealize Automation 7 or newer
- The Puppet Starter Content Blueprints downloaded and installed in vRA from here
- A quiet place where you will not be interrupted see my guide here
First we need to install some content on the Puppet Master
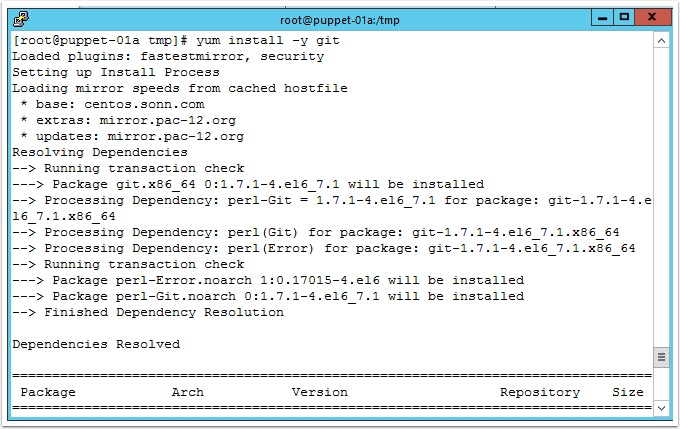
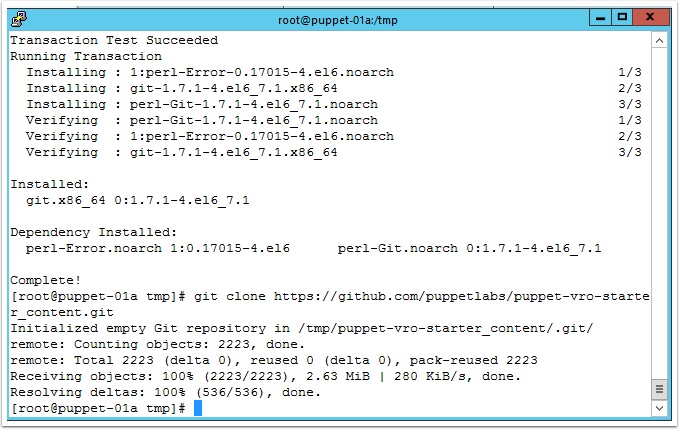
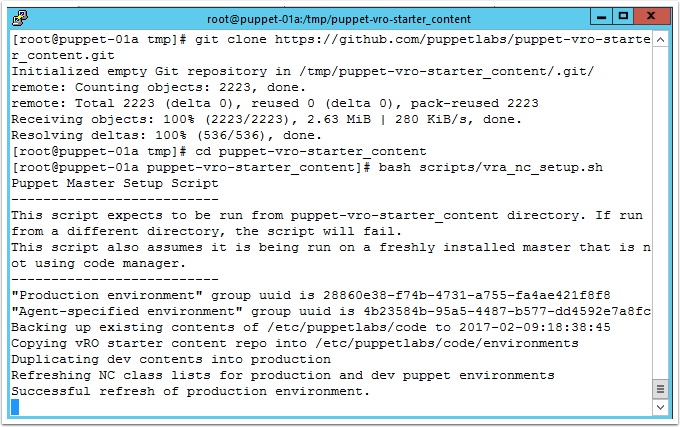
SSH to the Puppet Master and type the following to install git
yum -y install git
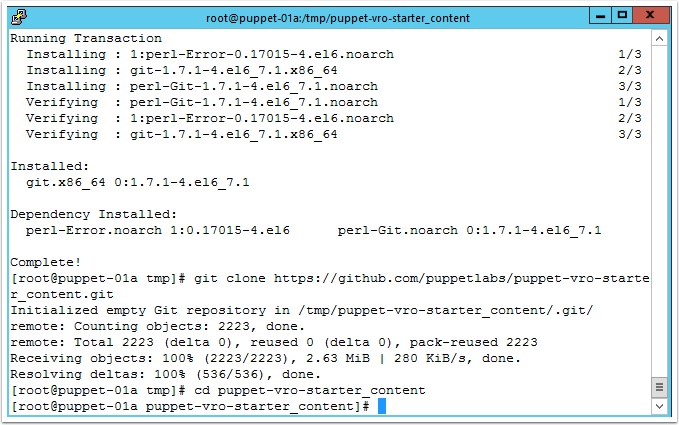
git clone https://github.com/puppetlabs/puppet-vro-starter_content.git
cd puppet-vro-starter_content
Run the script to install content with the following
bash scripts/vra_nc_setup.sh
puppet agent -t
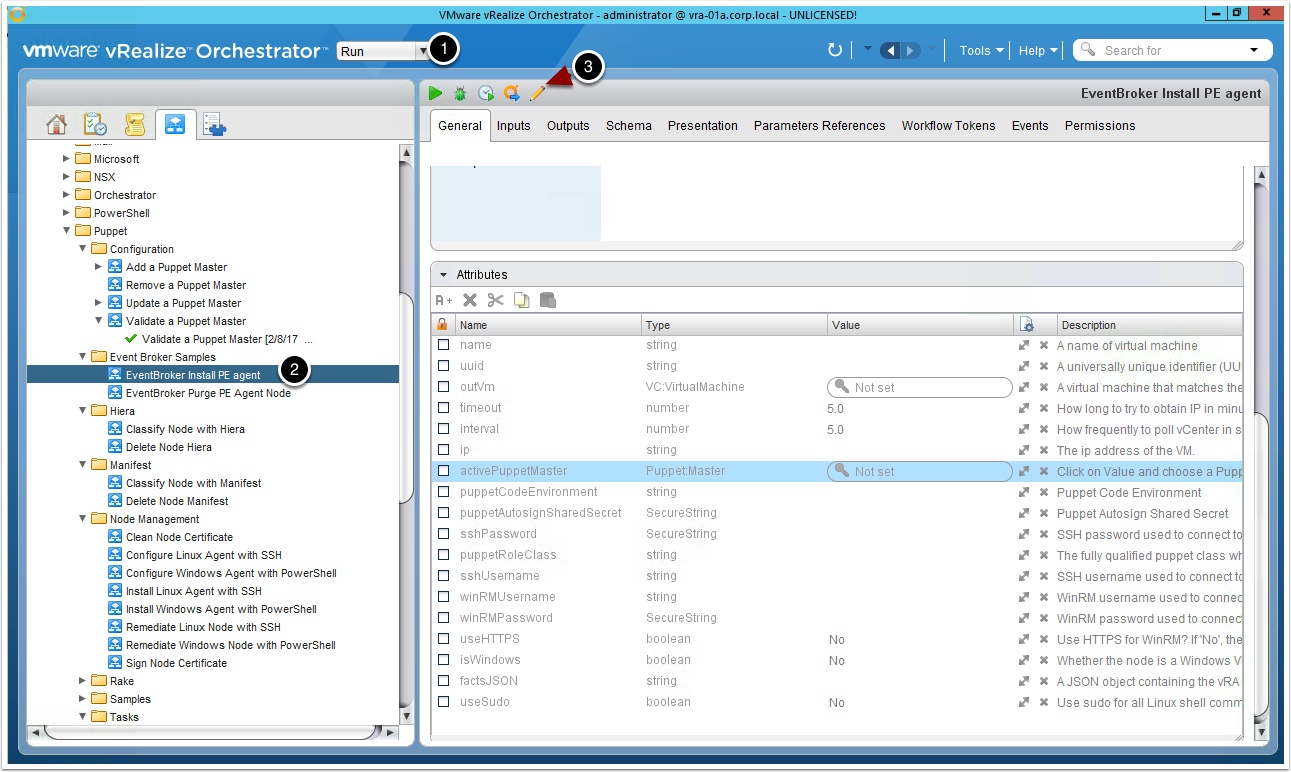
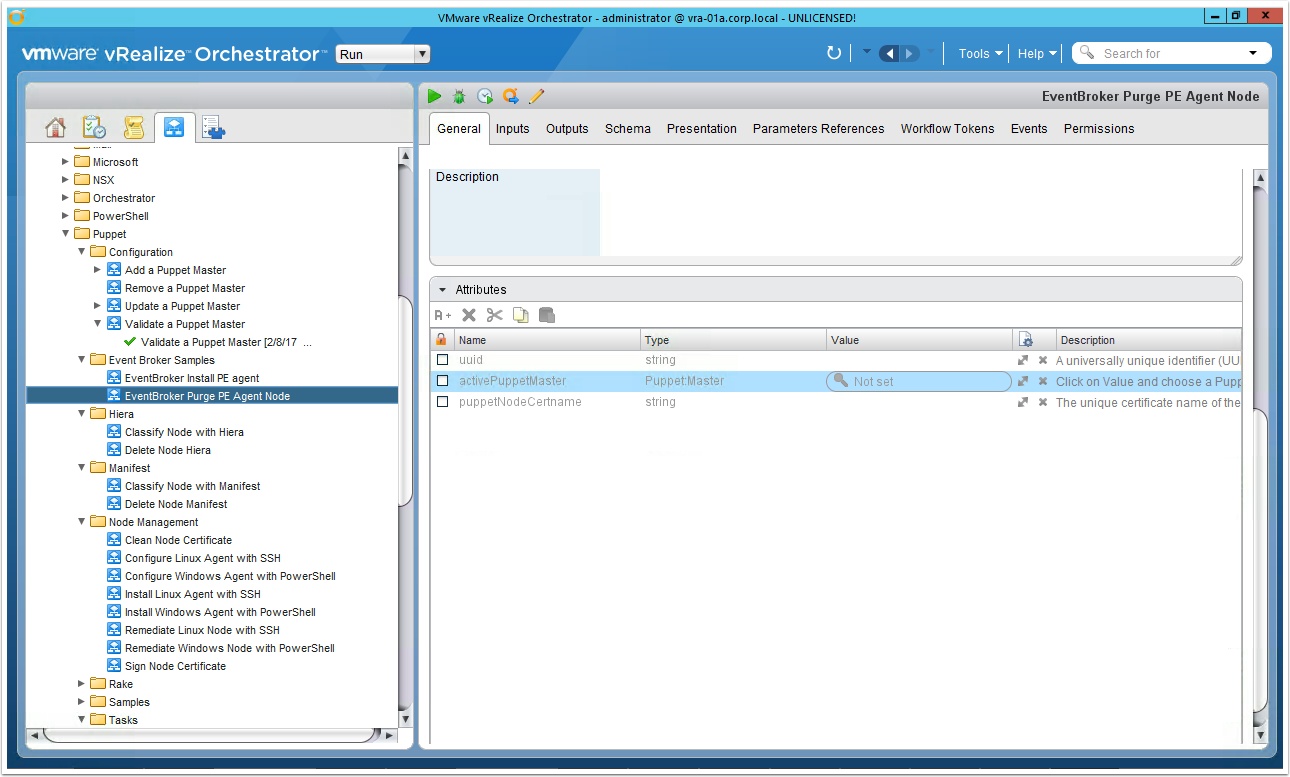
Open the vRealize Orchestrator Client and update the Event Broker Workflows
- Change view to run
- Select the EventBroker Install PE agent workflow
- Click the pencil to edit
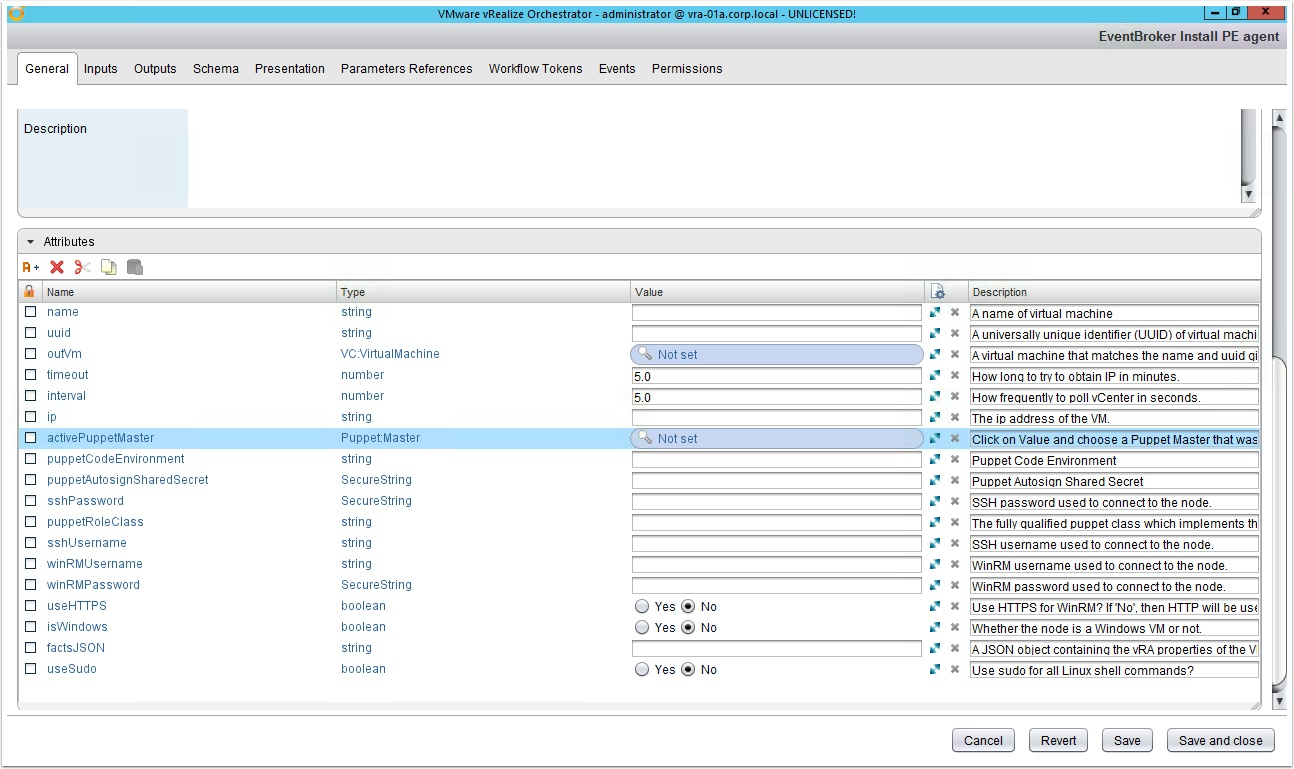
Click Not Set to select the Puppet Master we added earlier
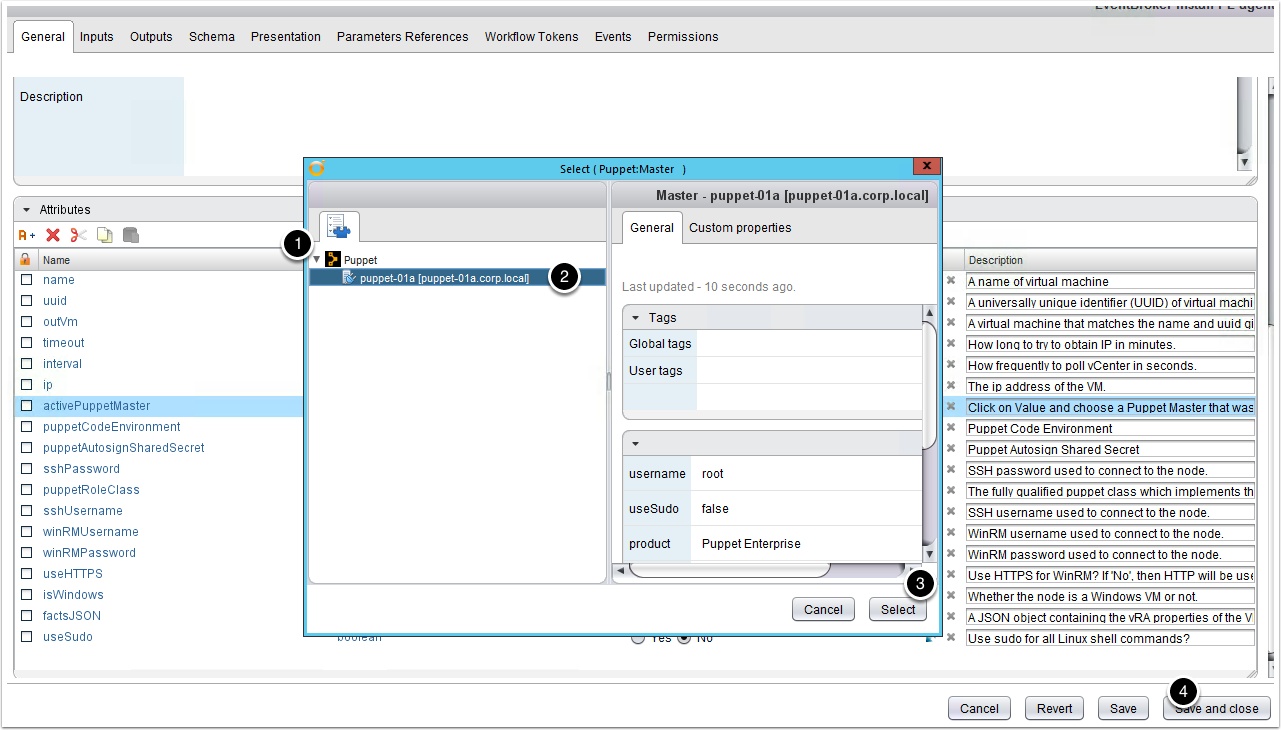
Select the puppet master server
- Click Puppet Dropdown
- Select the puppet master
- Click Select
- Click Save and Close
At this point you should already have uploaded the sample blueprints to vRealize Automation, if not download the Linux and/or Windows Blueprints and my guide for instructions to import using Cloud Client.
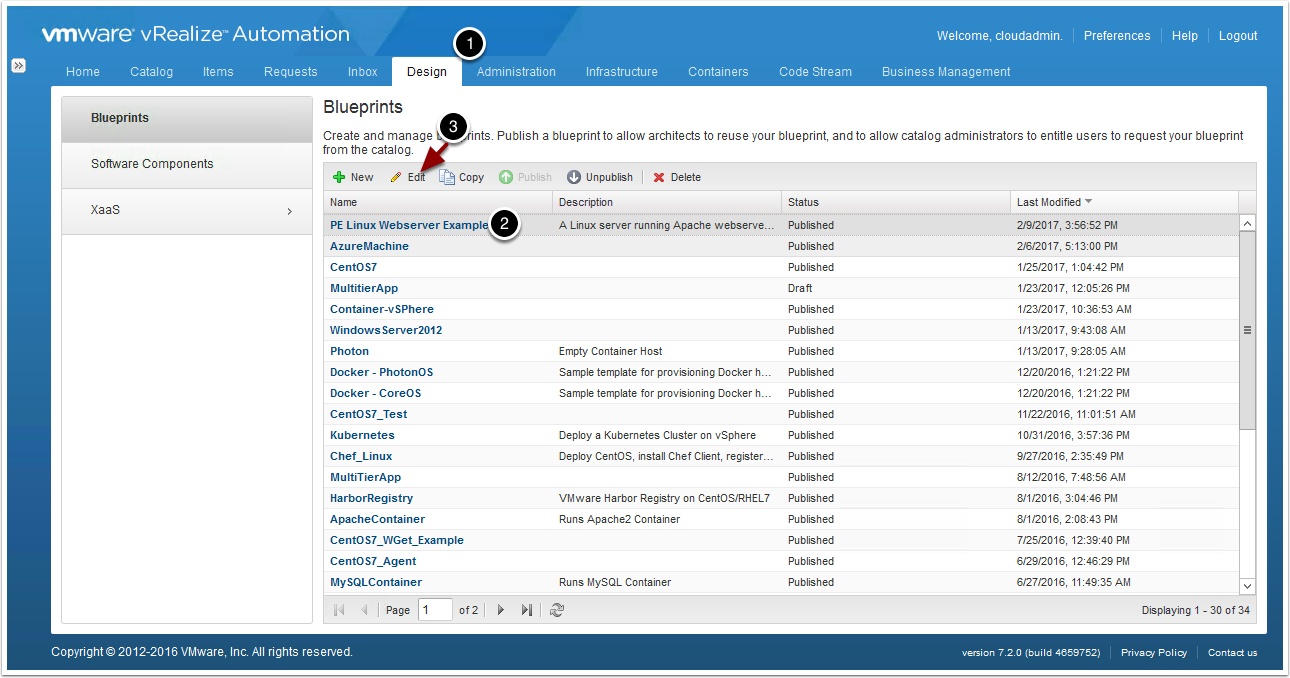
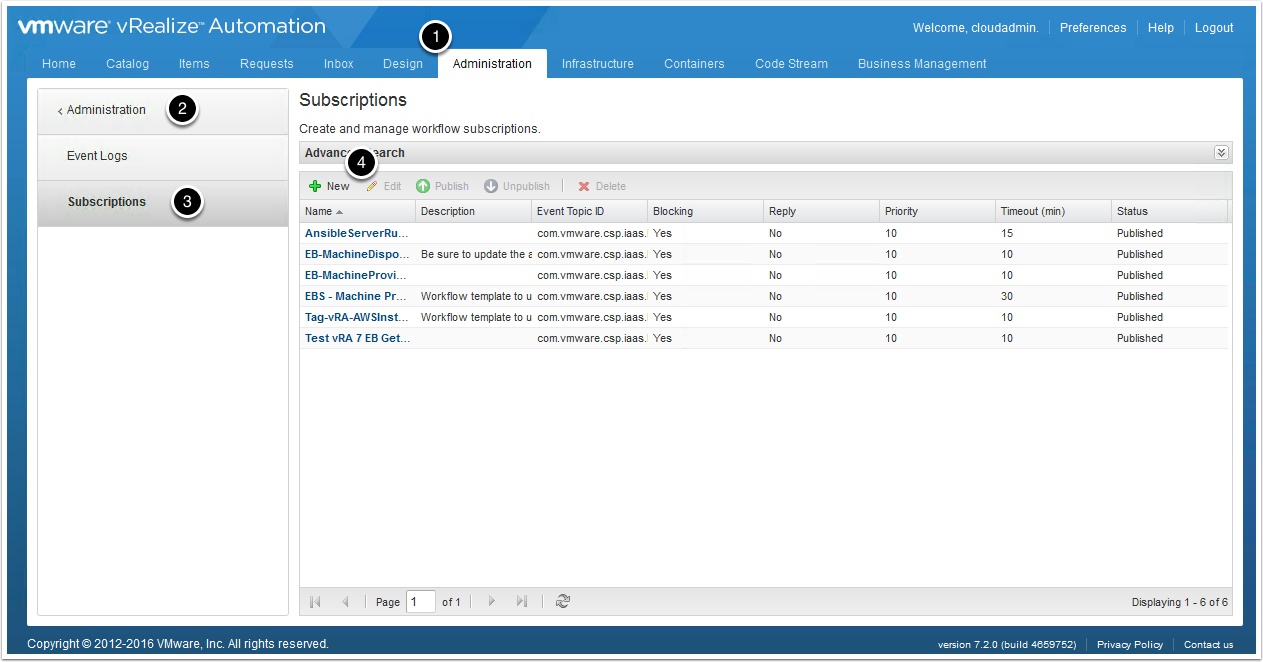
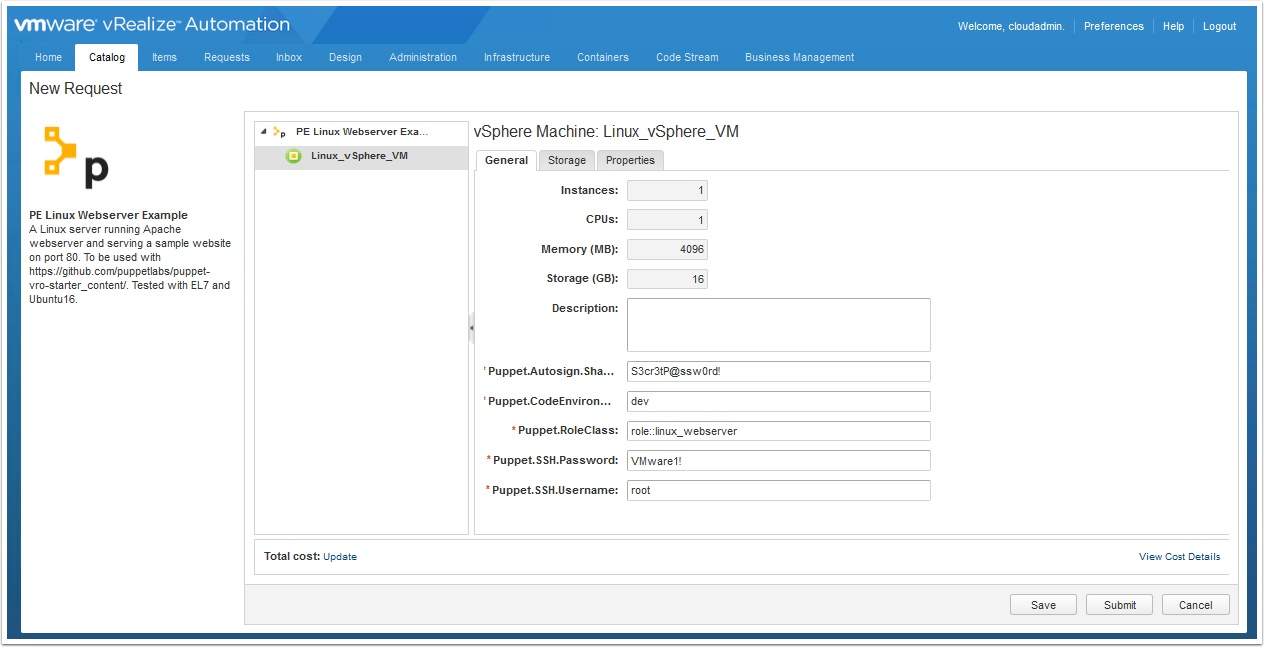
Go to the design tab and edit the sample blueprint
Select a RHEL/CENTOS 7 Template
- Click the Linux_vSphere machine
- Click the Build Information Tab
- Select the template
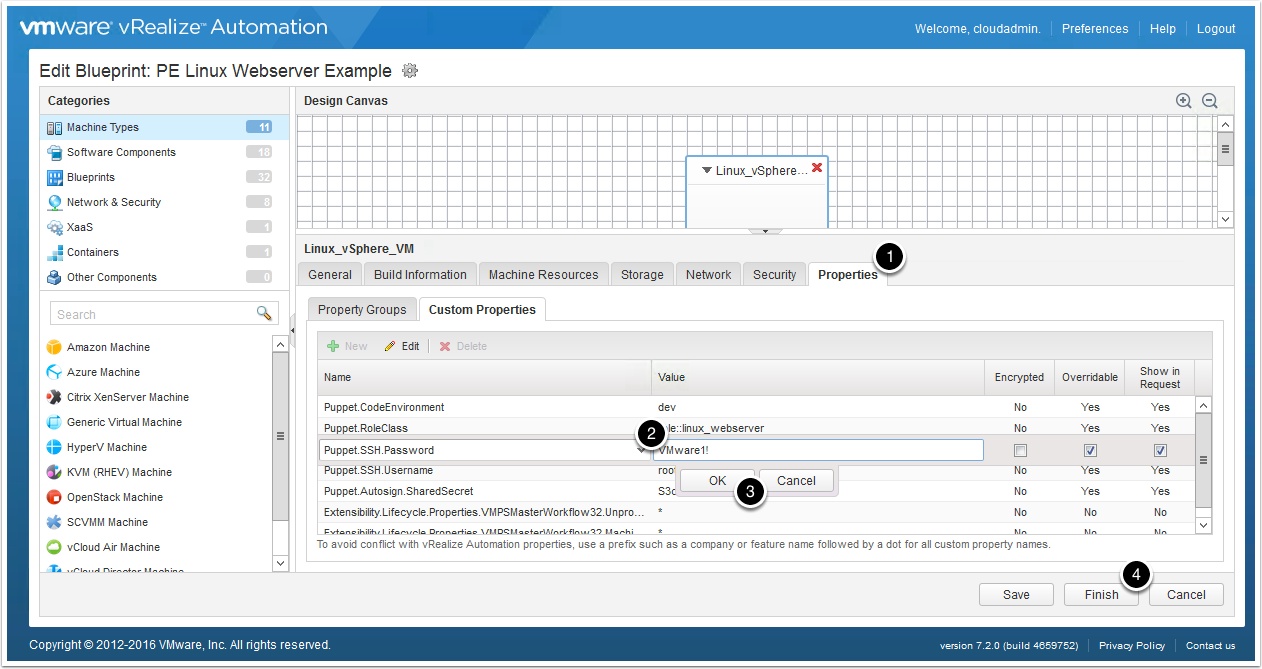
Enter the root password in the Custom Properties
- Click Properties
- Enter the password to login to the provisioned machine
- Click Ok
- Click Finish
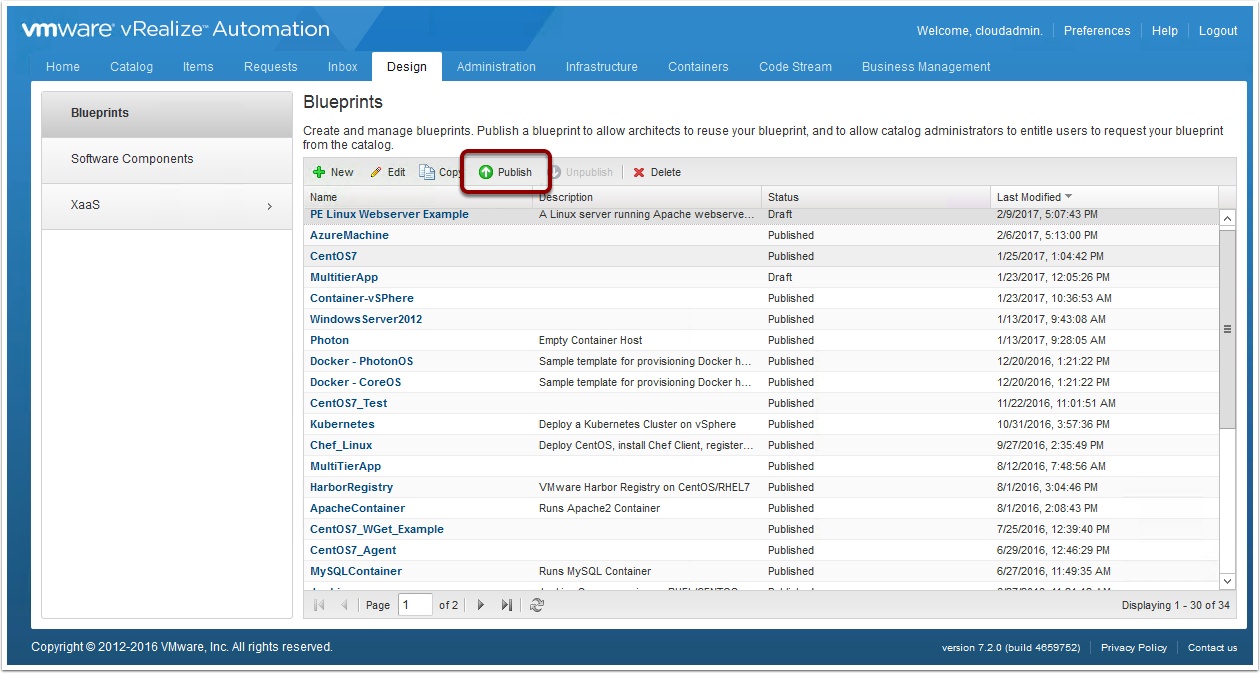
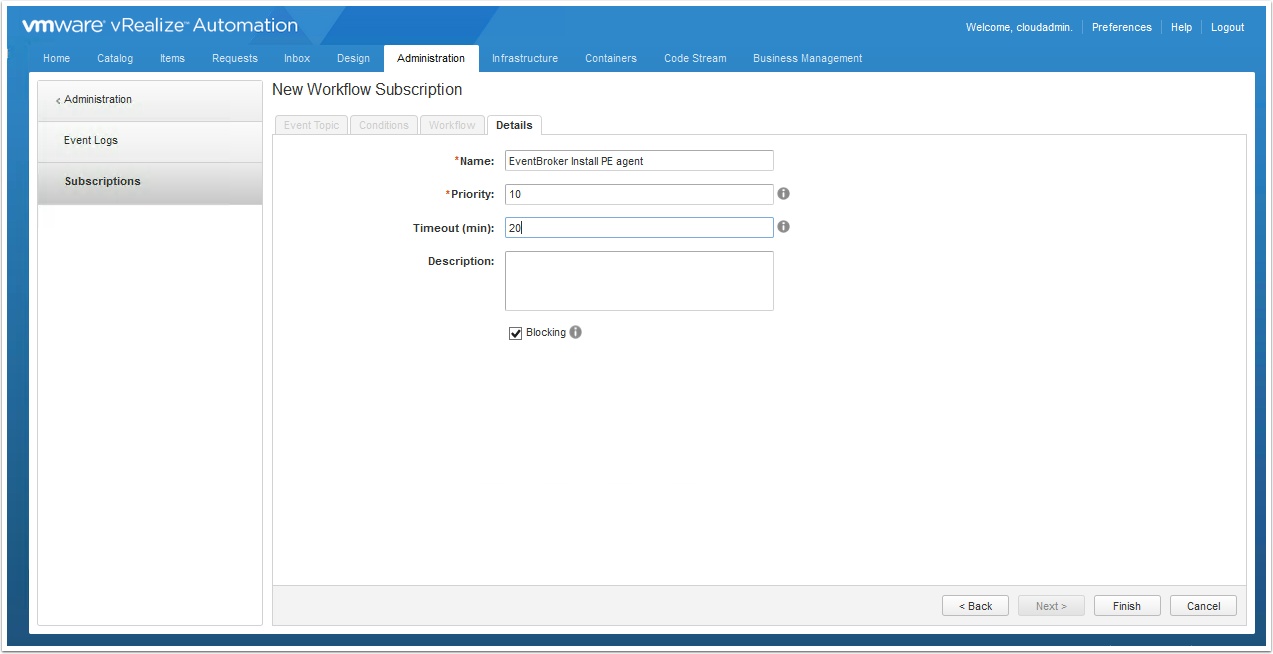
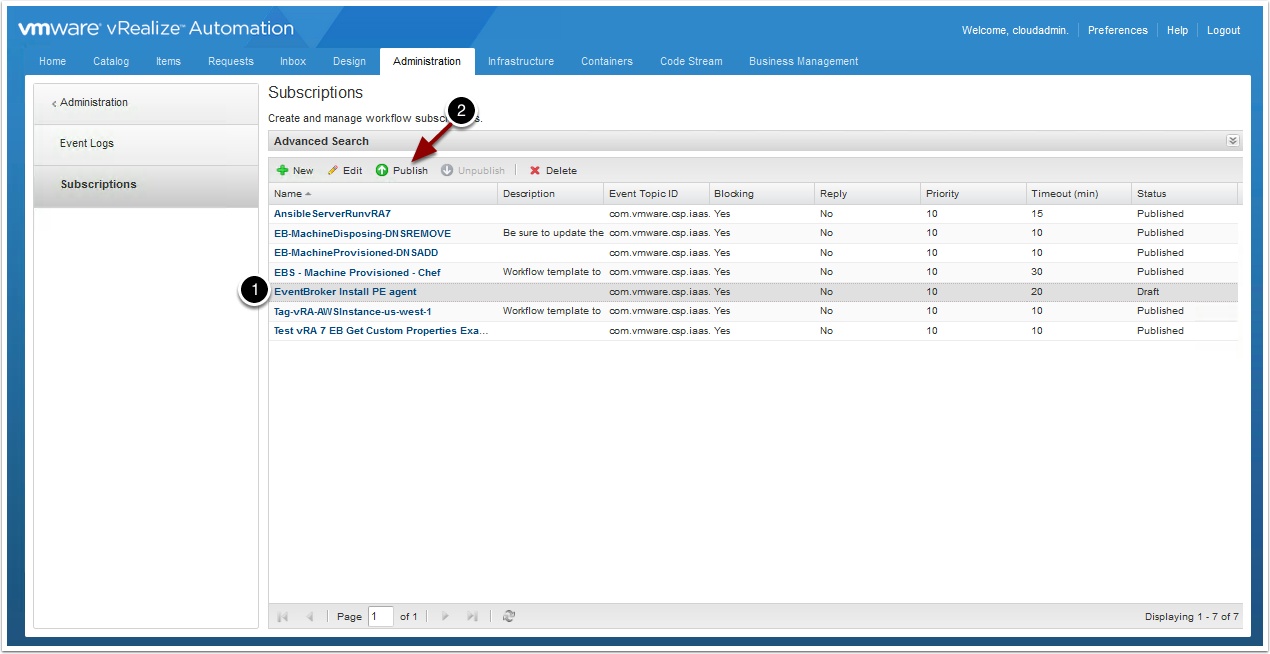
Click machine provisioning and click next
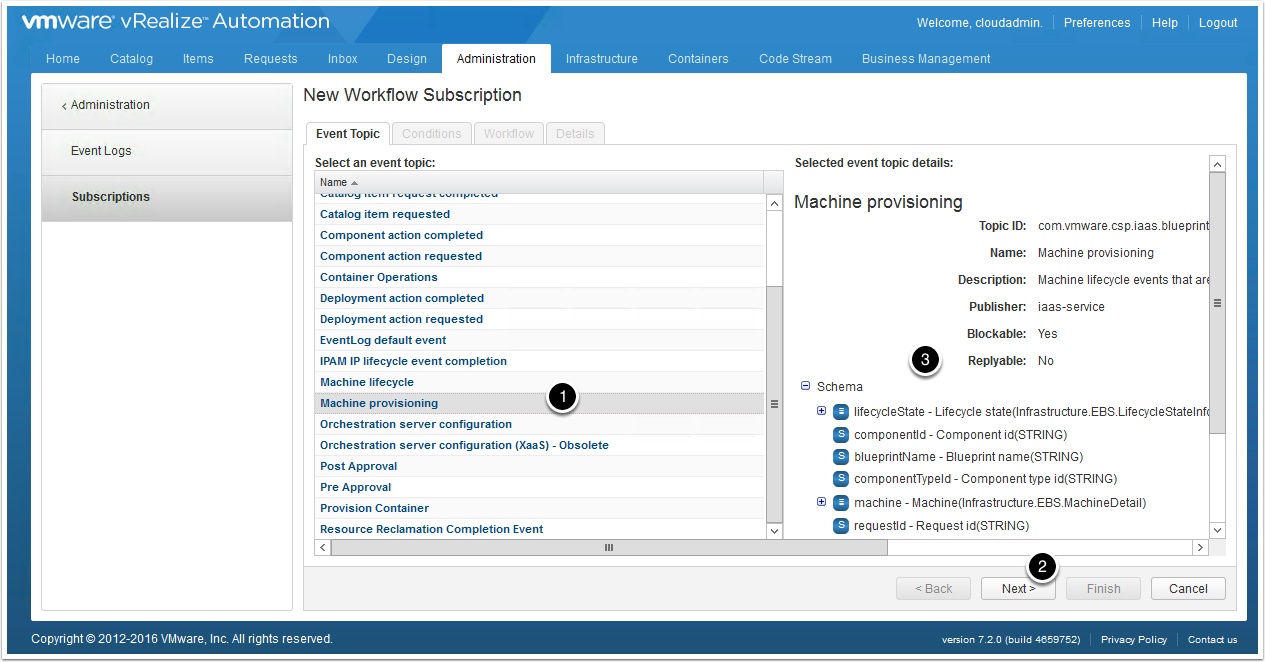
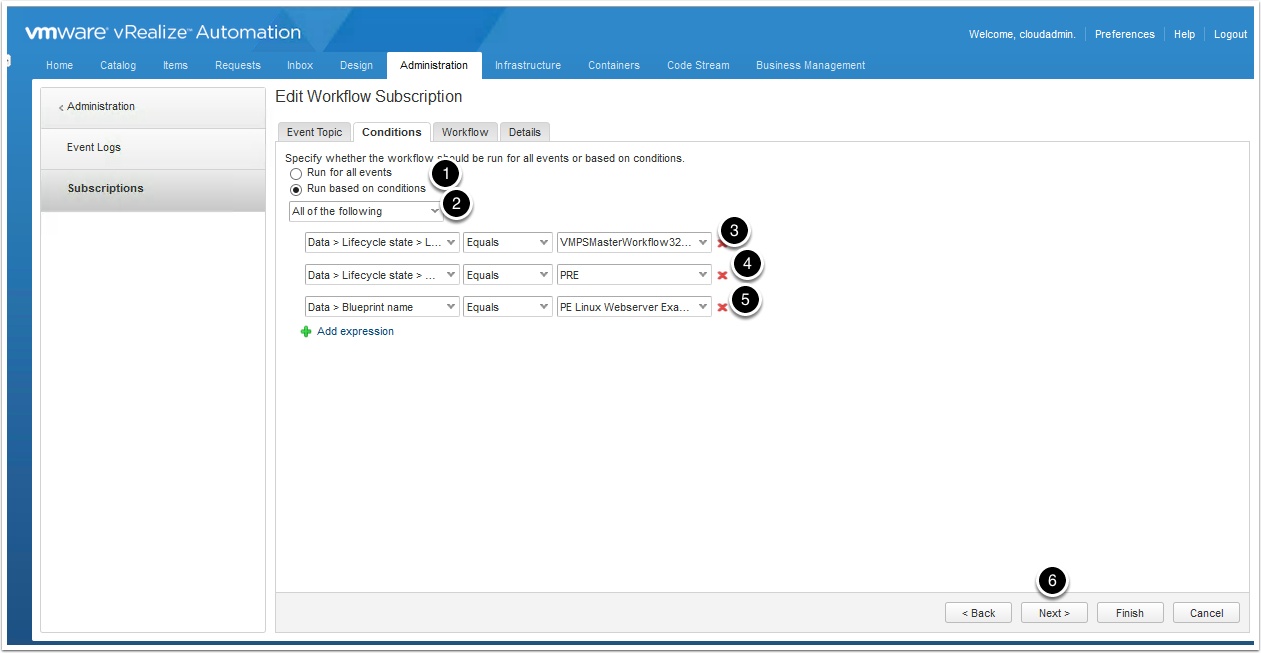
Enter the following
- Run based on conditions
- All of the following
- Data > Lifecycle state > Lifecycle stage name => Equals => (Constant) VMPSMasterWorkflow32.MachineProvisioned
- Data > Lifecycle state > State phase => Equals => (Constant) PRE
- Data > Blueprint name > Equals > PE Linux Webserver example
- Click next
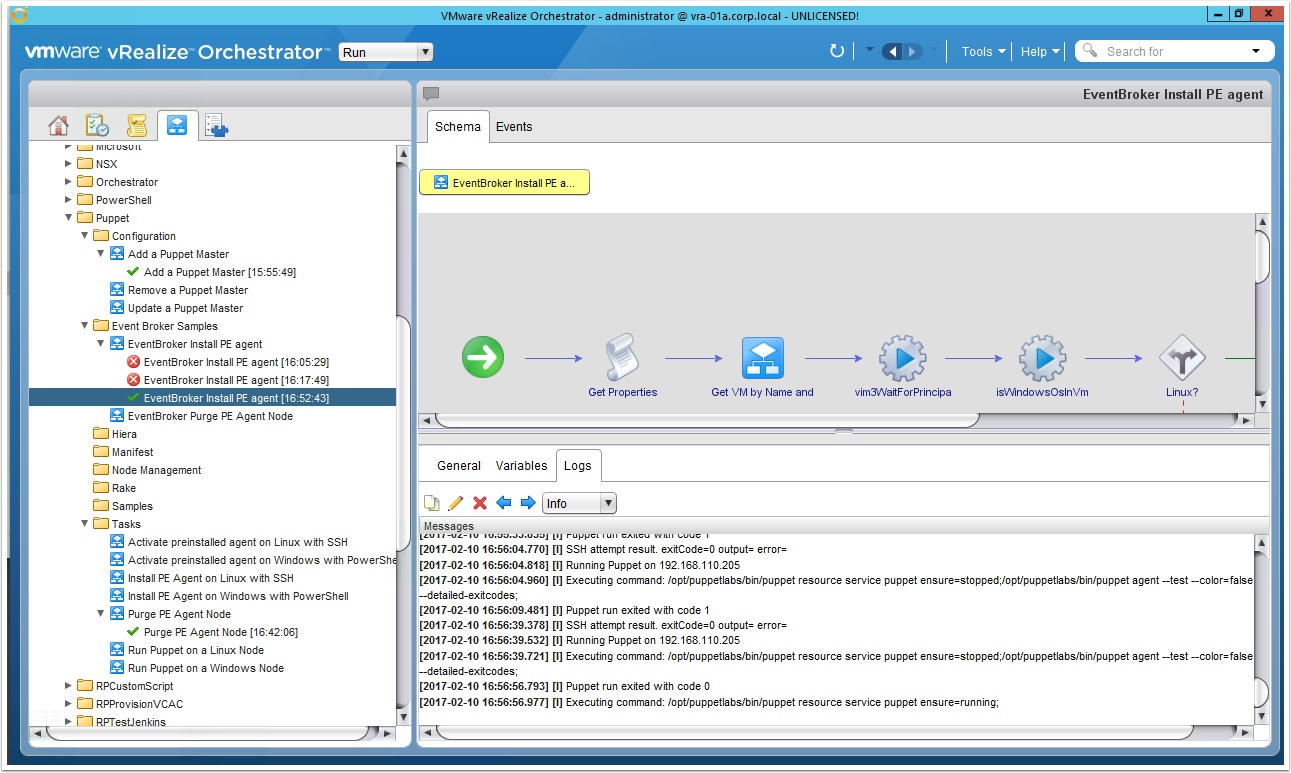
Check the vRO Client to verify the workflow ran
Notice I have a couple that failed, see my guide here to fix this issue.
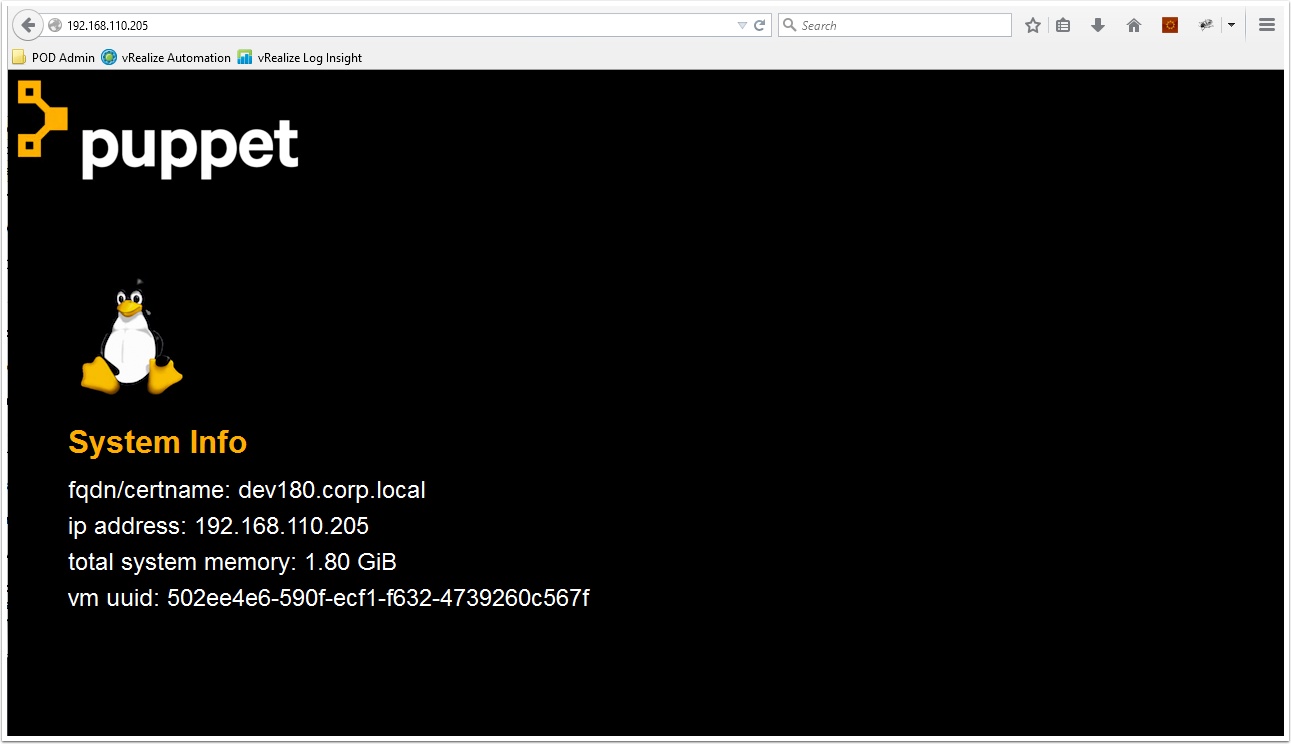
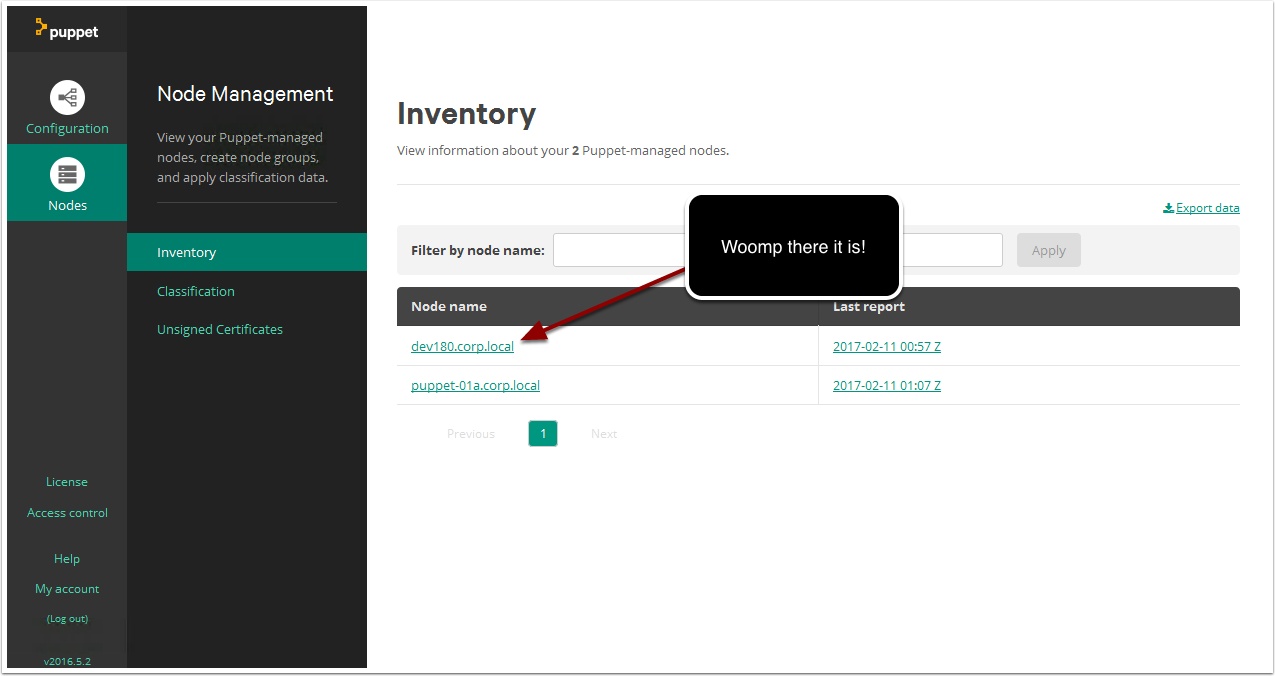
Enjoy!




Hi
I follow step your
(com.vmware.library.vc.vm.tools/vim3WaitForPrincipalIP) Error in (Dynamic Script Module name : vim3WaitForPrincipalIP#0) ReferenceError: vm is not defined for waiting for the DNS name
Check that the vCenter Plugin is working and configured properly, browse the plugin in vRO client or try to run a simple vCenter workflow.
OK Thank you.
I can provisioned
Do you have step remove agent puppet ?
I input subscriptions > workflow ‘EventBroker Purge PE Agent Node’
Input Conditions
Data > Lifecycle state > Lifecycle stage name => Equals => (Constant) VMPSMasterWorkflow32.Disposing
Data > Lifecycle state > State phase => Equals => (Constant) PRE
when delete vm. In workflow vRO error ‘Error in (Workflow:EventBroker Purge PE Agent Node / Get Properties (item1)#42) TypeError: Cannot call method “get” of null’
Thank you.
Can I add the Puppet Master from a RedHat Satellite installation? I’ve installed Puppet Plugin 3.1 and tried to run the Add a PE master workflow but it fails with “Host provided is not a puppet enterprise master”. Is there a workaround?