
In this guide I will show you how to install and configure the new Puppet Plugin version 2.0 for vRealize Automation! Update: I have discovered that you will need to remove the 1.0 Puppet Plugin prior to following this guide. See why here.
Pre-Reqs
- Download the Puppet Plugin 2.0 from here
- A Puppet master server running Puppet Enterprise 2016.4 or newer, or open source Puppet 4.6.2 or newer
- vRealize Orchestrator 6 or newer
- vRealize Automation 6 or newer
- A quiet place where you will not be interrupted see my guide here
- Remove the Puppet 1.0 Plugin if it is already installed using this guide here
Open the vRealize Automation Appliance landing page https://fqdnofappliance
Click vRealize Orchestrator Control Center
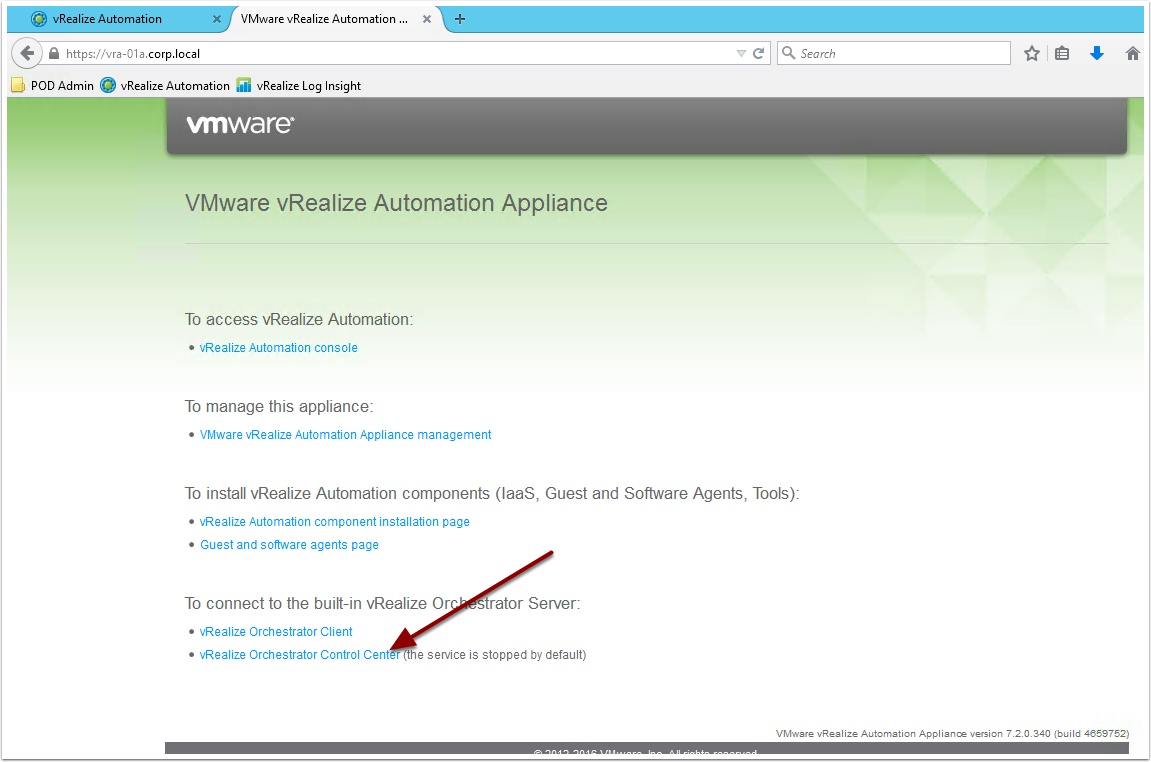
Note: The service is disabled by default
Open an SSH session to the vRA appliance and type the following command to start the service
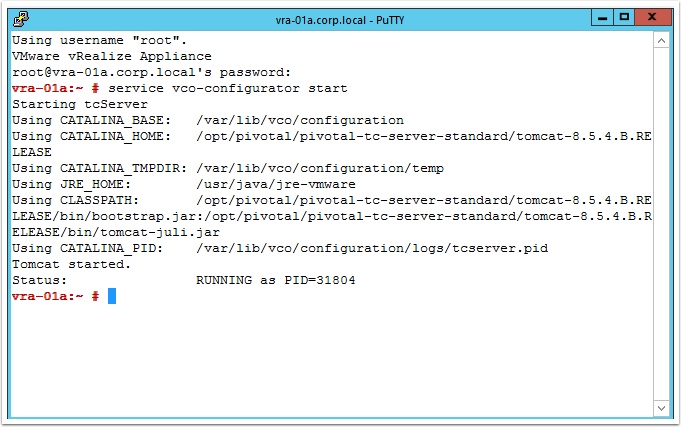
service vco-configurator start
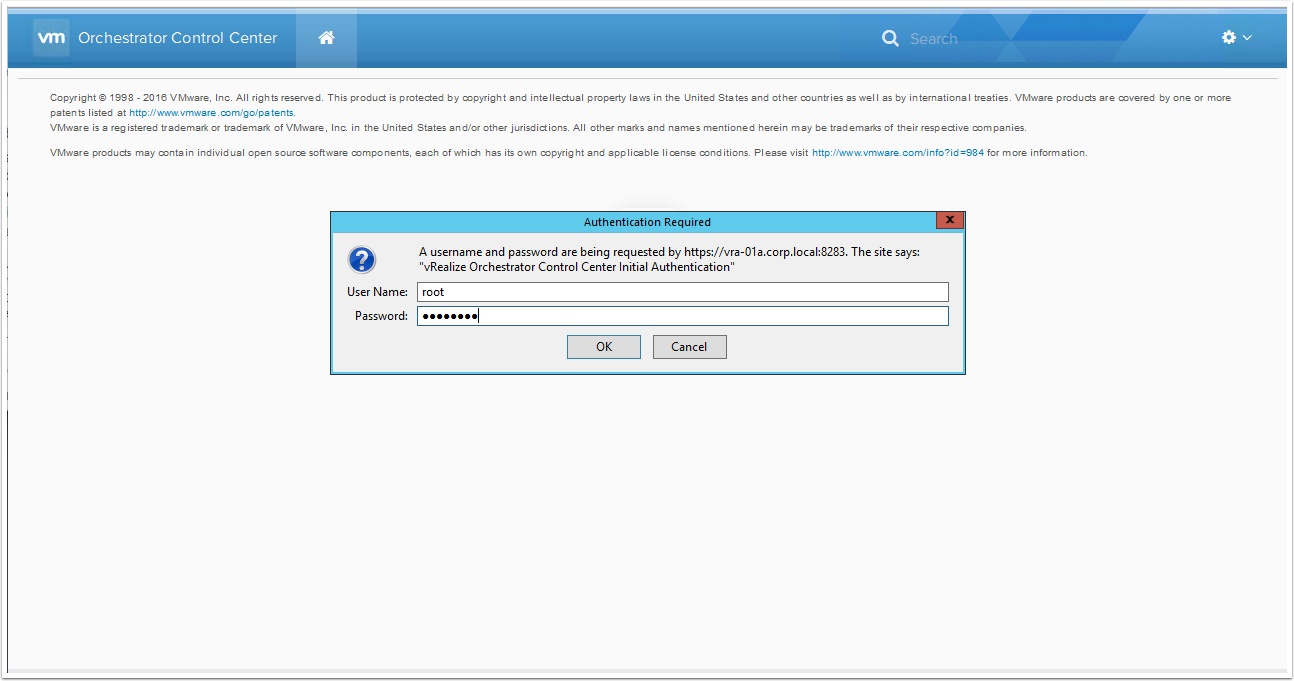
Now you should be able to open the Control Center
Login with the root and the password you used to configure the appliance with.
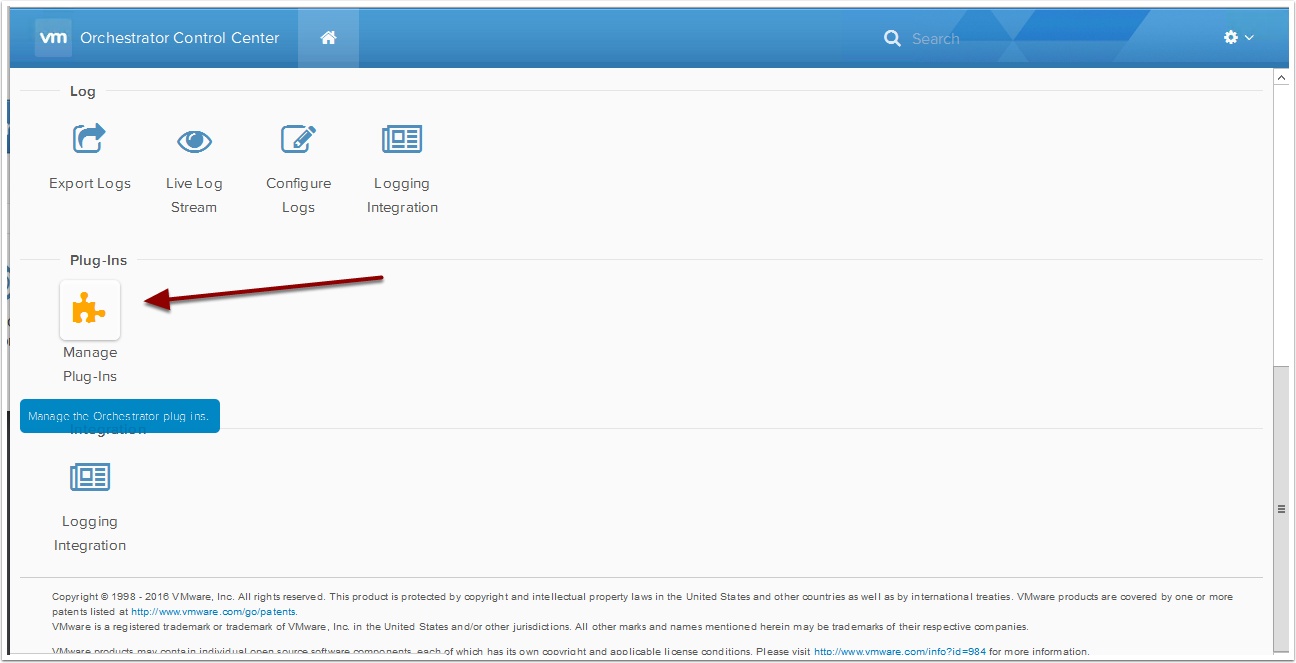
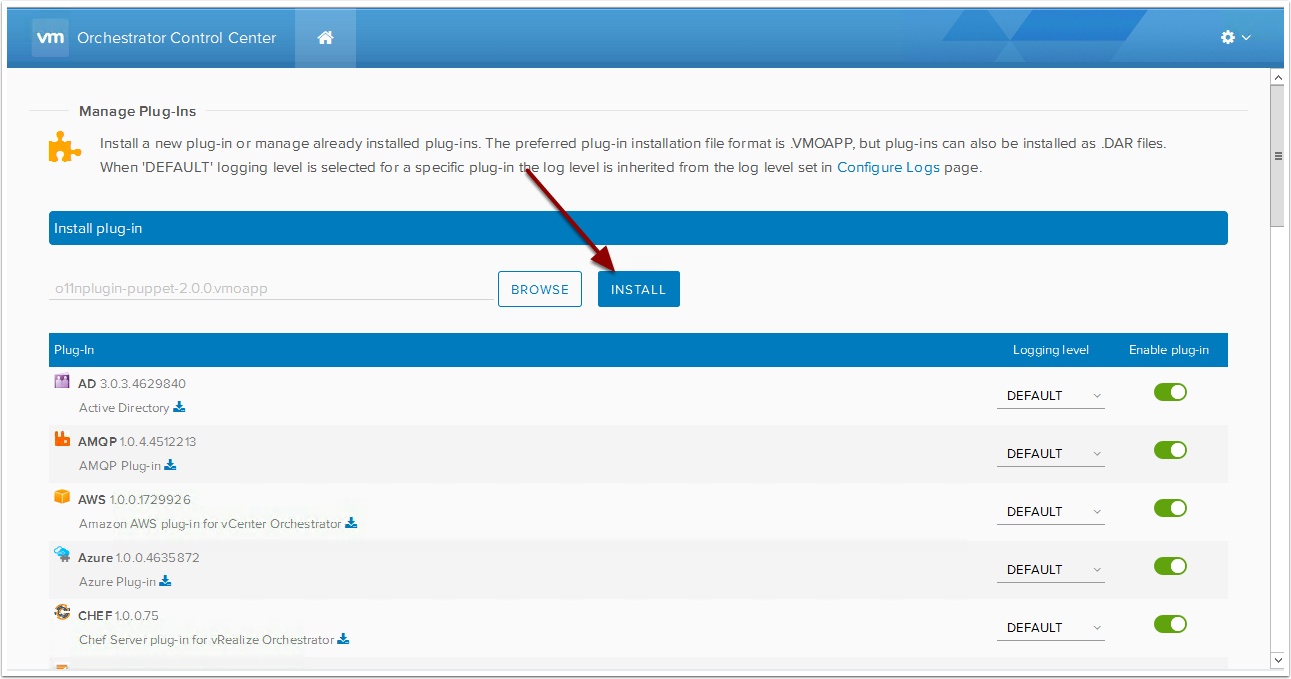
Scroll down and click Manage Plug-ins
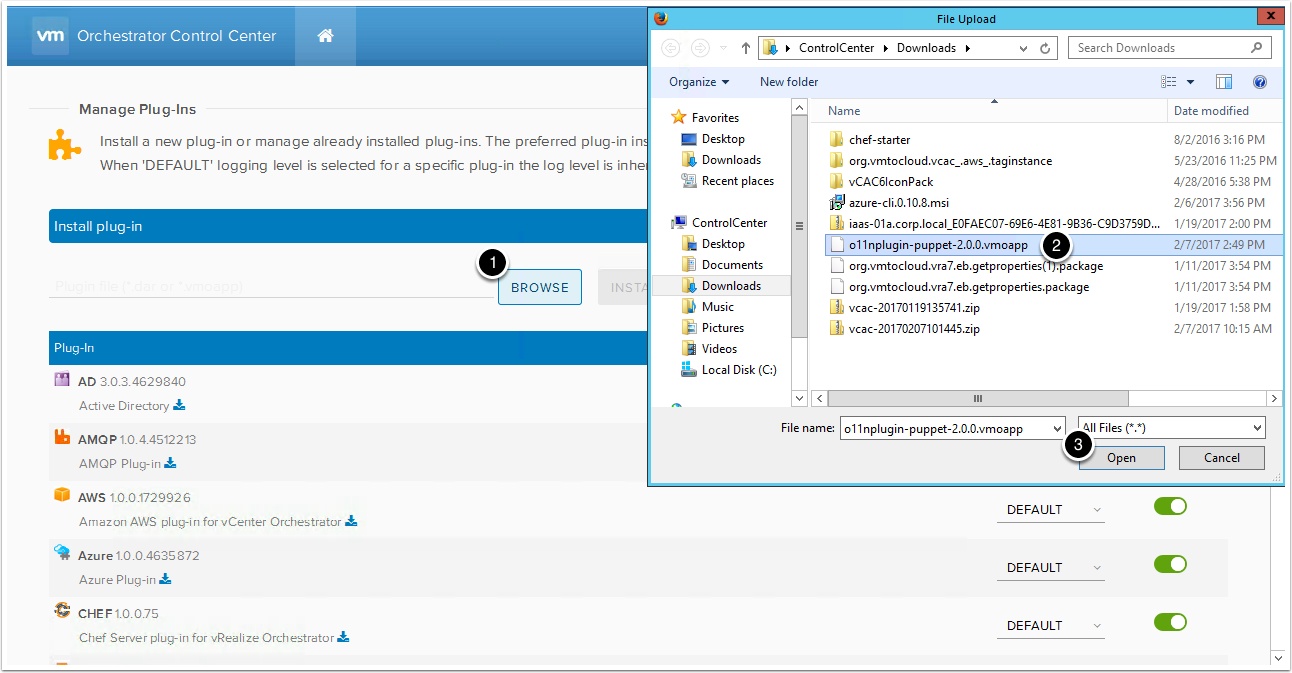
Browse to the Puppet Plugin 2.0 file you downloaded and click open
Click Install
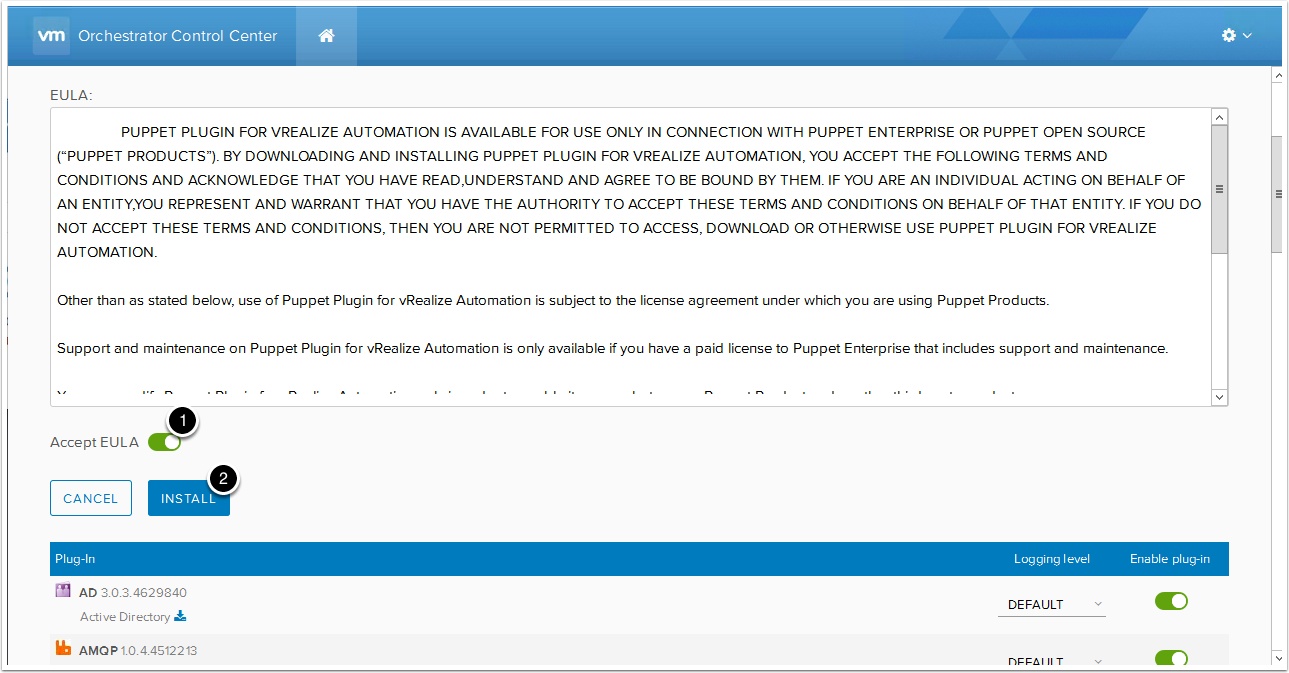
Read license agreement and accept it and click install
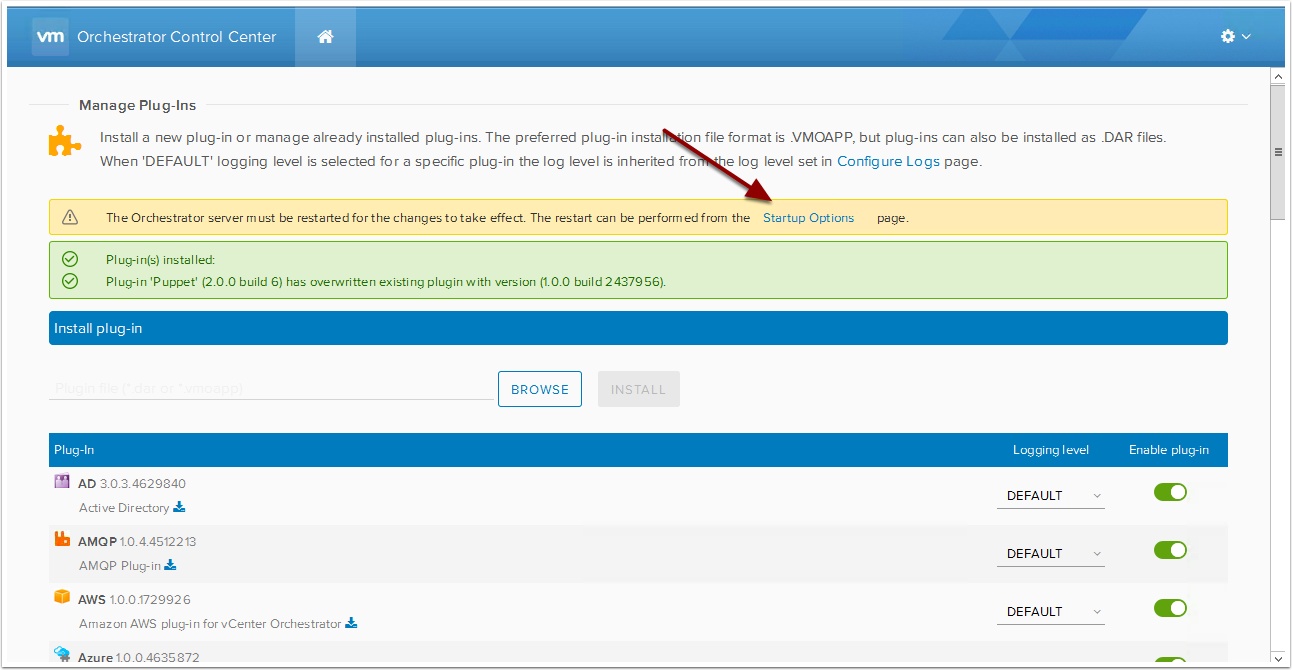
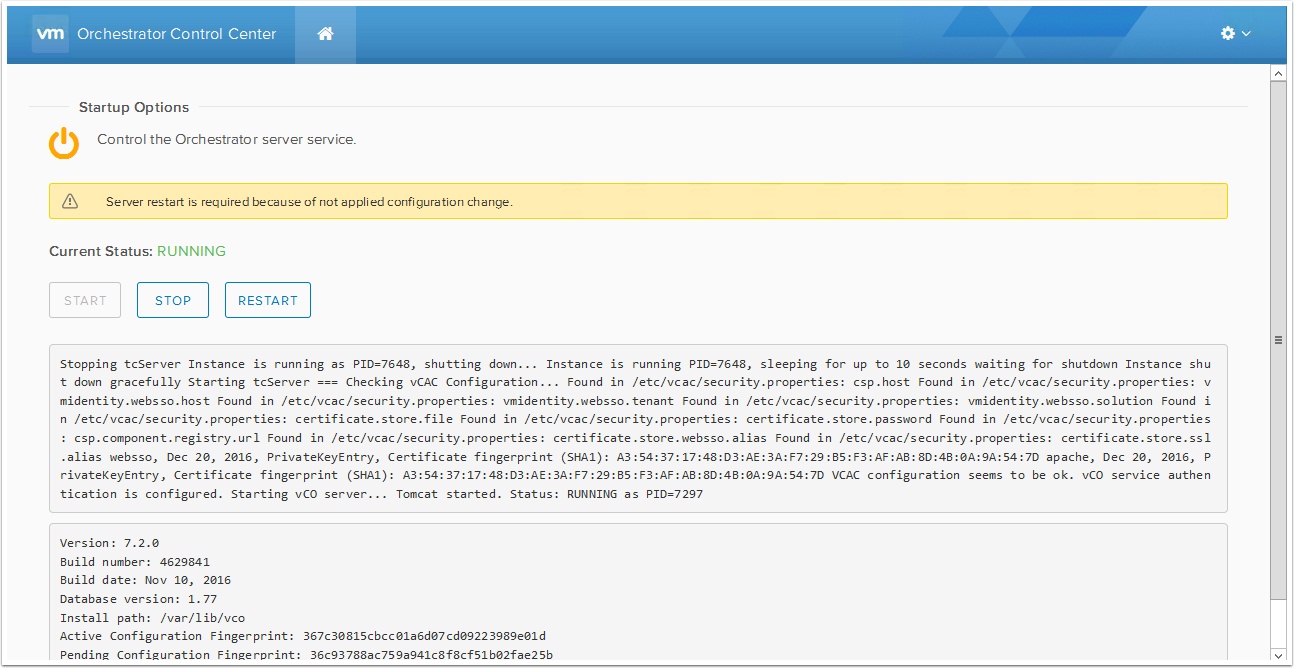
Now we need to restart the vRO server to make the changes
Click Startup options
Click Restart
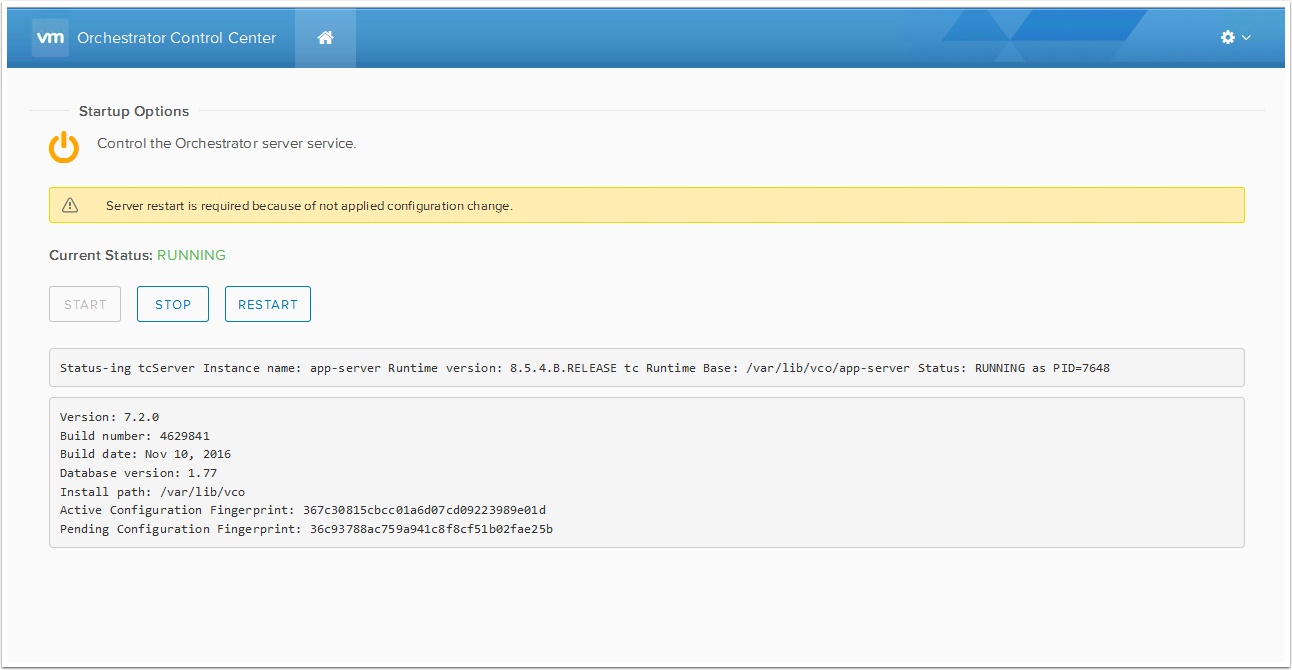
Once status is running you can close this window.
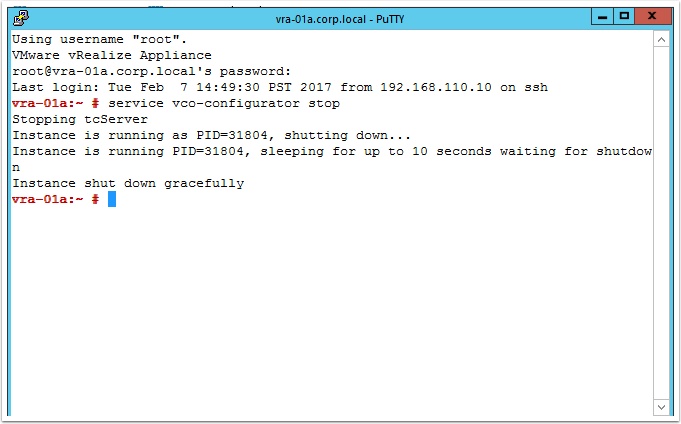
You may also want to stop the configuration service with the following command
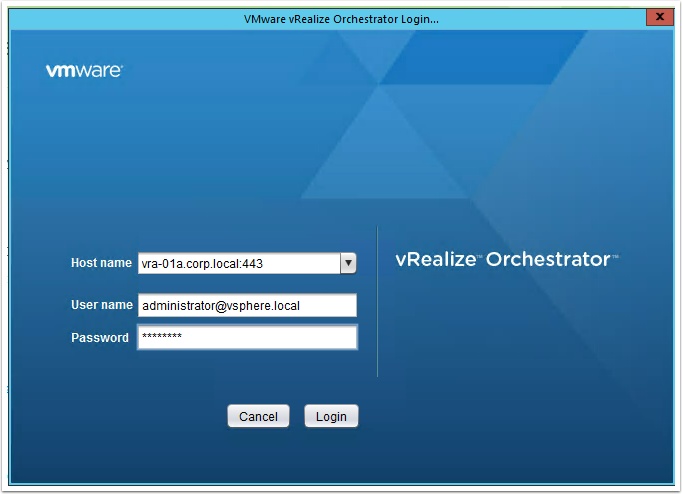
Open the vRO Client

service vco-configurator stop
Login to the vRO client
This may be administrator@vsphere.local and the password you set when you deployed the appliance or your LDAP credentials depending on your setup.
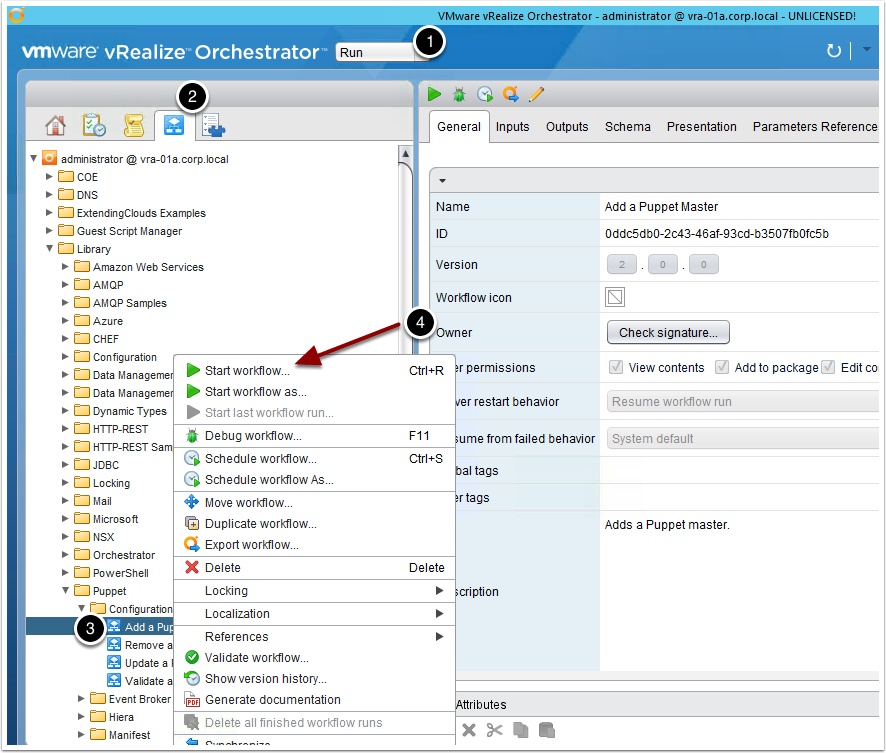
Add the puppet master
- Change view to run
- Change to the workflows tab
- Browse to Library/Puppet/Configuration/Add A Puppet Master workflow and right click it
- Click Start workflow
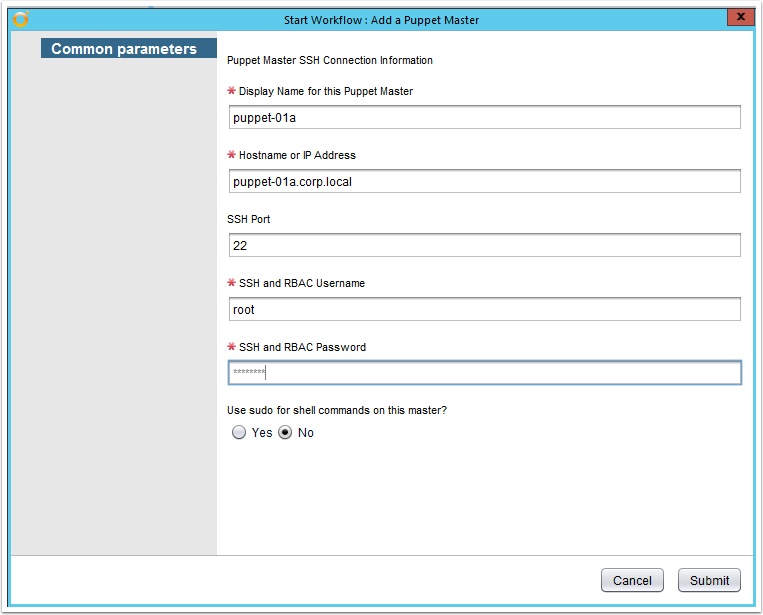
Enter the required name and credentials
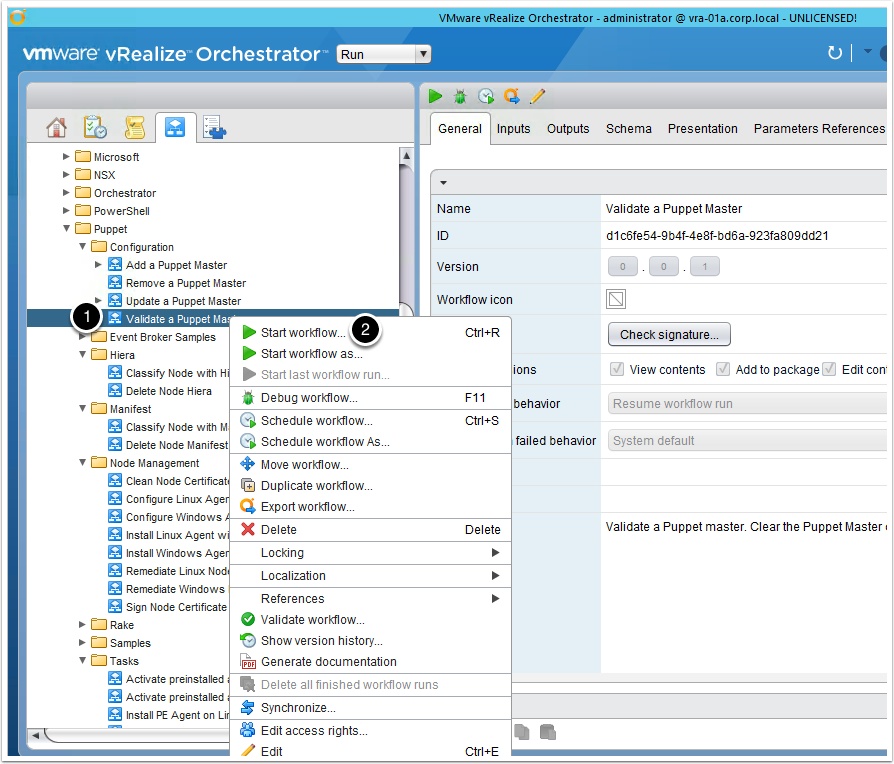
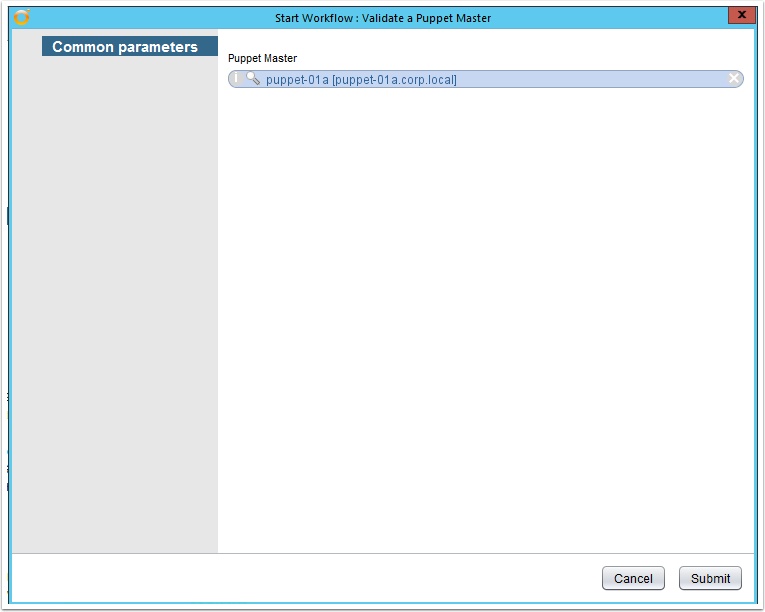
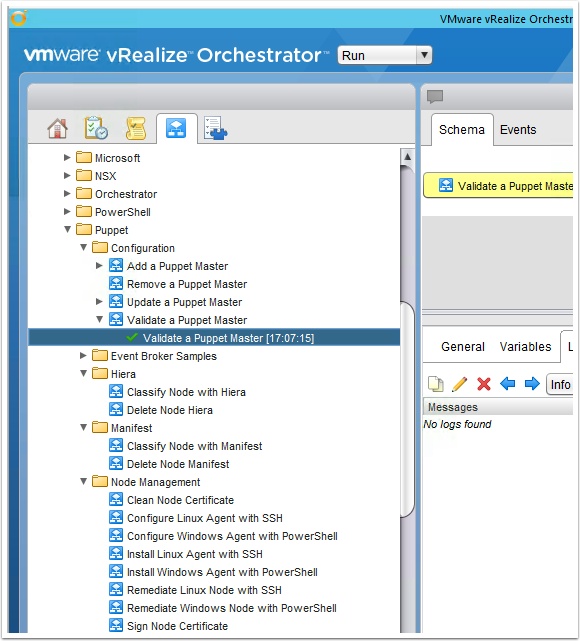
Now validate the puppet master
- Rught Click on the Validate Puppet Master Workflow
- Click Start workflow
Select the Puppet Master
- Use the drop down to select the Puppet Master we just created
- Click Select
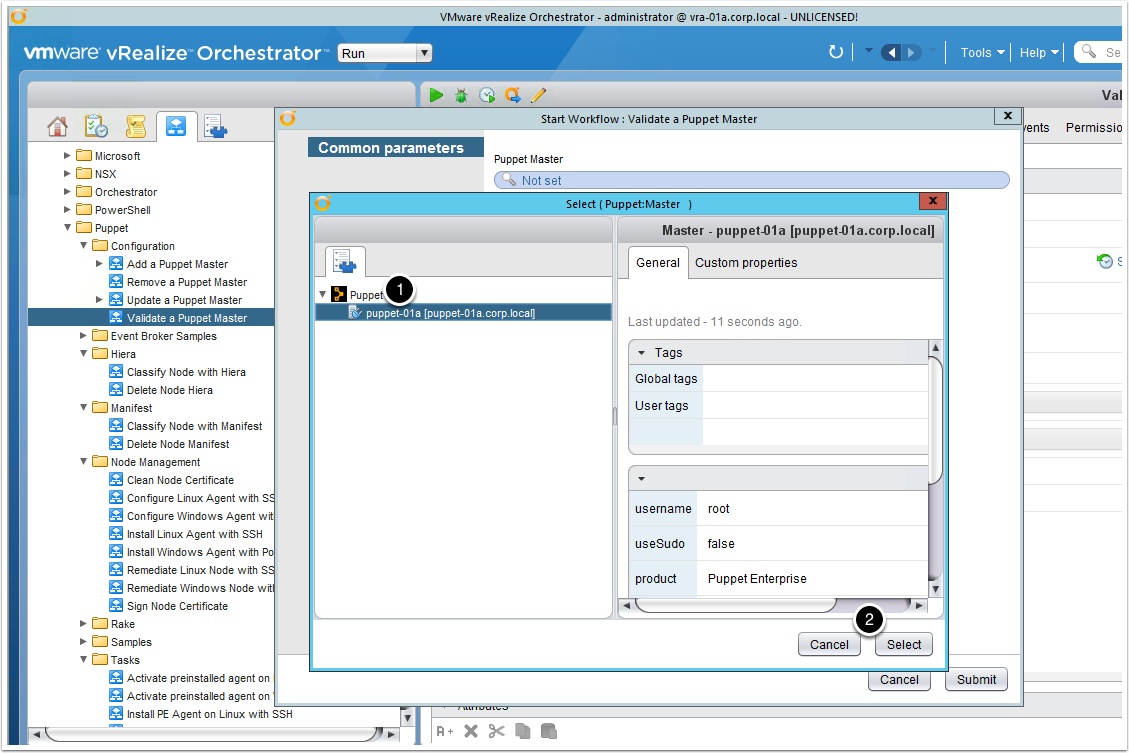
Click Submit
If you get a green check you are good to go! Enjoy! User Guide is here -> https://docs.puppet.com/pe/latest/vro_intro.html
Pingback: Puppet vRO Plugin 1.0 to 2.0 upgrade gotcha – VMtoCloud.com
Pingback: How to integrate vRealize Automation with the Puppet Plugin 2.0 – VMtoCloud.com