
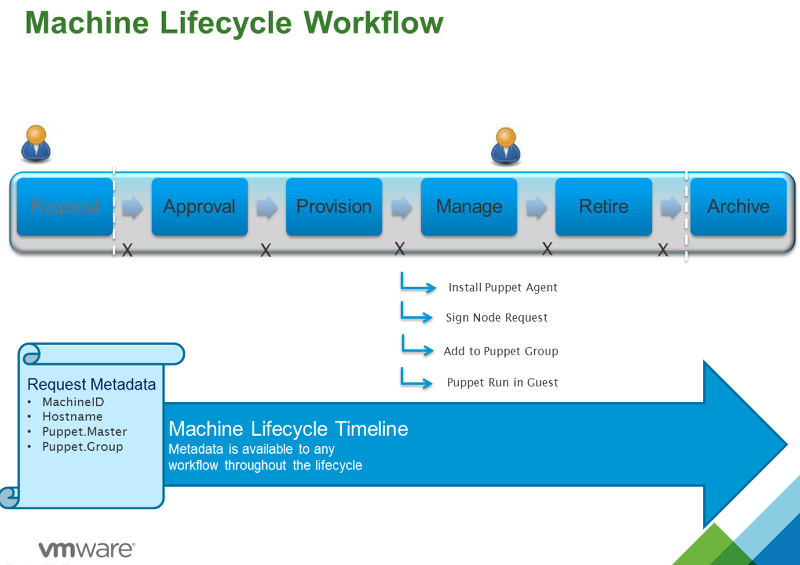
In Part 1 we configured vCAC to deploy a Linux VM and install and configure the Puppet Agent to register with the Puppet Master. In this lesson we will take it a step further by contacting the Puppet Master and signing the Node request, adding the node to the group you specify in vCAC and starting a Puppet Run in the guest to push down configuration.
For this lesson you will need the following:
- vCAC 6 installed and configured to provision to vSphere
- vCAC to vCO integration configured See here
- vCAC Plug-in for vCO See here
- A Linux based blueprint with the Linux guest agent configured and working. See my guide here:
- A Linux Blueprint configured to install the Puppet agent and register with Puppet master see my guide here:
- Puppet Enterprise 3.x Master and Console installed and configured with SSH access to the Puppet Master Server.
- An NFS share that can be mounted to the Linux Guest Agent blueprint once provisioned.
Basic flow of Events for this integration:
- vCAC will provision a VM based on a pre-configured Linux Template in vSphere
- The Linux Guest agent will run a script in the guest to mount an NFS share
- The Linux Agent in the Guest will run a shell script to install Puppet Enterprise Agent and configure it to register with the Puppet Master you specify.
- vCO will run a workflow to contact the Puppet Master and Sign the node request, add the Node to a group you speicify in the vCAC request then start a Puppet run in the guest to pull the new configuration.
- vCAC will then hand over control to the requester.
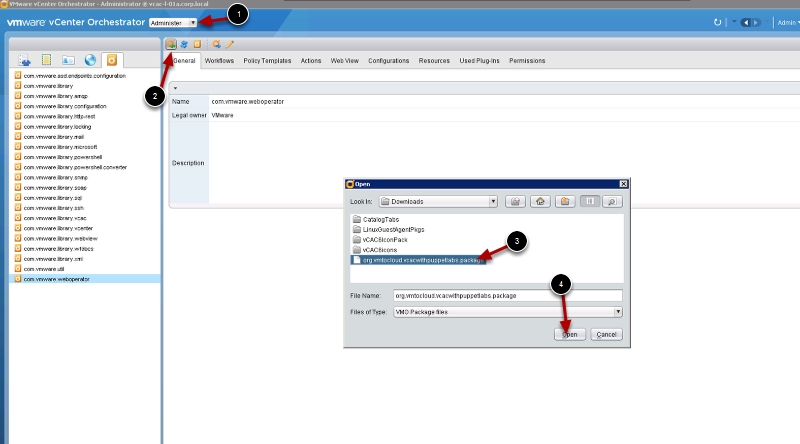
Step 1: Let’s get started. First you will need to download the vCO Package I created to add and remove nodes from Puppet. Download the package from the link below (Note: you will need to unzip the file before importing to vCO)
Step 2: Now you will need to import the package into the vCO instance using the vCO client. Change view to Administer and then click the Import workflow icon and browse to the package you just downloaded.
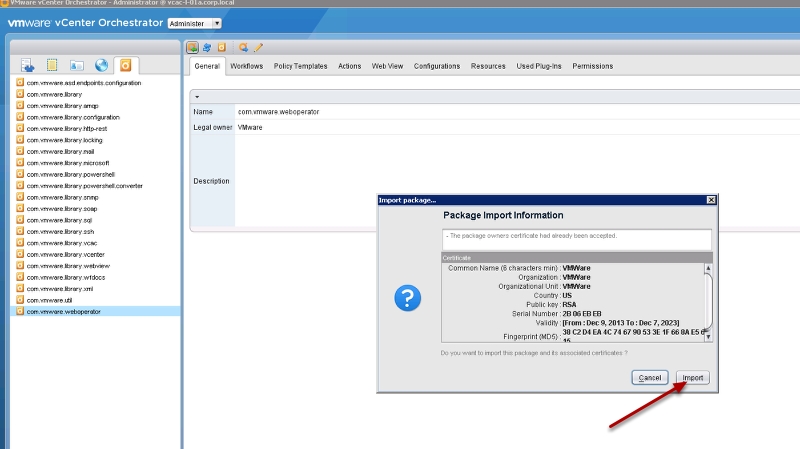
Step 2a: Now click Import
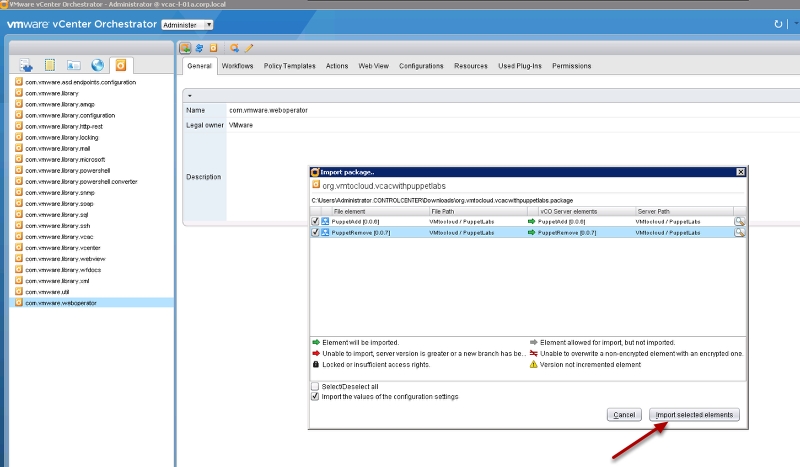
Step 2b: Now click Import Selected elements
Step 3: Now that you have the vCO workflows loaded we need to set some parameters for your environment. Change to Design Mode and brows to the Puppetadd workflow and click edit
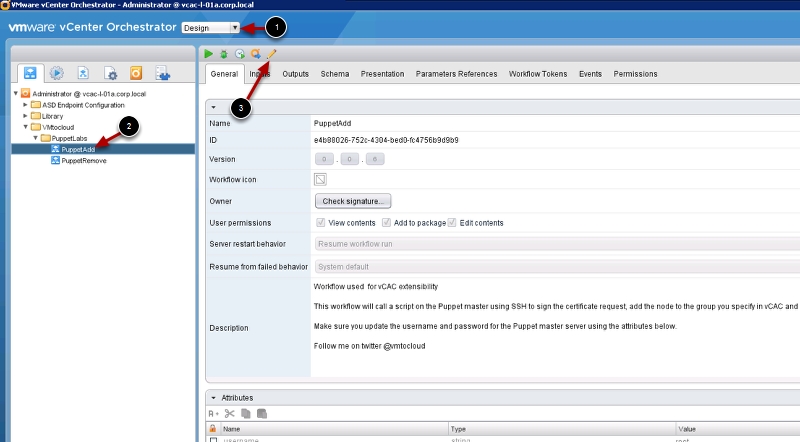
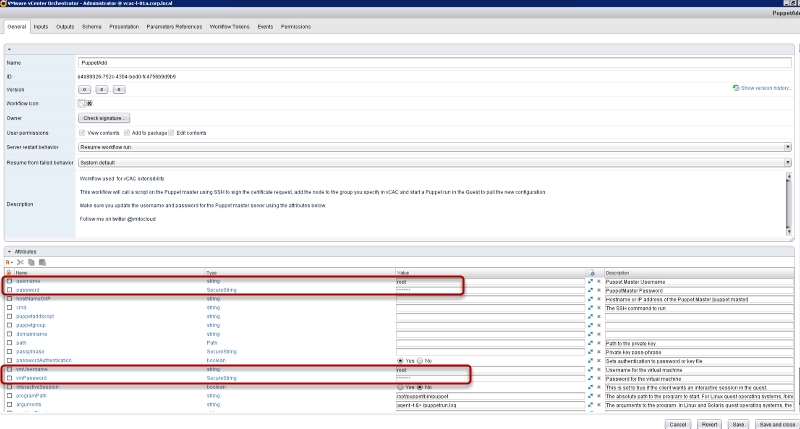
Step 4: You will need to change the the password and possible the user name that will have root privileges on the Puppet Master server and you guest VM’s. You will need to do the same for the PuppetRemove workflow
Step 5: Next we need to create the scripts that will add and remove nodes from the Puppet Master. Login to the puppet master server and create a shell file with the following and save it as puppetadd.sh NOTE: In this script I am running commands with variables as inputs. We will provide those arguments from vCAC custom properties.
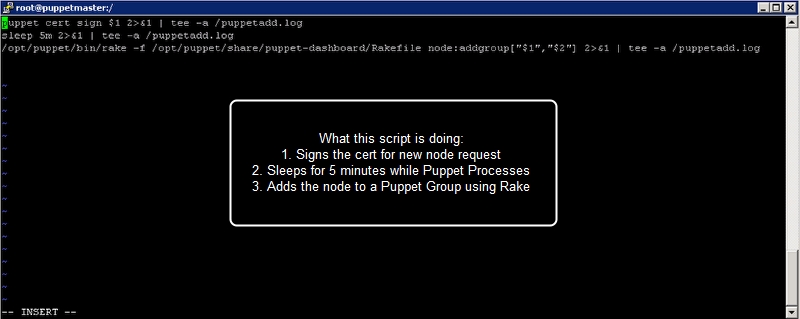
puppet cert sign $1 2>&1 | tee -a /puppetadd.log

 sleep 5m 2>&1 | tee -a /puppetadd.log

 /opt/puppet/bin/rake -f /opt/puppet/share/puppet-dashboard/Rakefile node:addgroup["$1","$2"] 2>&1 | tee -a /puppetadd.log
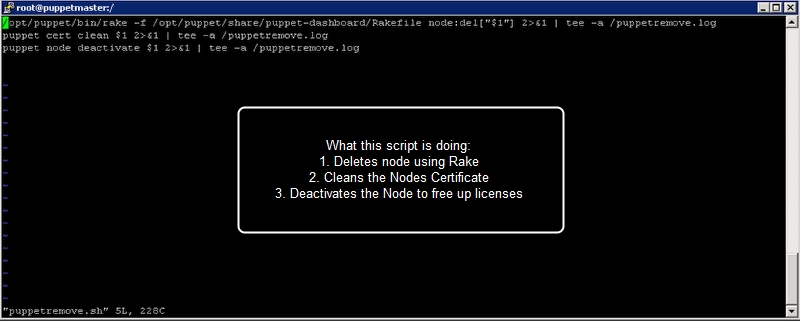
Step 6: Now we will do the same for the remove script. Create a shell file with the following and save it as puppetremove.sh
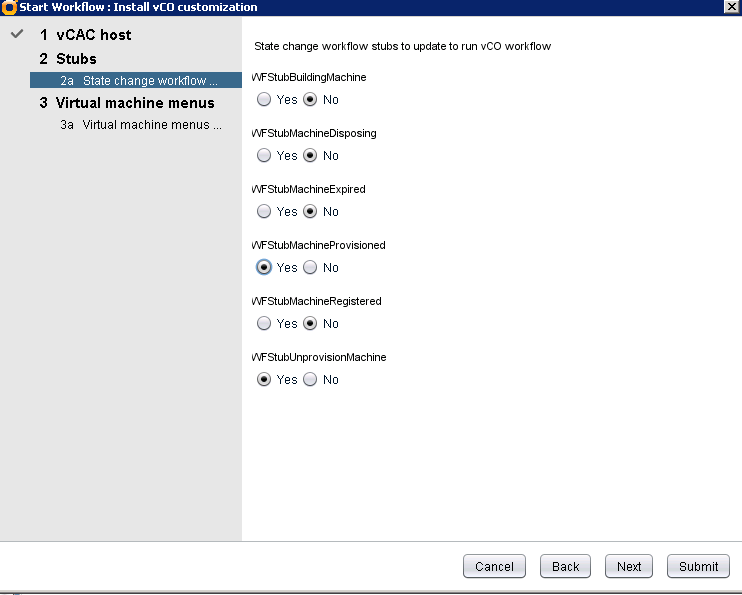
Step 7: Next we need to be sure that vCAC extensibility has been configured so that the vCAC workflow stubs run vCO workflows. Login to the vCO client and run the following workflow
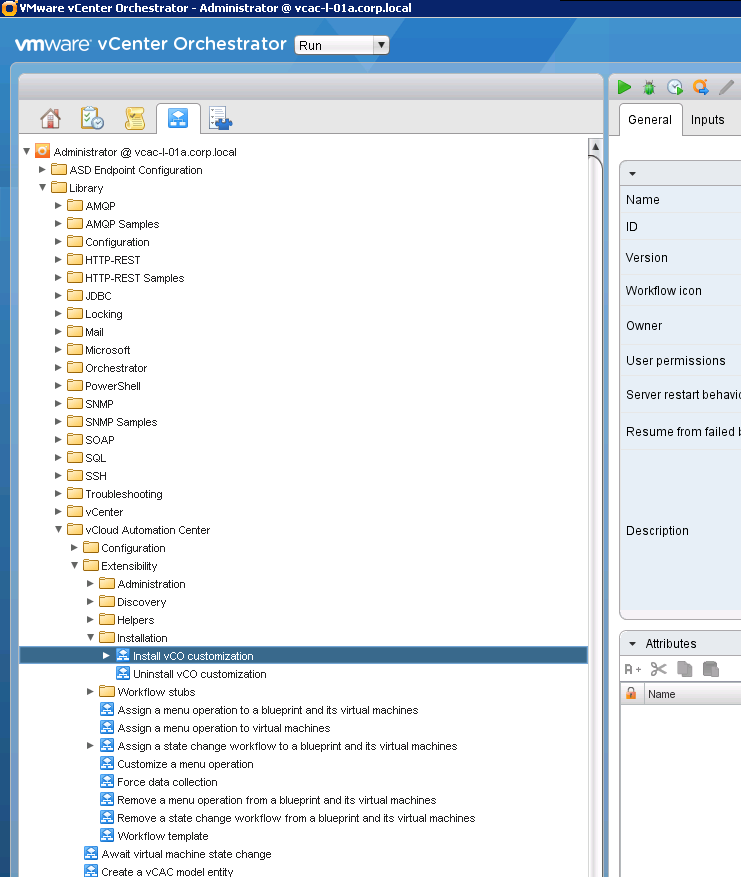
Step 8: Choose your vCAC host then choose the workflow stubs you want to modify. (I am only using WFStubMachineProvisoned and WFStubUnprovisionMachine
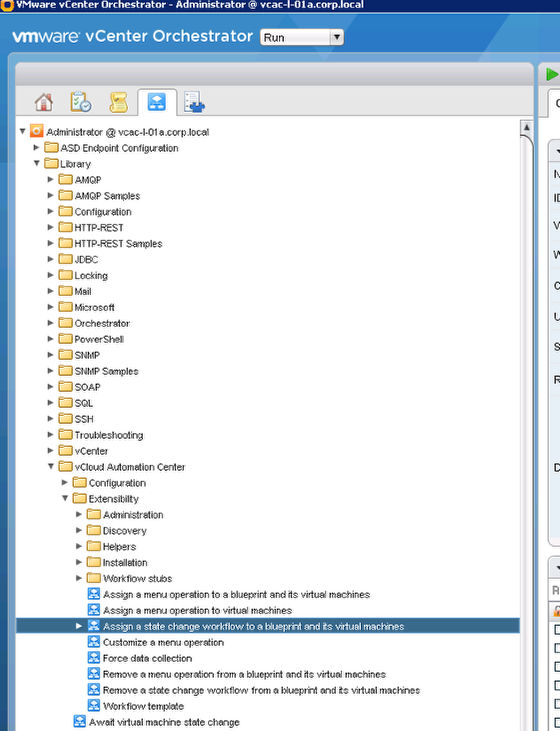
Step 9: Now we need to add the workflows to run when the Blueprint that you configured to install Puppet client gets provisioned and deprovisioned. Login to the vCO client and browse to the following workflow and run it
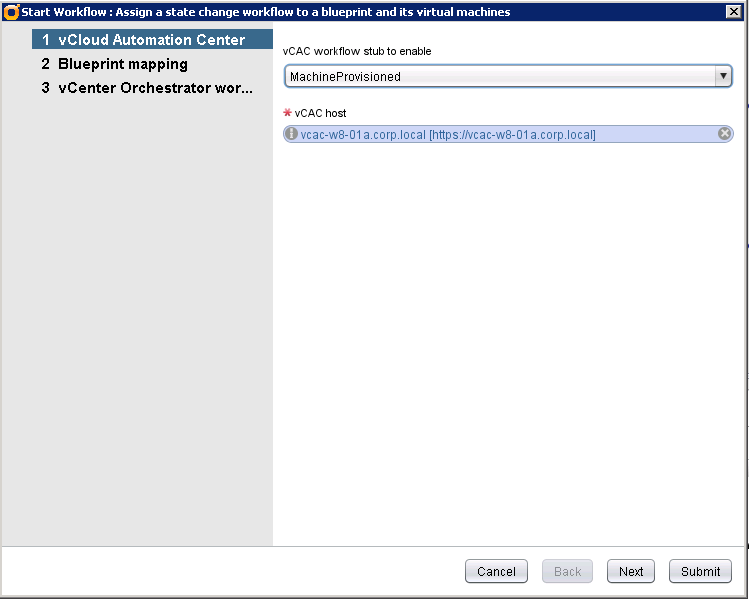
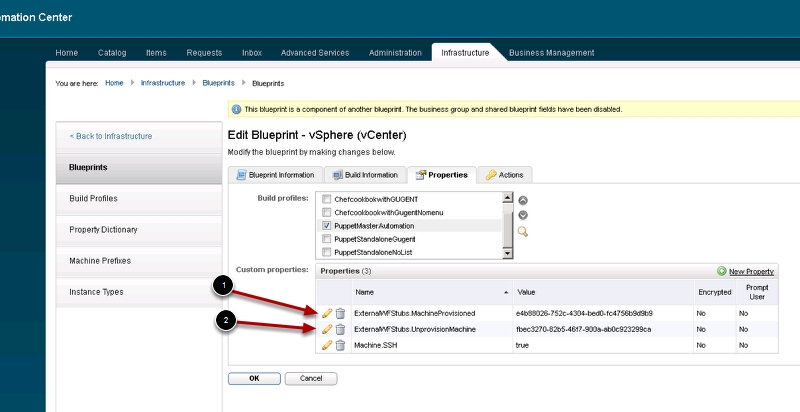
Step 10: Add the Puppet Add workflow to the Machine Provisoned WF Stub then choose you Linux Blueprint that you created with Puppet Client integration earlier. Run the workflow again to add the PuppetRemove workflow to the UnProvisionMachine workflow
Step 10a: When complete, login to vCAC and check the blueprint for two new custom properties
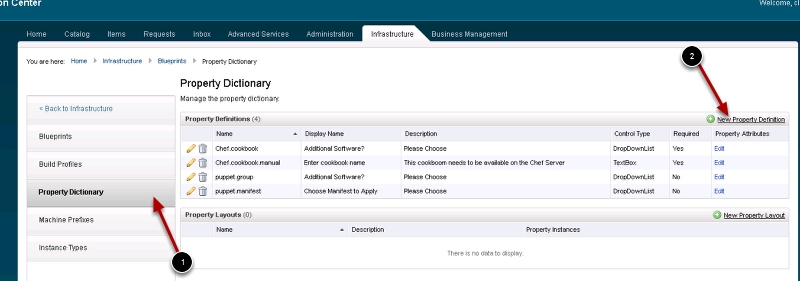
Step 11: Now we need to create the drop down menu for the requester to select the Group to add the node to. If you want to hard code the group to a Blueprint you can skip this step and hard code it. Click the Property Dictionary tab and then click new Property Dictionary
Step 11a: Create the new Definition with the following and click the Green Check mark:

Step 11b: Now click edit on the new Property Definition

Step 11c: Enter the following: The Value box should be your Puppet Groups that are created on your Puppet Master

Step 12: Now let’s create a build profile with all the information we want to pass to vCO to run our Puppet Workflows. Create the following Build Profile
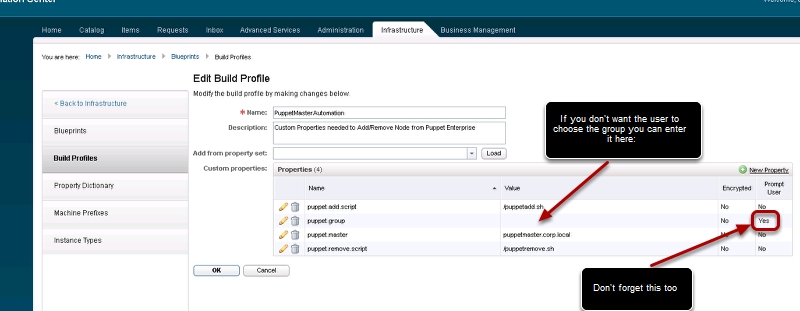
puppet.add.script /puppetadd.sh

 puppet.group

 puppet.master puppetmaster.corp.local

 puppet.remove.script /puppetremove.sh
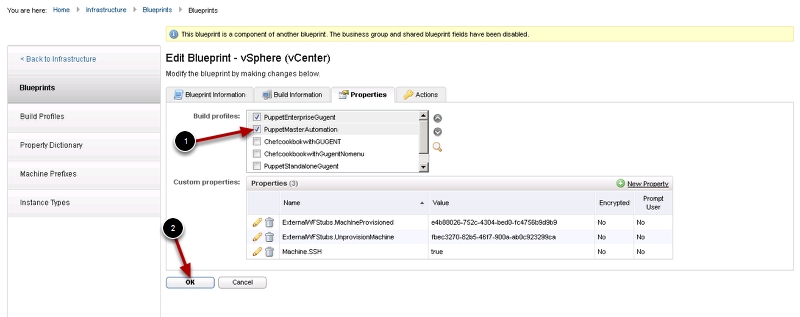
Step 13: Add this build profile to your Blueprint and click ok
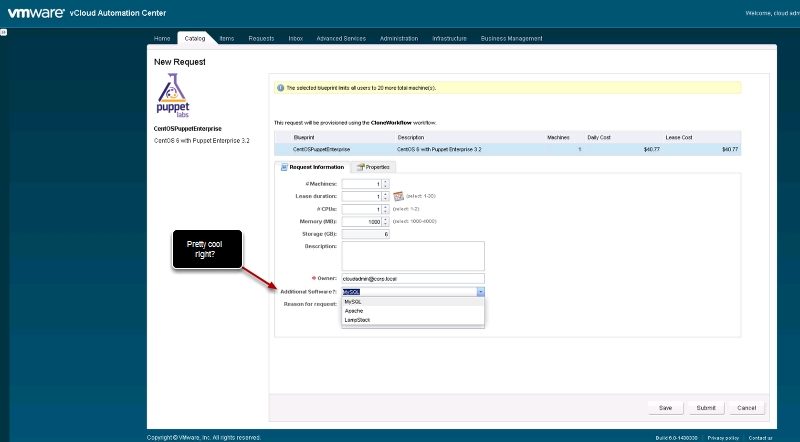
Step 14: Now fire off this new blueprint and watch the magic begin! You may need to make some fine tuning for paths as well as if you want to use sudo accounts instead of root.
If you like this and it was helpful please tweet or share with the world!
Pingback: Puppet Enterprise with vCAC – Part 1 Automatically install the PE agent | VMtoCloud.com