
It seems that Docker is all the rage right now. One of the limitations I noticed when playing with Docker in my lab is that pulling images from the Docker Hub can be a bit slow and storing images on Dockr hub may not be desirable if your building applications with sensitive information. So why not have your own registry on vSphere? It’s both private and super fast.
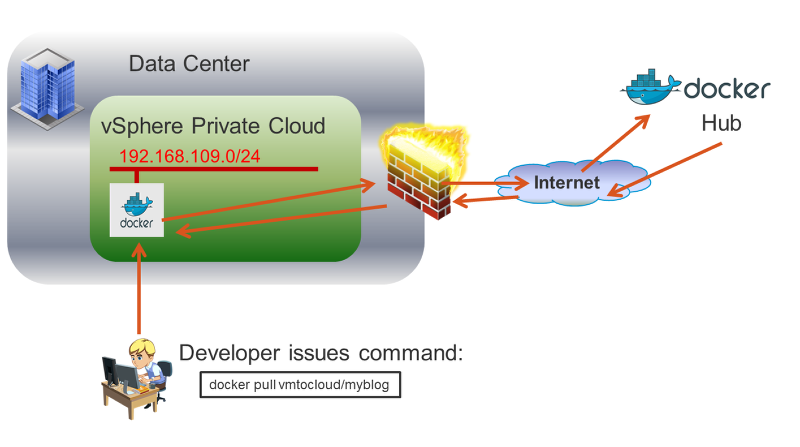
Current state without a local registry. Docker images pulled and pushed to Docker hub over internet and outside of data center firewall.
The following shows what we will be creating. A local Docker Registry that you can push and pull your images to and from. If most of your Docker nodes are on your local network in your data center it makes sense to have a local registry.

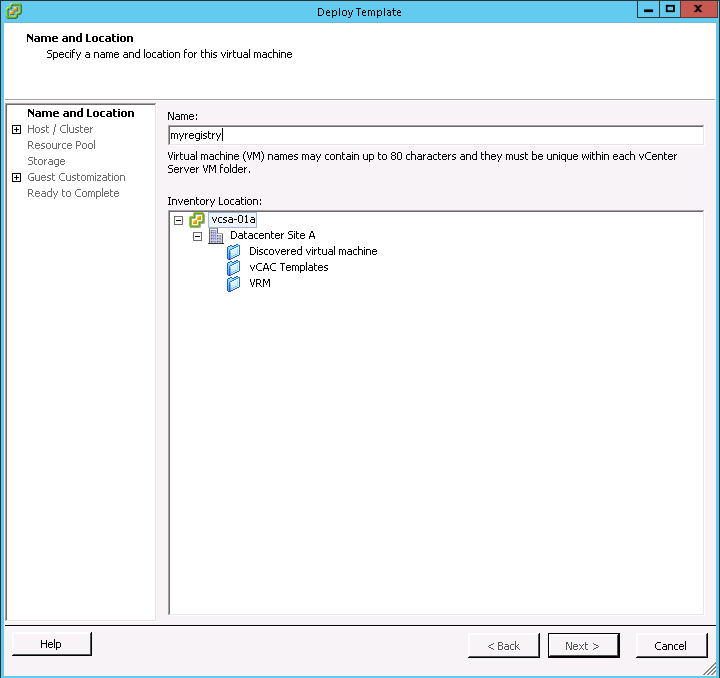
Login to the vSphere client and create a new RHEL or CENTOS with version 6.5 or newer. I am using CentOS 6.6 in my lab.
After the guest customization completes login to the VM via the console or SSH and type cat /etc/redhat-release and press enter and you should be on a release 6.5 or higher CentOS 6.6. If you are using 7 there is different way to install Docker so be aware of that.

Now we are ready to install Docker but first we need the extras packages repo. Type yum -y install epel-release and press enter
Now let’s install Docker by typing yum -y install docker-io (Note if you are using RHEL or CENTOS 7 you need to type yum -y install docker also I have not tested the registry on 7 yet so let me know if these instructions work.
yum -y install docker-io
Now start the docker server by typing service docker start

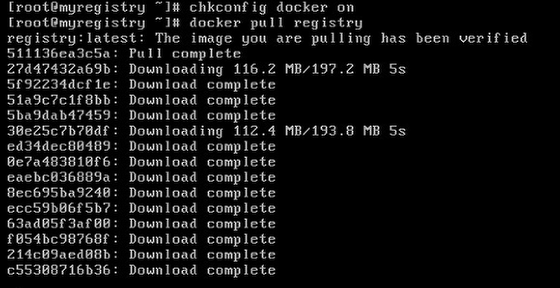
Now let’s make sure it starts on boot with chkconfig docker on
Now pull the registry container from docker with docker pull registry
After a few minutes the image will be downloaded.
Now create a new directory in tmp named registry, this is where we will store the images instead of in the container so if the container is restarted we don’t lose the images.
Start the registry server by typing docker run -d -p 5000:5000 -v /docker_repo:/tmp/registry registry

docker run -d -p 5000:5000 -v /docker_repo:/tmp/registry registry
Now that our registry is running we can go to another VM running a docker node and pull and push files to it. But first we need to tell the Docker Daemon on the docker nodes to use an insecure channel to talk to the docker registry we created. Stop the docker server by typing service docker stop and press enter

Now type docker -d –insecure-registry 192.168.109.9:5000 &
docker -d --insecure-registry hostnameorIPofRegistryserver:5000 &
now pull an image from the Docker hub with docker pull vmtocloud/myblog and press enter (Notice it takes several minutes because it is pulled from the internet)
Once the image download completes tag the image by typing docker tag vmtocloud/myblog 192.168.109.2:5000/myblog
Type Docker images to see your images
Now type docker push 192.168.109.9:5000/myblog and press enter

Now let’s test that we can pull by spinning up a new Docker node and typing docker pull 192.168.109.9:5000/myblog
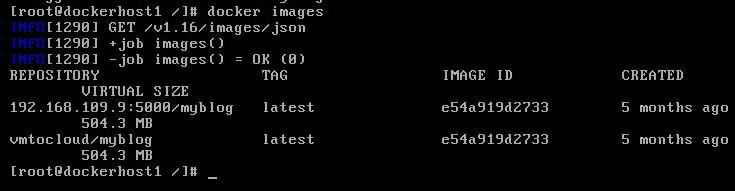
After a minute or two it should complete and type docker images to verify it downloaded
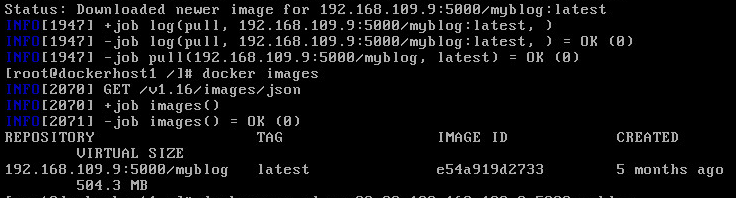
docker images
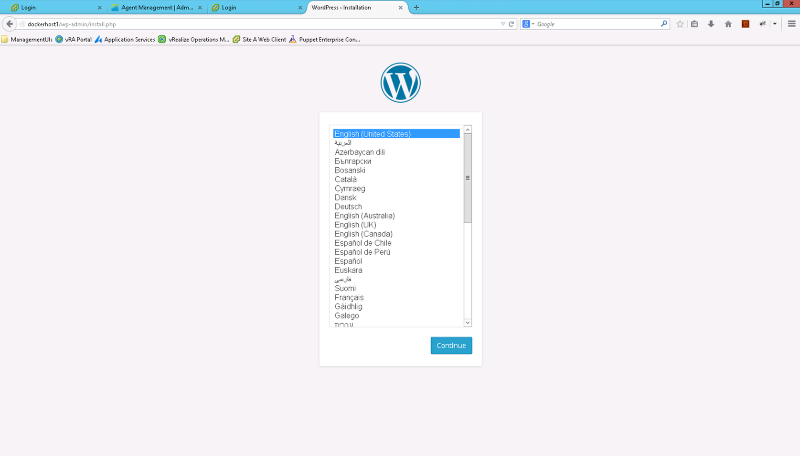
Type docker run -d -p 80:80 192.168.109.9/myblog and press enter
Open a web page to the docker host and verify the container started!
Pingback: Containers for the vSphere Admin | VMtoCloud.com
Pingback: Container as a service with vRA/vCAC and Project Photon | VMtoCloud.com